SAML SP for ASP.NET service provider configuration - SSO
This document assumes that the name of the application server is sp.example.com and the name of the web application is webapp. After installation, activation and integration, https://sp.example.com/webapp will be protected by the SAML IDP (Ubisecure SSO Server).
This service provider configuration is performed for each application to be protected on the server.
Create the SAML Service Provider identity
The SAML Service Provider identity consists of an Entity ID, an RSA private key and a HTTP endpoint address. The Entity ID and private key are used to identify and authenticate the Service Provider to the Ubisecure Identity Provider. The HTTP endpoint is used by the Ubisecure IDP to submit protocol messages to the Service Provider.
The HTTP endpoint is a fully qualified URL address where ServiceProviderHandler is bound. The path of ServiceProviderHandler is /spsso.ashx. E.g. https://sp.example.com/webapp/spsso.ashx.
The identity is generated in a file named identity.properties. This file is located in a subfolder of the Service Provider configuration directory.
Windows Server 2003:

cd /d "%ALLUSERSPROFILE%\Application Data\Ubisecure\Ubisecure.SAML2.ServiceProvider"
mkdir sp
"%ProgramFiles%\Ubisecure\Ubisecure.SAML2.ServiceProvider\bin\saml2.exe" Generate https://sp.example.com/webapp/spsso.ashx -o sp

Windows Server 2008:

cd /d "C:\ProgramData\Ubisecure\Ubisecure.SAML2.ServiceProvider"
mkdir sp
"C:\Program Files\Ubisecure\Ubisecure.SAML2.ServiceProvider\bin\saml2.exe" Generate https://sp.example.com/webapp/spsso.ashx -o sp
The sample command in Listing 1 assumes the application server is accessible using the DNS name sp.example.com and the name of the web application is webapp. All communication with the application is encrypted using HTTPS. The text shown in red must be changed to suit your application.
If the application is available to users at the server root address, e.g. https://sp.example.com/, remove the additional path component /webapp from the generate commands in Listing 1.
The address parameter used when generating the identity is case sensitive. Ensure that your application name in IIS matches the case used in this command. Failure to match case at this point may cause incorrect redirection after authentication has been completed.
Associate the SP identity with a Ubisecure Web Application
Now the Ubisecure Management application must be used to associate the Service Provider identity with a Ubisecure Web Application. The SAML metadata of the Service Provider is uploaded to the management application. SAML metadata is a XML formatted document. The metadata represents the public information about the Service Provider identity.
First, create the SP metadata file using the
saml2.execommand in Listing 2.Listing 2. Write the SAML metadata of the Service Provider to the c:\temp\sp.xml fileWindows Server 2003: cd /d "%ALLUSERSPROFILE%\Application Data\Ubisecure\Ubisecure.SAML2.ServiceProvider" "%ProgramFiles%\Ubisecure\Ubisecure.SAML2.ServiceProvider\bin\saml2.exe" Metadata sp -f c:\temp\sp.xml Windows Server 2008: cd /d "C:\ProgramData\Ubisecure\Ubisecure.SAML2.ServiceProvider" "C:\Program Files\Ubisecure\Ubisecure.SAML2.ServiceProvider\bin\saml2.exe" Metadata sp -f c:\temp\sp.xml
- Use Ubisecure Management to create the web application.
- Create a web application
- Select Type SAML Service Provider (Figure 1)
- Press Activate
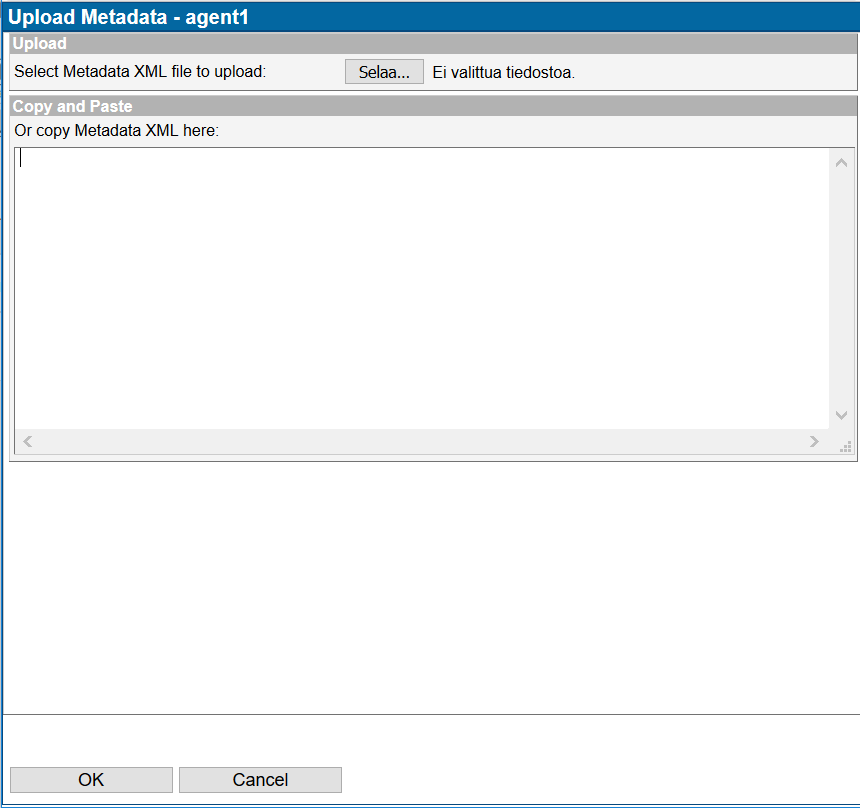
- Select the file that was created in Listing 2 (
c:\temp\sp.xml) to be uploaded or paste thesp.xmlfile contents in the text window provided (Figure 2) - Click OK
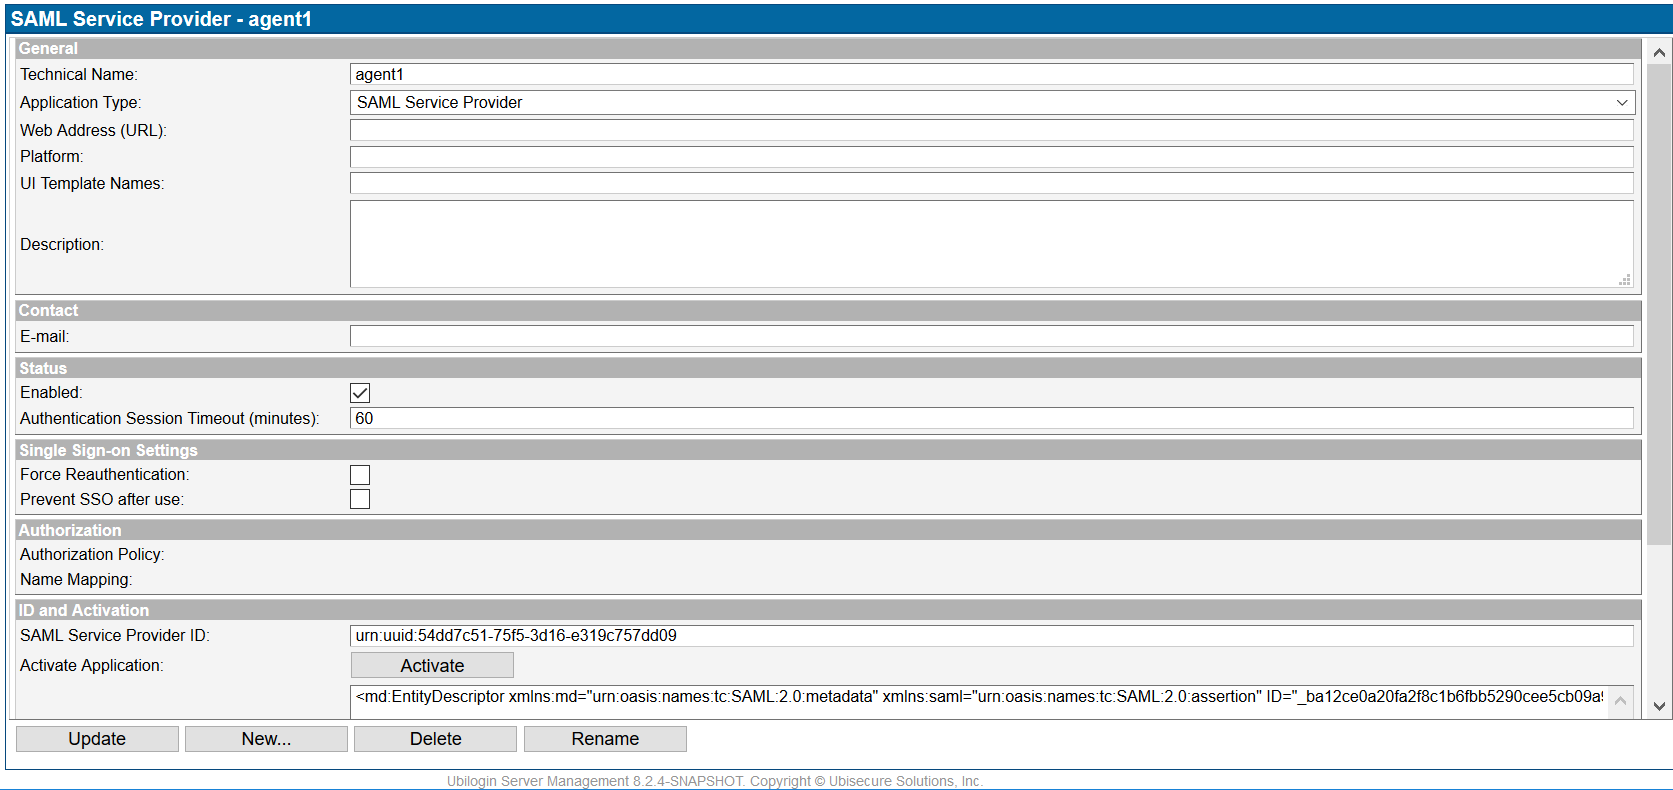
- The SAML Service Provider ID is now shown. (Figure 3) Click Update
- Copy the SAML Service Provider ID (entity ID) text shown in Figure 3. It will be used later when configuring the
web.configfile. - Ensure the application has appropriate methods enabled and access to the application is configured in the Allowed To tab. An appropriate Authorization Policy is required to define which additional attributes will be available to the ASP.NET application. For more information on Web Application and Authorization Policy configuration, please refer to the Management user interface - SSO.
Using the Ubisecure Management application
|
|---|
| Figure 1. Select SAML Service Provider from the drop down list and click Activate |
|
|---|
| Figure 2. Click Browse and select the file with the SP metadata, then click OK |
|
|---|
| Figure 3. The SAML Service Provider ID filed now shows the Entity ID of your SP |
Get the metadata of the Identity Provider
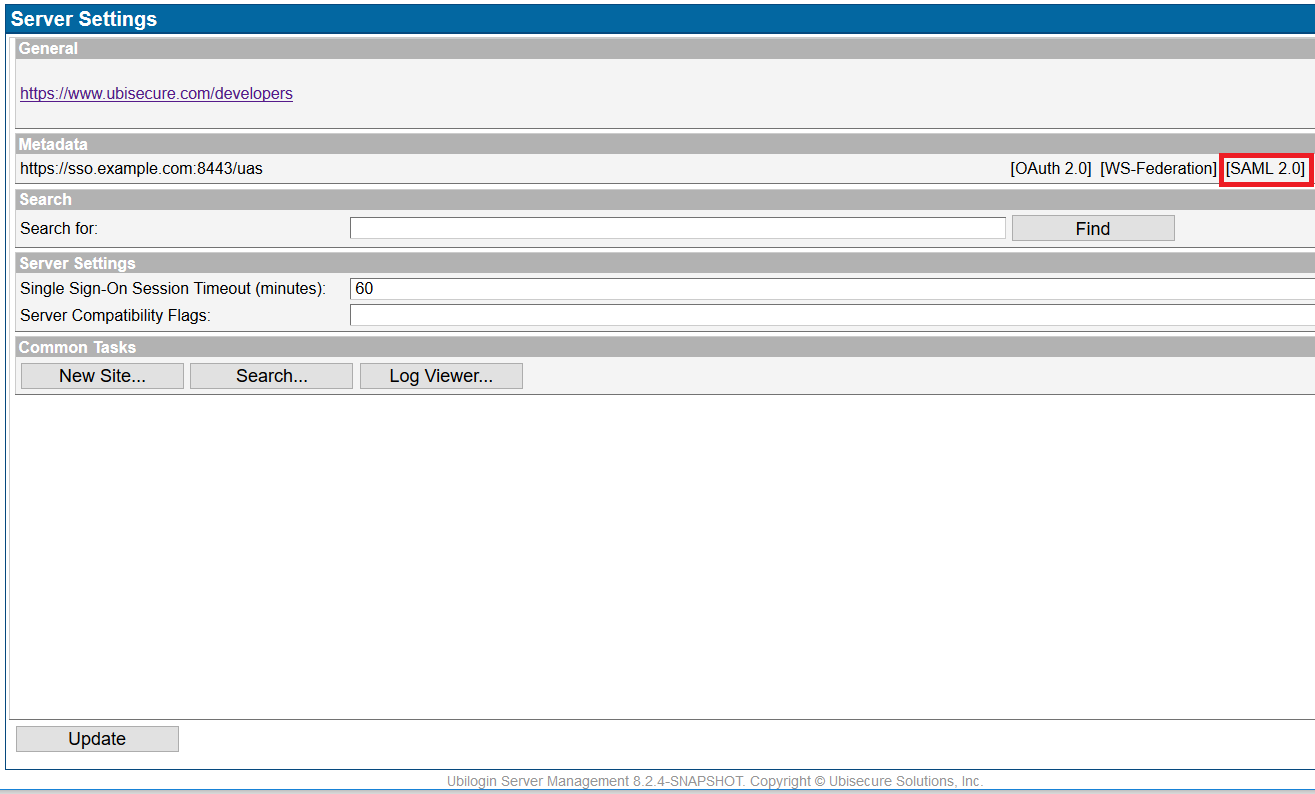
Download the Ubisecure IDP metadata from the SAML 2.0 link on the Ubisecure Management home page. Save this file using the name idp.xml in the folder below according to the operating system used:
Windows 2003:

%ALLUSERSPROFILE%\Application Data\Ubisecure\Ubisecure.SAML2.ServiceProvider\sp\metadata

Windows 2008:

C:\ProgramData\Ubisecure\Ubisecure.SAML2.ServiceProvider\sp\metadata
|
|---|
| Figure 4. Click SAML 2.0 to download the IDP metadata file |
During startup the Service Provider will locate and read all of the XML files in the sp/metadata folder in the Service Provider configuration directory. This folder must contain only one metadata file for a SAML Identity Provider. (It may however contain another metadata file for an Attribute Authority. See chapter Configure Attribute Authority below.) The Service Provider startup will fail if an IDP metadata file is not found, or if the folder contains more than one IDP metadata file.
Multiple IDPs are configured using the IDP Proxy functionality of Ubisecure SSO Server.
Configure Attribute Authority
The use of an Attribute Authority is optional and for most installations not usually required. Skip this section if Attribute Queries are not being used.
Attribute Queries allow an SP to query a Subject's attributes run-time from Attribute Authority service. For example, it is possible to get a user's attributes that were not sent in conjunction with initial authentication, or attributes that may have changed after initial authentication.
The following configuration is only required if Attribute Queries are used.
Copy the attribute authority (AA) metadata to the file listed below according to the operating system used:
Windows 2003:

%ALLUSERSPROFILE%\Application Data\Ubisecure\Ubisecure.SAML2.ServiceProvider\sp\metadata\aa.xml

Windows 2008:

C:\ProgramData\Ubisecure\Ubisecure.SAML2.ServiceProvider\sp\metadata\aa.xml