Lab 1.1: Ubisecure IAM Installation
The purpose of this lab is to:
- Give a short overview of the installation process of Ubisecure Identity Server
- Get familiar with the IAM Academy Managed IAM environment
- You have access to your own IAM Academy environment (a Windows Server 2019 virtual machine)
Introduction
During this training you will receive a pre-installed Ubisecure Identity Server environment for your learning purposes. However, knowing the installation process of Ubisecure Identity Server will be very useful in the future when you need to install or upgrade on your own.
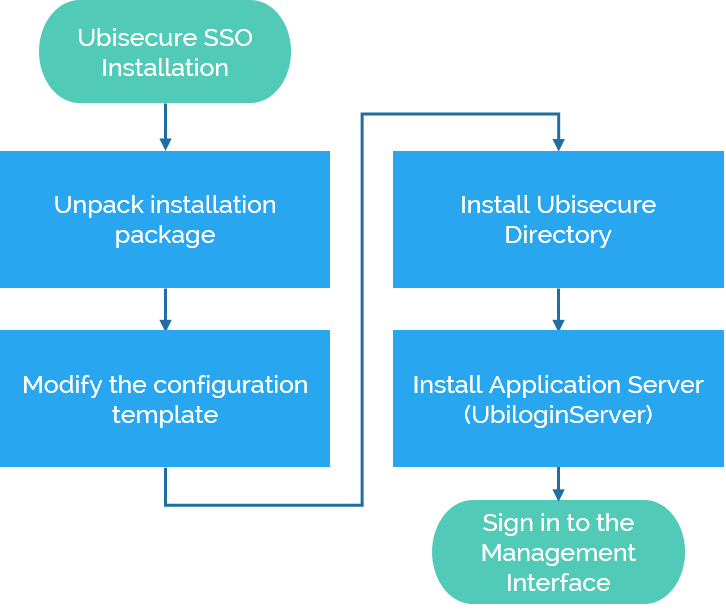
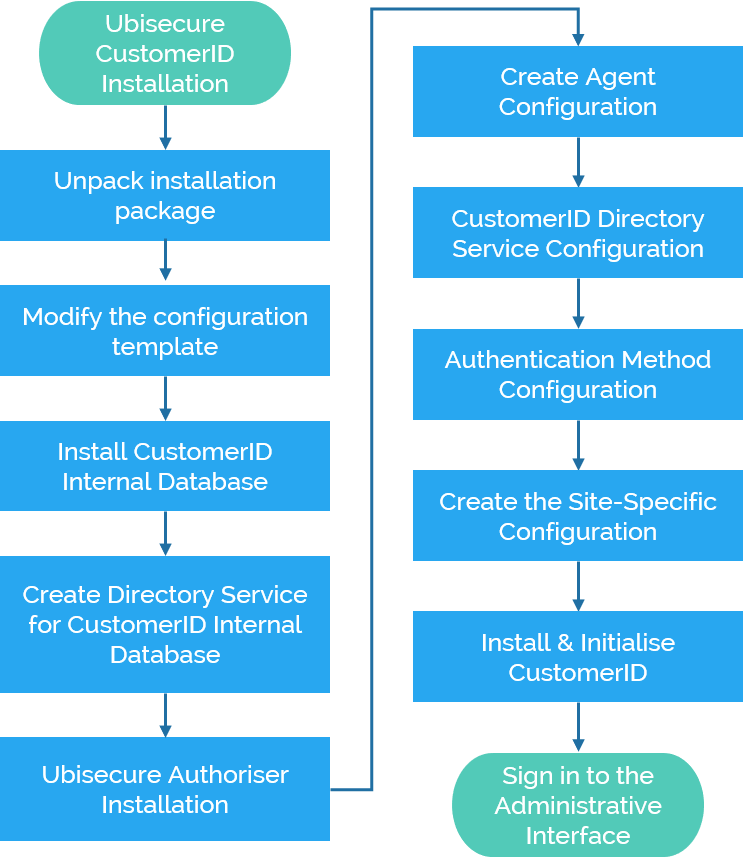
In practice, Ubisecure Identity Server is built based on two main components: Ubisecure SSO and Ubisecure CustomerID. For both components, Single Node Installation is the simplest possible deployment and will be used for training purposes.
SSO is installed first, as it is a requirement for installing CustomerID.
The following graph shows an overview of the main steps of installing Ubisecure Identity Server:
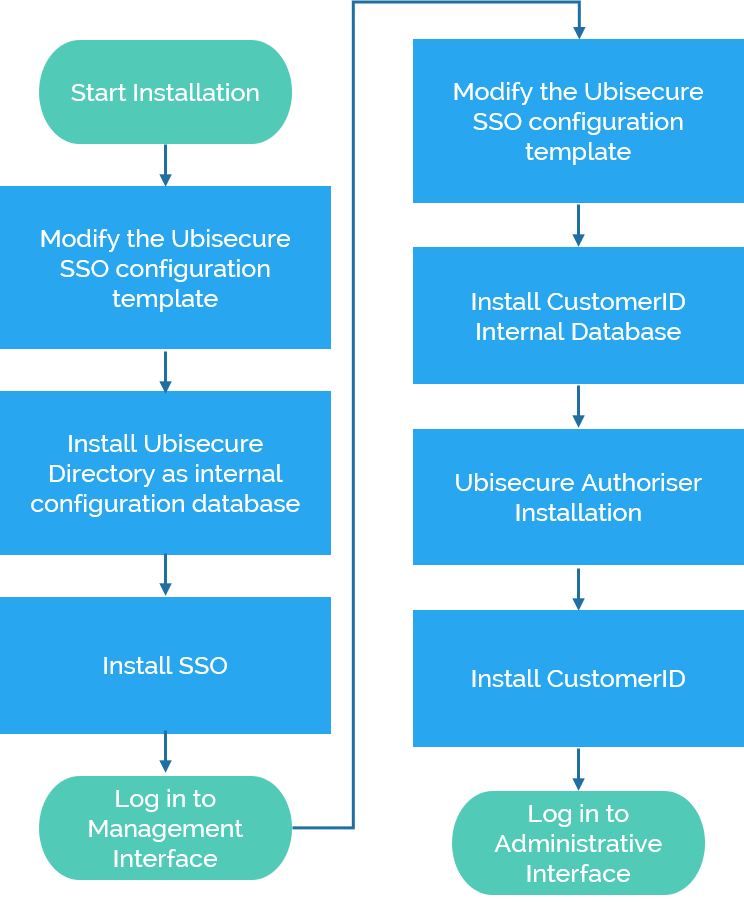
Ubisecure SSO Installation
Ubisecure CustomerID Installation
IAM Academy environment
Each student has access to a pre-installed IAM Academy environment consisting of the following services
Ubisecure SSO Management Console
https://login.smartplan.com:8443/ubilogin
Ubisecure CustomerID Administration Interface
https://login.smartplan.com:7443/eidm2/wf/admin
Ubisecure CustomerID Self-service Interface
https://login.smartplan.com:7443/eidm2/wf/self-service
Ubisecure CustomerID Password reset tool
https://login.smartplan.com:7443/eidm2/wf/changepwd
You will access the environment using your browser on your virtual machine
Connecting to your own virtual machine
Open your browser and load the portal https://iamacademy.ubisecure.com/
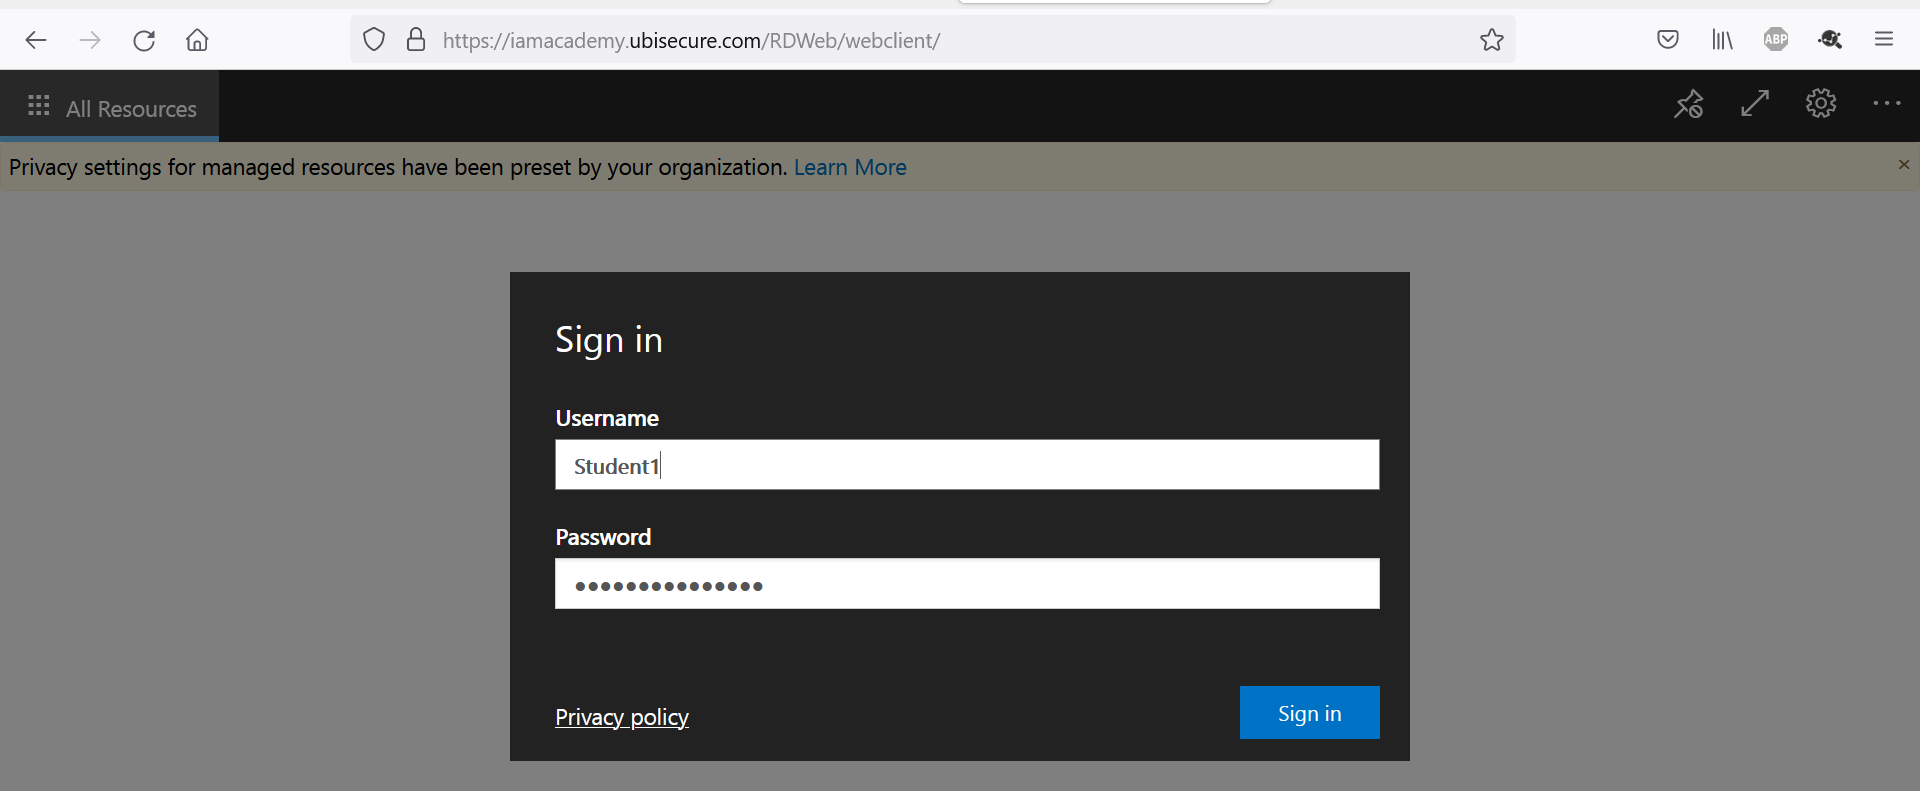
| Portal | https://iamacademy.ubisecure.com/ |
| User name | StudentX (each student has a different username e.g. Student1) |
| Password | ************ (provided by the instructor) |
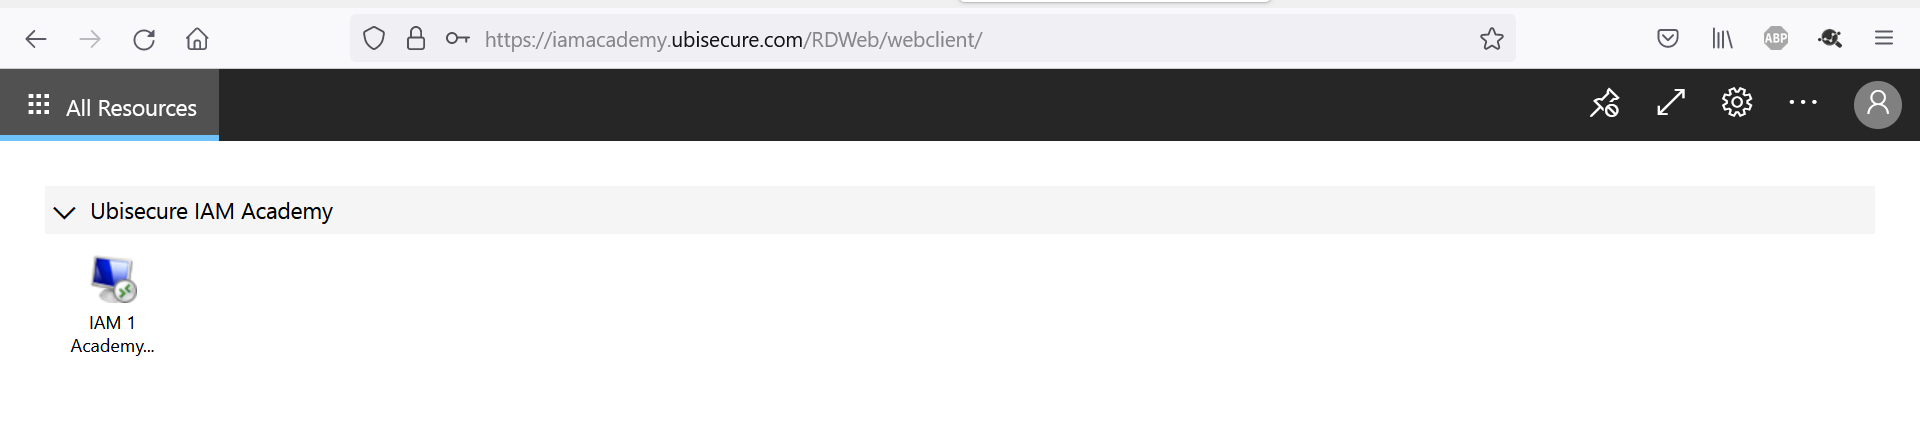
Click the icon and that will launch the virtual machine on your browser tab.
Now you're ready to start the exercises!
Instructions
Part 1: Getting familiar with Ubisecure SSO Management
Now it's time to get familiar with some basics about SSO management.
Step 1: Sign in to Ubisecure SSO management console
- Open the address https://login.smartplan.com:8443/ubilogin in a browser (inside your virtual machine)
Username: system
Password: ***********
Step 2: Change the system user password
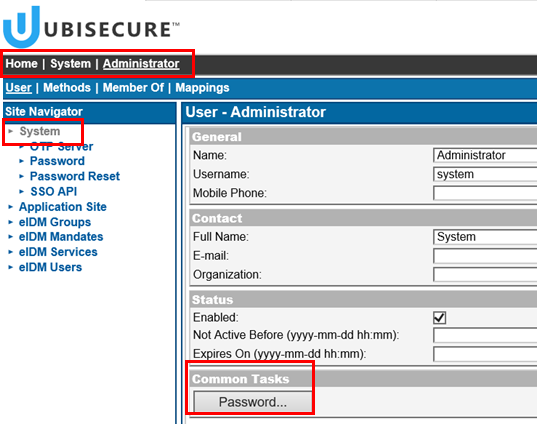
- On Site Navigator, select site ”System”
- Select ”Users” tab
- Select user ”Administrator”. Note, username of the "Administrator" user is system.
- Select ”Password” and enter a new password of your choice
- Verify by logging out and then logging in
Step 3: Create your own administrative user account
- On Site Navigator, select site ”System”
- Select ”Users” tab
- At the bottom select "New User"
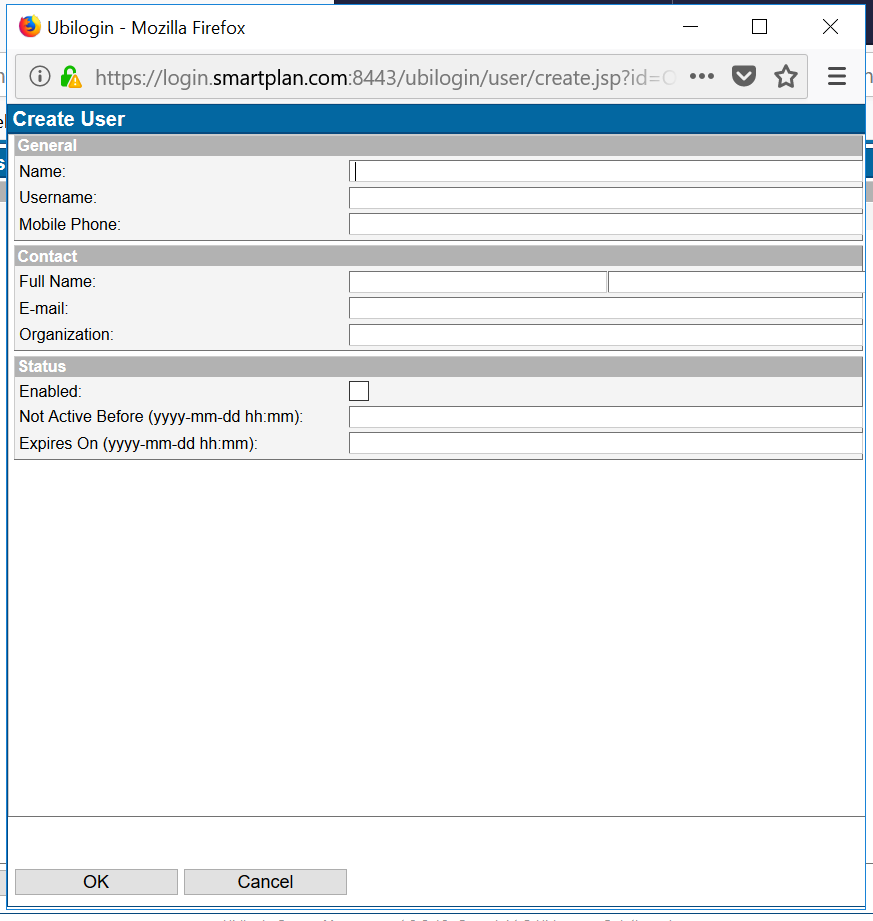
- Enter the fields "Name" and "Username." We suggest using your first name as "username." Don't fill in "Mobile Phone" or any other field.
- Check "Enabled" and finally click "OK" button.
- There are still three steps to do:
- enabling Password as an authentication method for the user,
- and setting a password, and
- adding the user to the administrators' group
- In order to set a password, first go to "Methods" tab. Check authentication method "Password" and finally click the button "Update" at the bottom of the page.
- Now passwords is an authentication method enabled for this user.
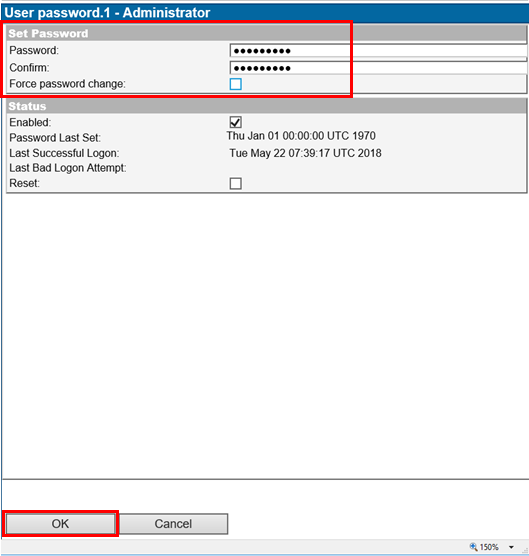
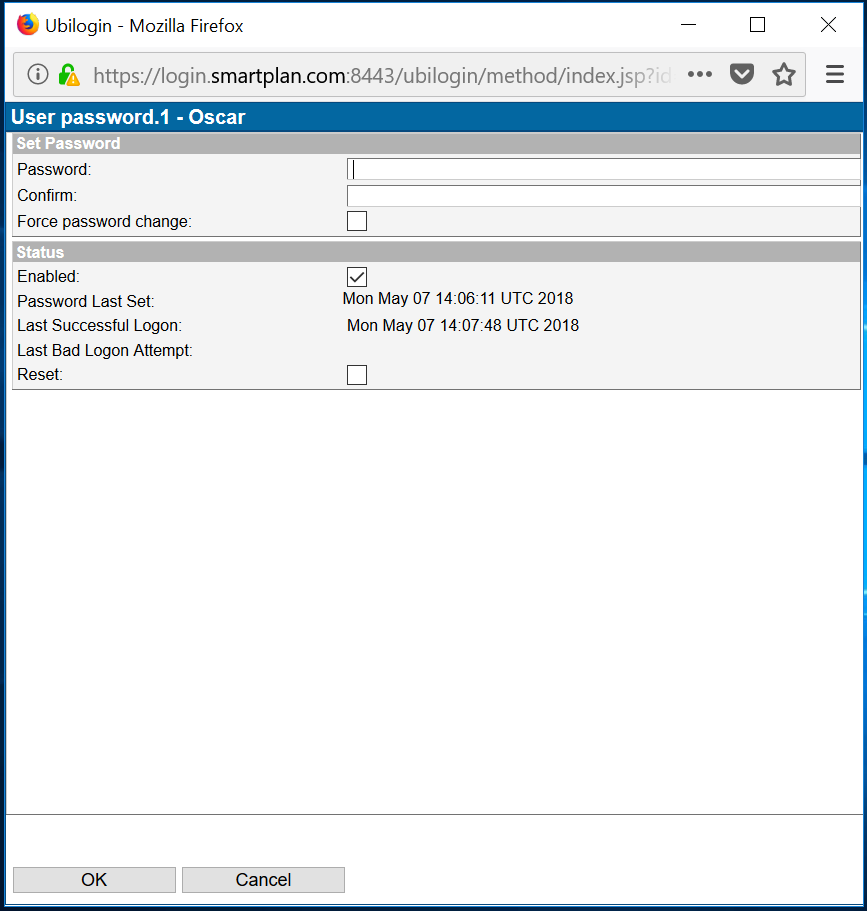
- Now go back to Users tab, and click on "Password" button under "Common Tasks"
- Write your password (twice) and click OK. Once the pop up disappears, click "Update."
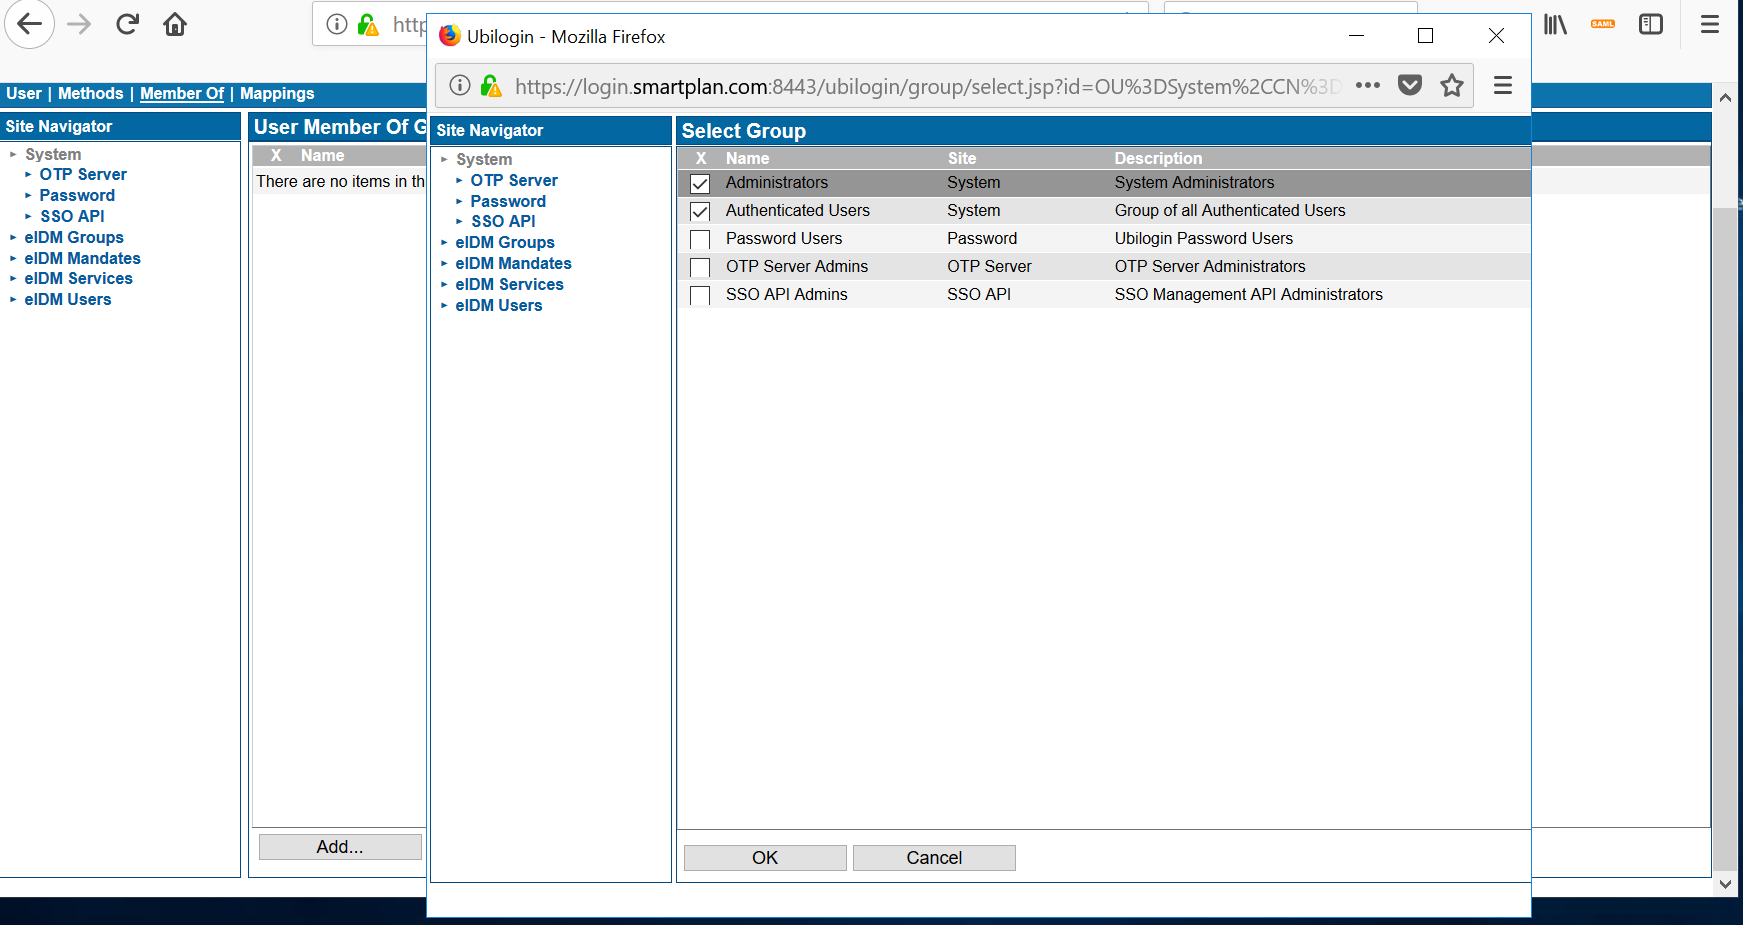
- In order to add the user to the administrators' group, first go to "Member of" tab. Then click "Add" button at he bottom of the page. Select "Administrators" and "Authenticated Users" groups and click the button "OK"
- Log out from system user.
- Now log in with your own administrative user account.
Part 2: Prepare for federation training tasks
To minimise configuration steps, we must enable two settings - one to disable backchannel logout flows which can be prevented by incorrect firewall settings, and the second to set the metadata configuration to show the public key within an X.509 certificate.
On the main screen, add SAML 2.0 Compatibility Flags (notice the space between the two flags):
LiteNoBackChannel MetadataCertificate
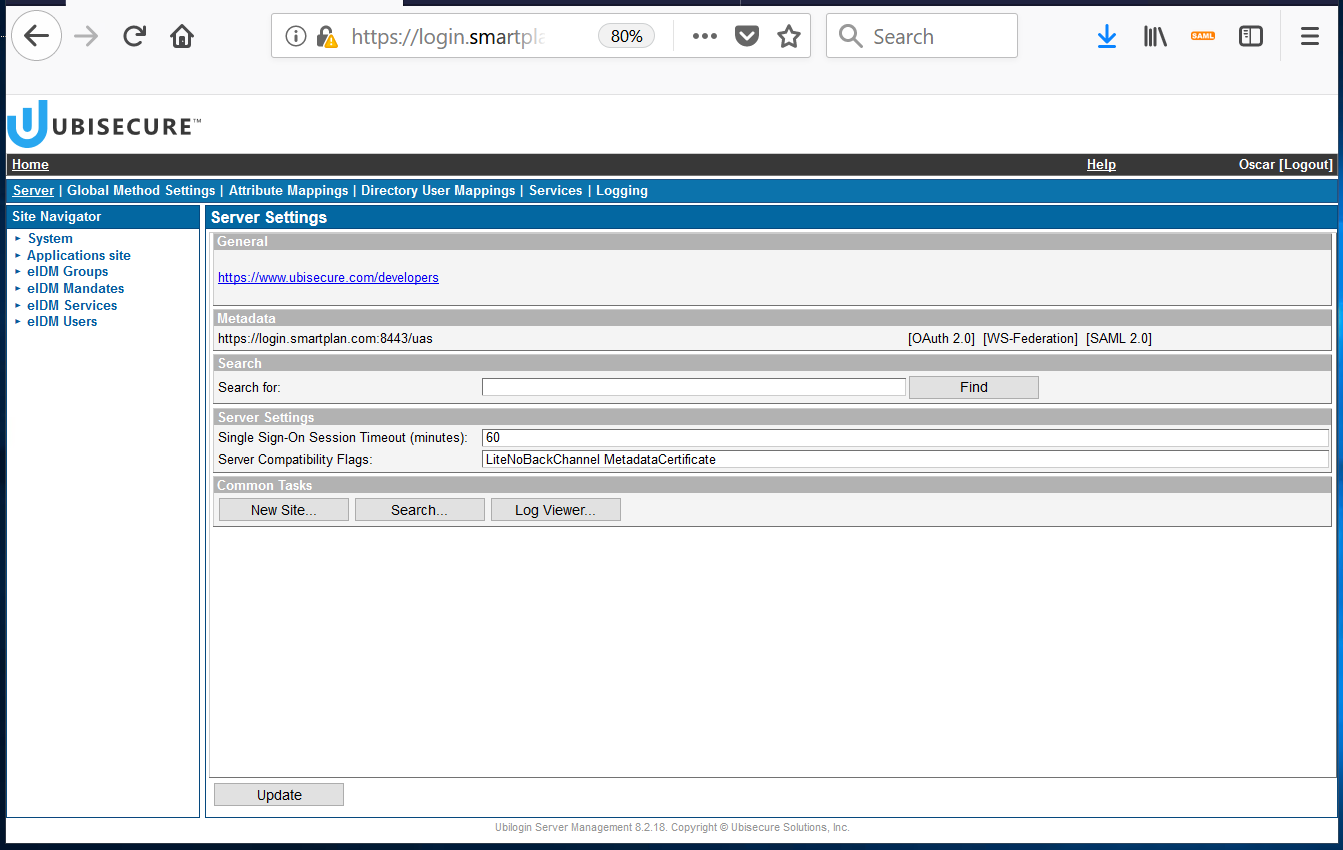
Once the flag is set, press "Update" button
Part 3: Manage Ubisecure SSO Services
It's useful to get familiar with the services that Ubisecure SSO runs and how they affect the system. SSO runs two services:
- UbiloginDirectory (Active Directory Lightweight Directory Services)
- UbiloginServer (Apache Tomcat)
These services restart automatically whenever the system reboots.
When do you need to restart a service?
- When changing files that reference new files (new languages, new logos, new templates)
- When installing upgrades
Step 1: Restarting Ubisecure SSO Services
There are two ways of restarting the services: via Command Prompt or via "Services" GUI.
The first way is via the Command Prompt. To open it, type "cmd" in Search box, and right-click to run as Administrator.
The sequence of commands is:
net stop ubiloginserver
net stop ubilogindirectory
net start ubilogindirectory
net start ubiloginserver
The second way is via Windows graphical user interface. To launch "Services" GUI, type "services" in Search box.
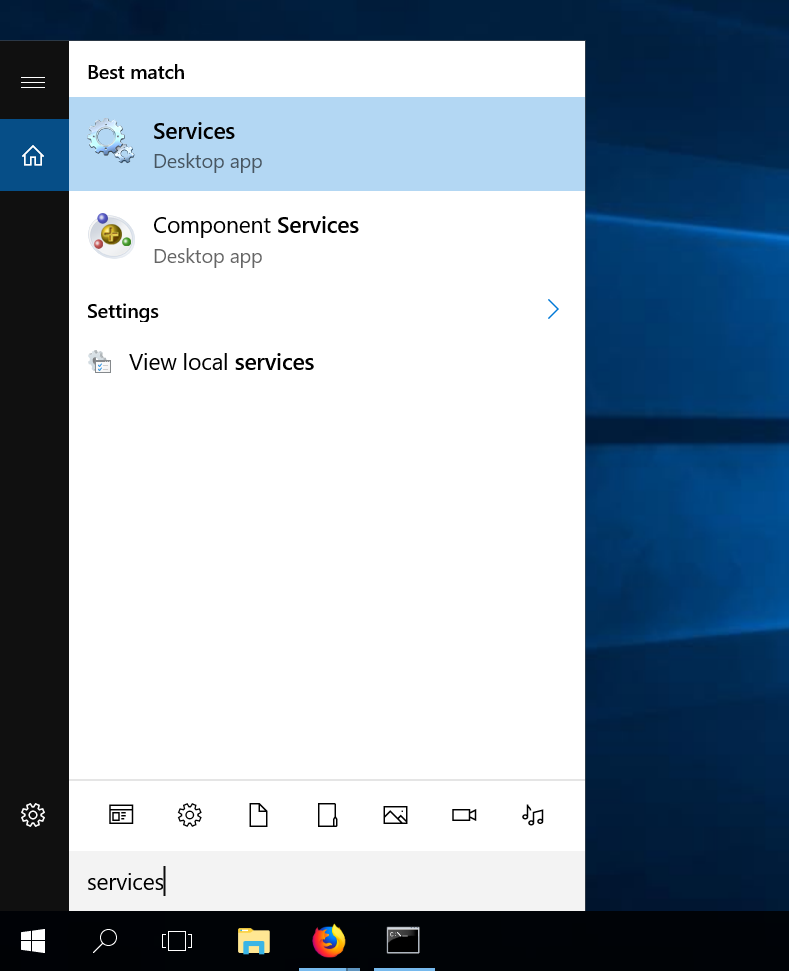
In the following screenshot you can see the two services running:
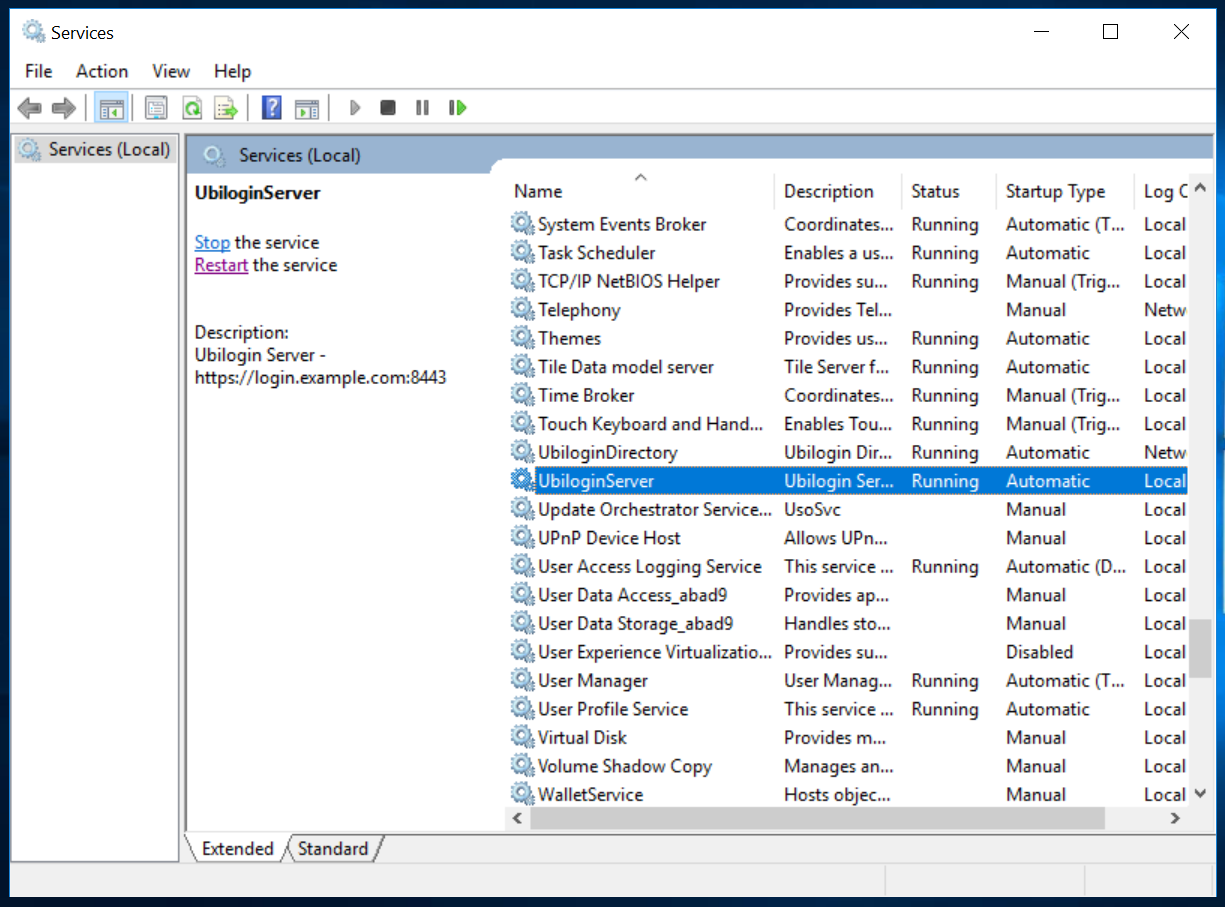
You must replicate the four steps in the exact order.
Now choose your preferred way, and perform the following tasks in this order:
- Stop UbiloginServer
- Stop UbiloginDirectory
- Start UbiloginDirectory
- Start UbiloginServer
Verify that the service is running by logging in.
Step 2: System User Password Reset
cd /d C:\Program Files\Ubisecure\ubilogin-sso\ubilogin\ldap
adam\import.cmd system-password.ldif
Step 3: Disable System User
Security best practice dictates that administrators should always access the system using personally named accounts and any generic accounts should be disabled.
On Ubisecure SSO management interface, Home / System / Users and select "Administrator." The User object main view will look like this:
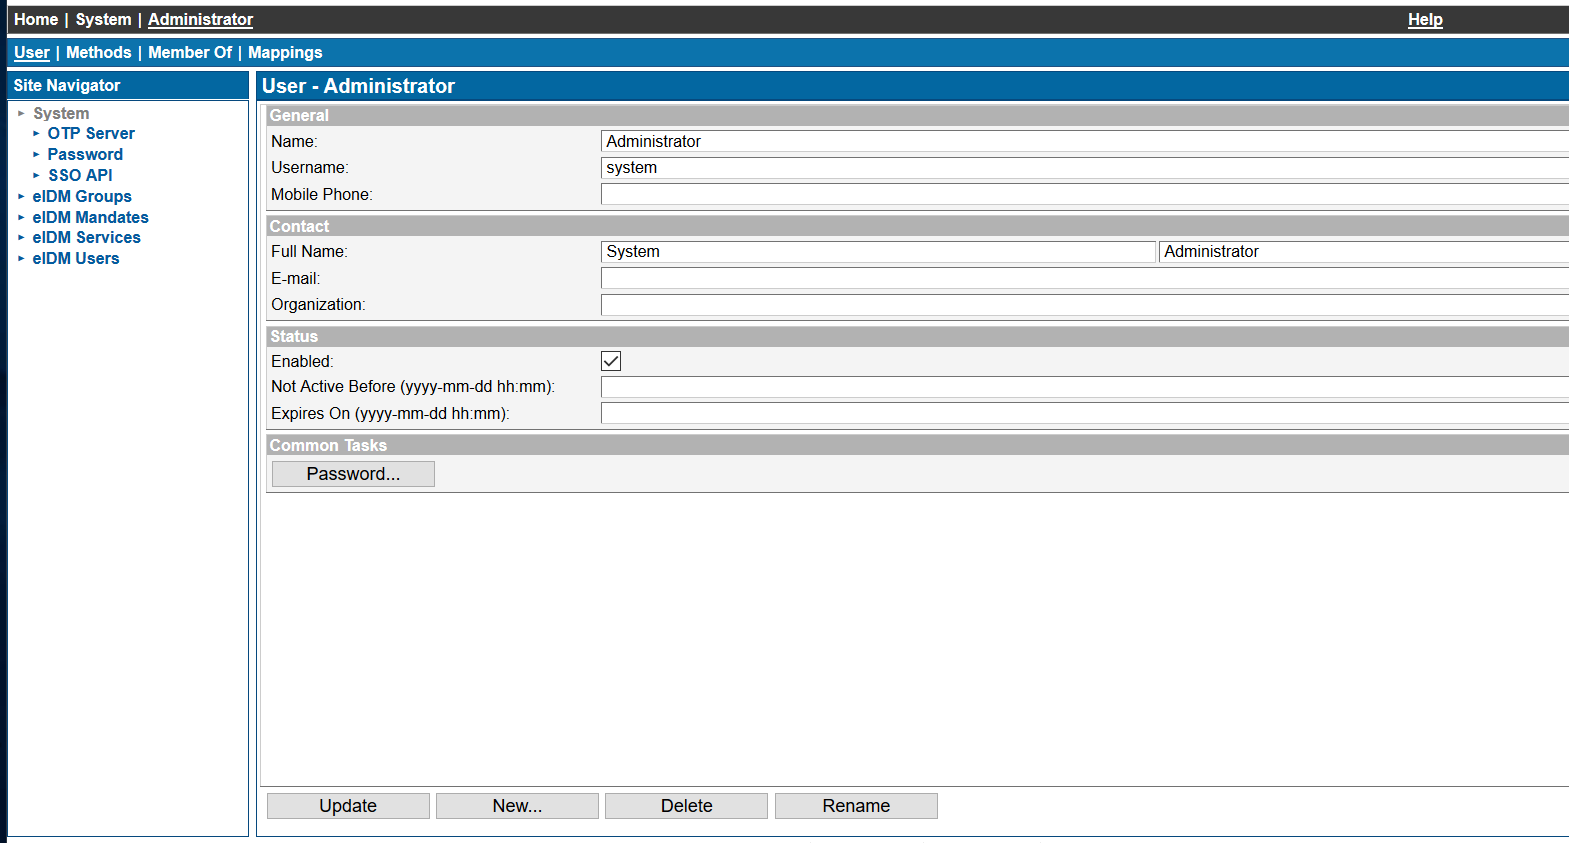
Uncheck the "Enabled" status and then click "Update" button. Now the system user is disabled.
Verify by trying to login with "system" user.
Part 4: Getting familiar with Ubisecure CustomerID Admin User Interface
Right after CustomerID is installed, there are no user accounts you can log in. You must first create an administrative user account on the system. This is done with the Example user data import on Windows - CustomerID.
However, in this training environment there is an administrative user created.
Step 1: Create User Accounts on CustomerID with Import Tool
Get familiar with import tool by creating a new user account, the administrative user Scott Long for SmartPlan: scott.long@smartplan.com
In%PROGRAMFILES%\Ubisecure\customerid\toolsfolder, modify the provided template import file.cd /D "%PROGRAMFILES%\Ubisecure\customerid\tools" notepad examples\importtool\example.import
(You can use Notepad++ editor if you prefer so)
Everything with the bracket "#" in the start of a line is commented out, which means they are not enabled.
Then edit the file to include Scott's account. The import file could contain multiple users - for example for migrating users from an existing system, separated by a blank line.
entity: user
organization: Users
uid: scott.long
firstname: Scott
surname: Long
email: scott.long@smartplan.com
role: eIDM/eIDMMainUser
password: Password2
Now execute the import command on the command prompt:
import.cmd examples\importtool\example.import
- Successful execution will show something like this:
ImportTool X.X.XX

Create 'scott.long@smartplan.com': OK
  'Assign Role': OK
Step 2: Log in to CustomerID administrative interface
The service address of CustomerID admin interface is:
Open the address in a browser and sign in using the following credentials
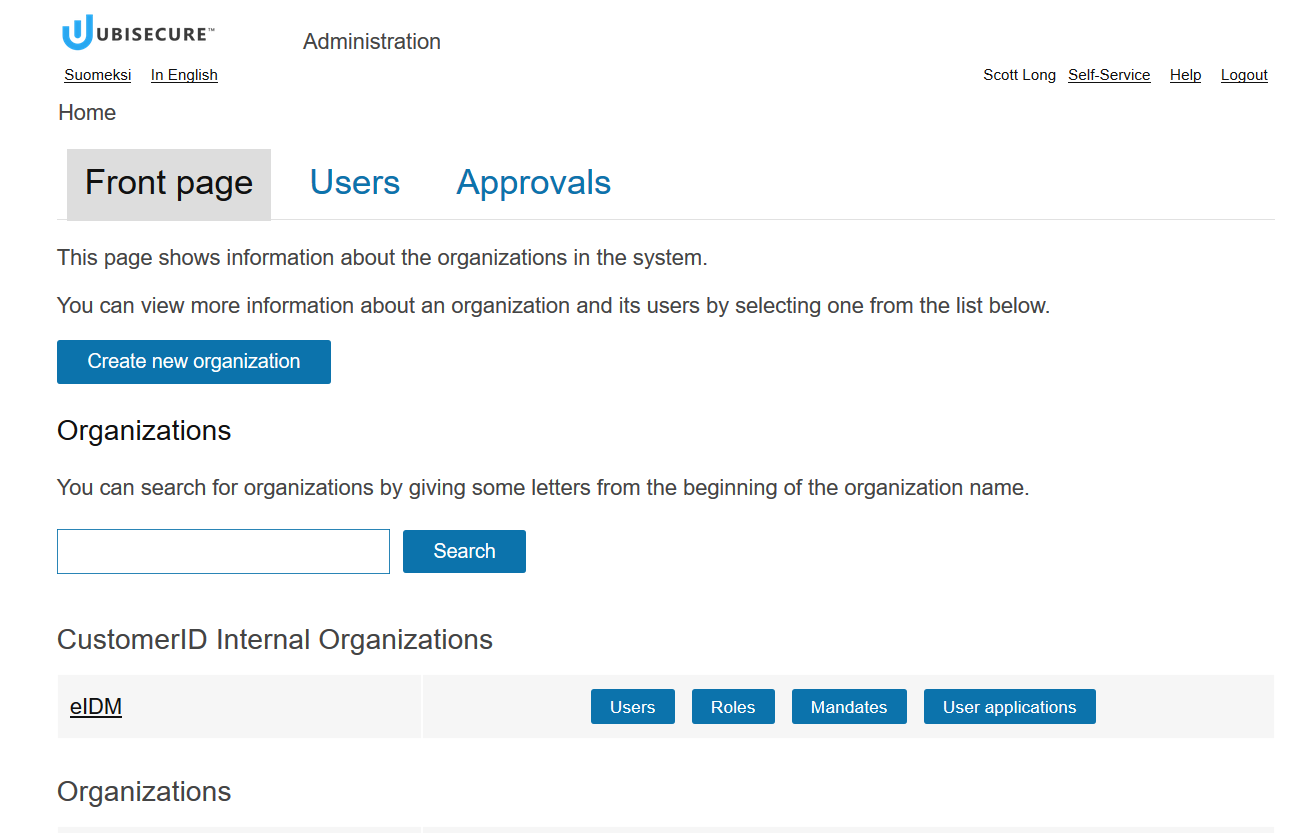
In case you have problems logging in, there is an administrator account with the following credentials:
Self-service interface
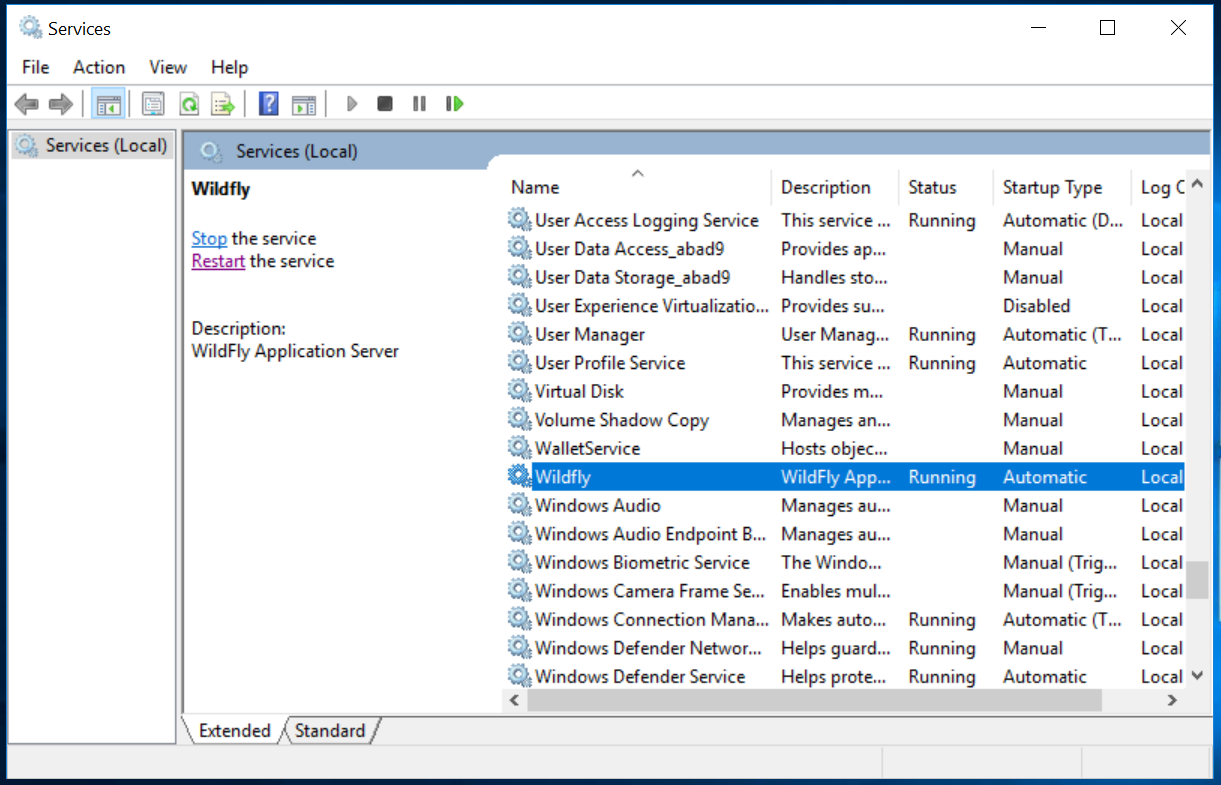
Step 3: Restarting CustomerID Service
Unlike SSO, CustomerID uses Wildfly instead of Tomcat.
Changes to the eidm2.properties file require a restart of the CustomerID service to become effective. The service you must restart is Wildfly.
Execute this sequence in the command prompt:
net stop Wildfly
net start Wildfly
or via Windows graphical user interface as seen in the picture:
How to install SSO
The installation steps are on the page Single node installation - SSO of Ubisecure Developer and Partner Portal.
How to install CustomerID
The installation steps are on the page Single node installation - CustomerID of Ubisecure Developer and Partner Portal.