Lab 3.3: User Driven Federation
The purpose of this module is to learn how to link external identities to CustomerID accounts
- Google configured as authentication method
Overview
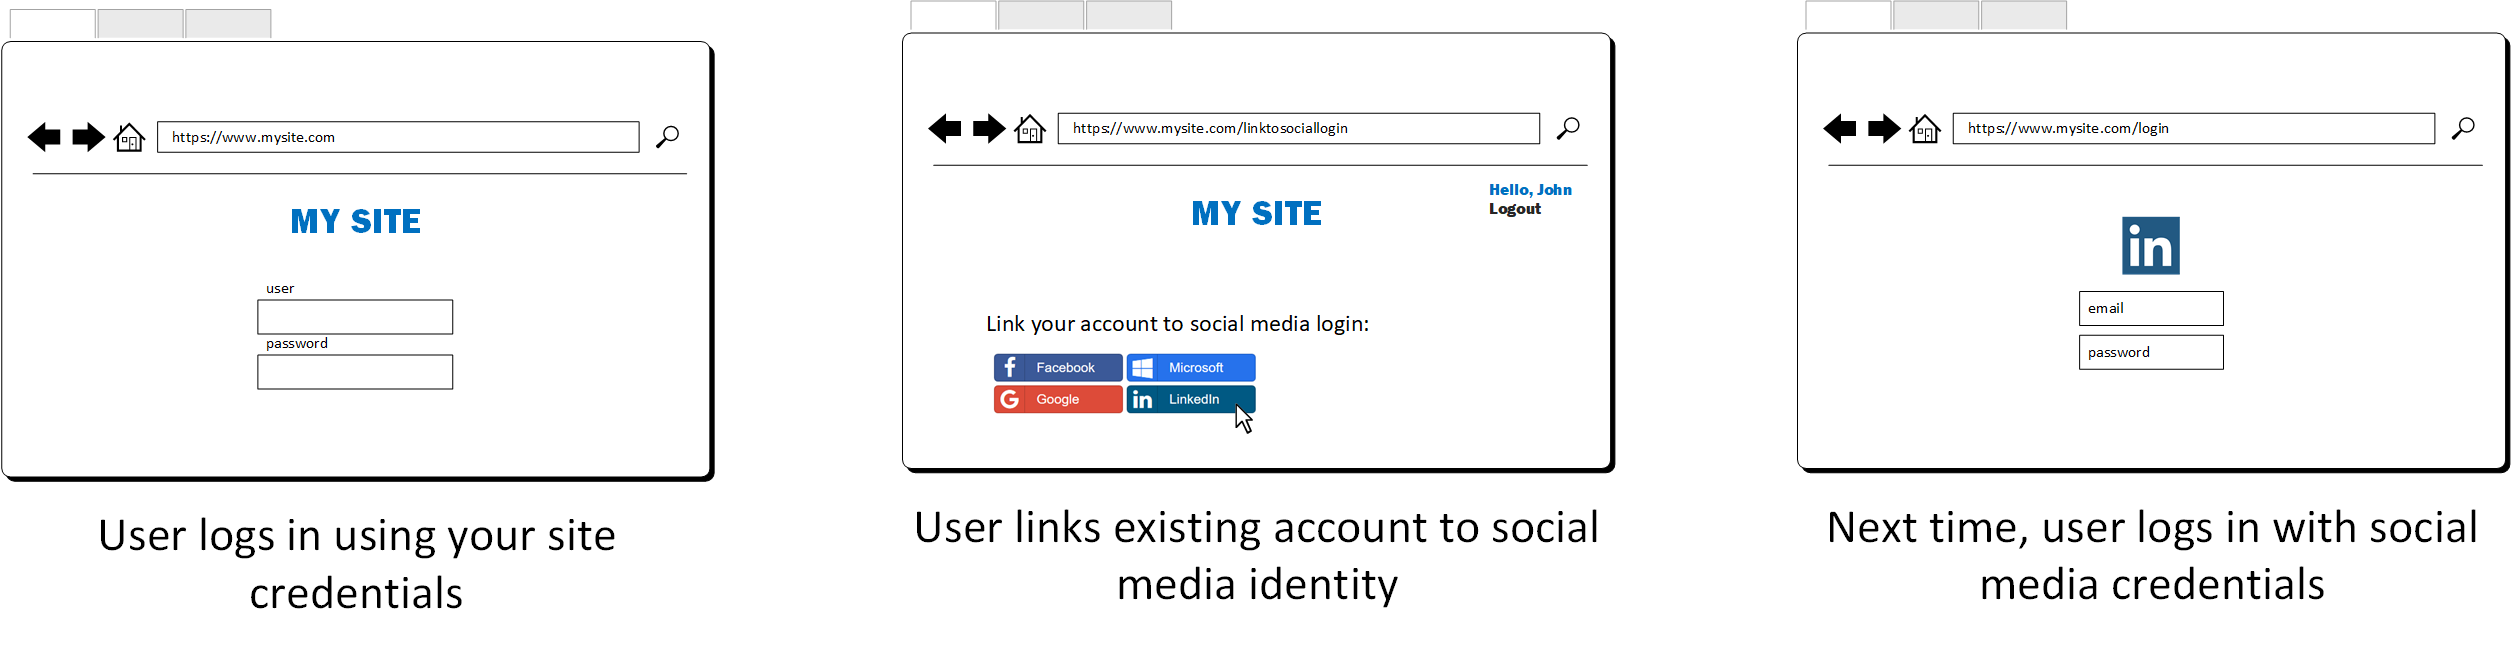
User Driven Federation (UDF)
After registering for or having an existing account within your services, the user can bind their own external digital identity, such as their social media account or a strong identity such as a Mobile ID, to their UserID and password account within your services. Starting with their next login, the user is permitted access to your systems using the external digital identity. UDF enables matrix-type of linking of digital identities supported by Ubisecure SSO component. UDF allows for the “Bring Your Own Identity” use case and increases convenience for the end users.
In lab 1.3 Authentication Methods, we configured Google login via OAuth2. In this lab, we will link CustomerID (password.2) authentication to Google login.
Instructions
Part 1: Create LDIF and import to directory
We need to create a series of configurations and then import it to the directory via importtool command.
Step 1: Create udf.ldif
Create a text file on C:\Program Files\Ubisecure\ubilogin-sso\ubilogin\ldap\ and save it as udf.ldif
NOTE! Remove all empty spaces at the end of each row.
Alternatively, the file is also available for download here: udf.ldif
# LDIF file to configure User Driven Federation

# Listing 1. LDIF block creating the CustomerID Federation Service

dn: cn=CustomerID Federation,cn=Services,ou=System,cn=Ubilogin,dc=login,dc=smartplan,dc=com
changetype: add
objectClass: ubiloginService
objectClass: top
cn: CustomerID Federation
ubiloginClassname: com.ubisecure.customerid.federation.CIDFederationManagerFactory
ubiloginServiceInputParameter: subject
ubiloginTitle: CustomerID Federation

# Listing 2. LDIF block creating a User Mapping Table for Ubisecure CustomerID

dn: cn=CustomerID User Mapping,cn=Server,ou=System,cn=Ubilogin,dc=login,dc=smartplan,dc=com
changetype: add
objectClass: top
objectClass: ubiloginLDAPURLUserMappingTable
cn: CustomerID User Mapping

# Listing 3. LDIF block creating a Ubisecure CustomerID specific Ubilogin Service User Mapping Entry
# The number 44a5a6c3-706e-419f-adf8-d31f182bcffa is a unique identifier for the mapping

dn: cn=44a5a6c3-706e-419f-adf8-d31f182bcffa,cn=CustomerID User Mapping,cn=Server,ou=System,cn=Ubilogin,dc=login,dc=smartplan,dc=com
changetype: add
objectClass: ubiloginServiceUserMappingEntry
objectClass: ubiloginServiceReference
objectClass: top
ubiloginServiceDN: cn=CustomerID Federation,cn=Services,ou=System,cn=Ubilogin,dc=login,dc=smartplan,dc=com
ubiloginServiceInputParameter: subject ${nameID}
cn: 44a5a6c3-706e-419f-adf8-d31f182bcffa

# Listing 4. LDIF block defining a Federation Manager Template

dn: cn=eidm.policy,ou=eIDM Services,cn=Ubilogin,dc=login,dc=smartplan,dc=com
changeType: modify
replace: ubiloginConfString
ubiloginConfString: FederationManager.TemplateName federation
-

# Listing 5. Modifying google.oauth2.1 method to offer federation

dn: cn=google.oauth2.1,cn=Server,ou=System,cn=Ubilogin,dc=login,dc=smartplan,dc=com
changetype: modify
replace: ubiloginLDAPURLUserMappingTableDN
ubiloginLDAPURLUserMappingTableDN: cn=CustomerID User Mapping,cn=Server,ou=System,cn=Ubilogin,dc=login,dc=smartplan,dc=com
-
changetype: modify
replace: ubiloginDirectoryServiceDN
ubiloginDirectoryServiceDN: cn=CustomerID Directory,cn=Services,ou=System,cn=Ubilogin,dc=login,dc=smartplan,dc=com
-
Step 2: Import settings to directory
Then we'll use import tool to read settings in udf.ldif file:
Import udf.ldifcd C:\Program Files\Ubisecure\ubilogin-sso\ubilogin\ldap\adam import.cmd ..\udf.ldif
If the command is executed successfully, the result will be:
Connecting to "localhost:389"
Logging in as current user using SSPI
Importing directory from file "..\udf.ldif"
Loading entries......
5 entries modified successfully.
The command has completed successfully
Part 1b: Enable federation template
The pages in user driven federation workflow will be using a default template unless changed. In order to keep SmartPlan look and feel, we will enable a new template almost identical to smartplan template (configured in Lab 2.3).
- First make a copy of "C:\Program Files\Ubisecure\ubilogin-sso\ubilogin\custom\templates\smartplan.properties" in the same directory, and rename it as federation.properties
Add the new template to the index of templates:
template.indexfederation = templates/federation.properties
- Restart Ubilogin Server
- You will verify this later
Part 2: Enable an external authentication method for CustomerID
Now we need to enable an external authentication method so a user can link her CustomerID account to that existing external account (e.g. a Google account). For this exercise, we will configure Google accounts. On your SSO Management Console, Google is already set up as an authentication method and was named google.oauth2.1.
Step 1: Enable Google as authentication method in SSO Management Console
- Open SSO Management Console with your administrator account.
- Go to eIDM Services site.
- On Site Methods, add google.oauth2.1.
- On Applications, you will see two applications: eidm2 and workflow.

- For each of these two applications go to Allowed Methods and add google.oauth2.1. It's important that you add google.oauth2.1 as allowed method for both eidm2 and workflow.
- Now go to eIDM Users site.
- On Site Methods, add google.oauth2.1.
Step 2: Enable Google as authentication method in CustomerID
- Open eidm2.properties with your text editor.
Find the line that starts with "methods.protected" and add google.oauth2.1 as shown below.
eidm2.propertiesmethods.protected = methods.password, methods.sms, google.oauth2.1
- Restart Wildfly.
- Open CustomerID self-service login page https://login.smartplan.com:7443/eidm2/wf/self-service
- You will find Login with Google button under "Sign In Using a Provider"
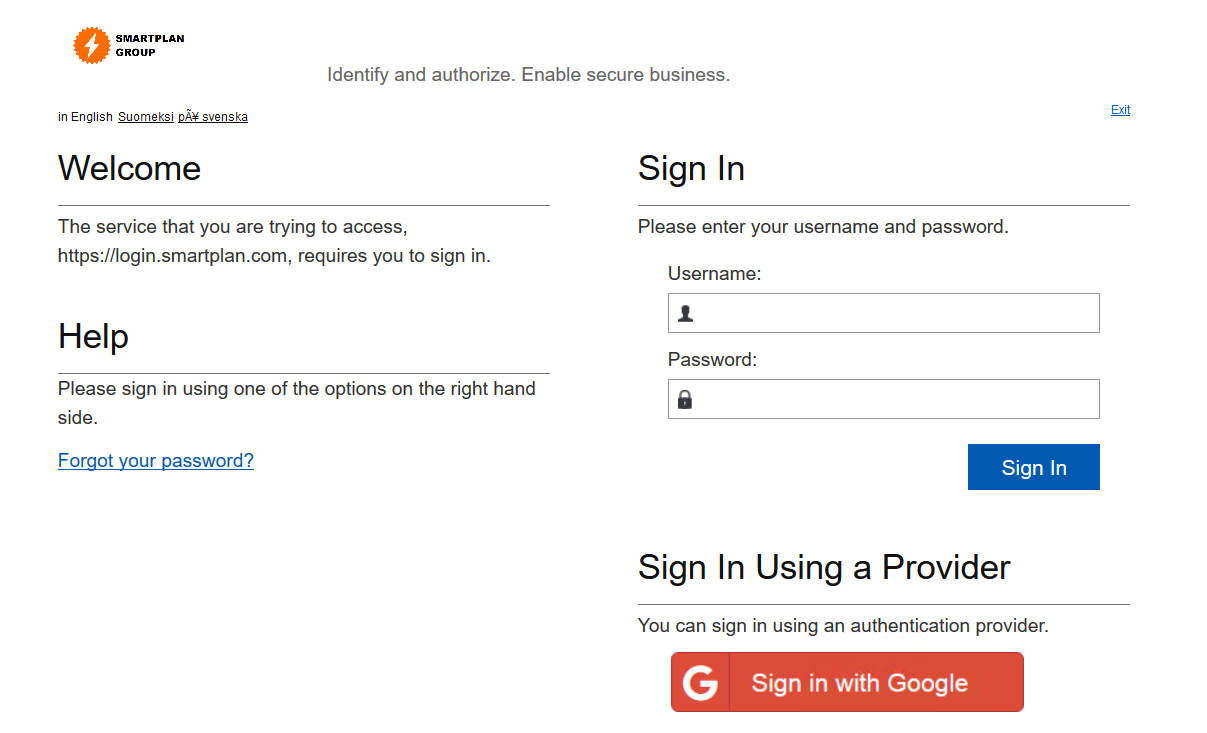
- Observation: You will see the button as an image only if method-image has been previously configured. Otherwise the button will be a blue rectangle similar to "Sign In"
Part 3: Link your accounts
Now that User Driven Federation is configured, you can link your accounts.
In this exercise, the accounts you will link are your Google account and your CustomerID account.
The steps will be:
- Link your accounts (typically done once and kept as a permanent setting)
- Verify by logging in to CustomerID directly with your Google account
- Verify that you can also unlink your accounts
Step 1: Link your accounts
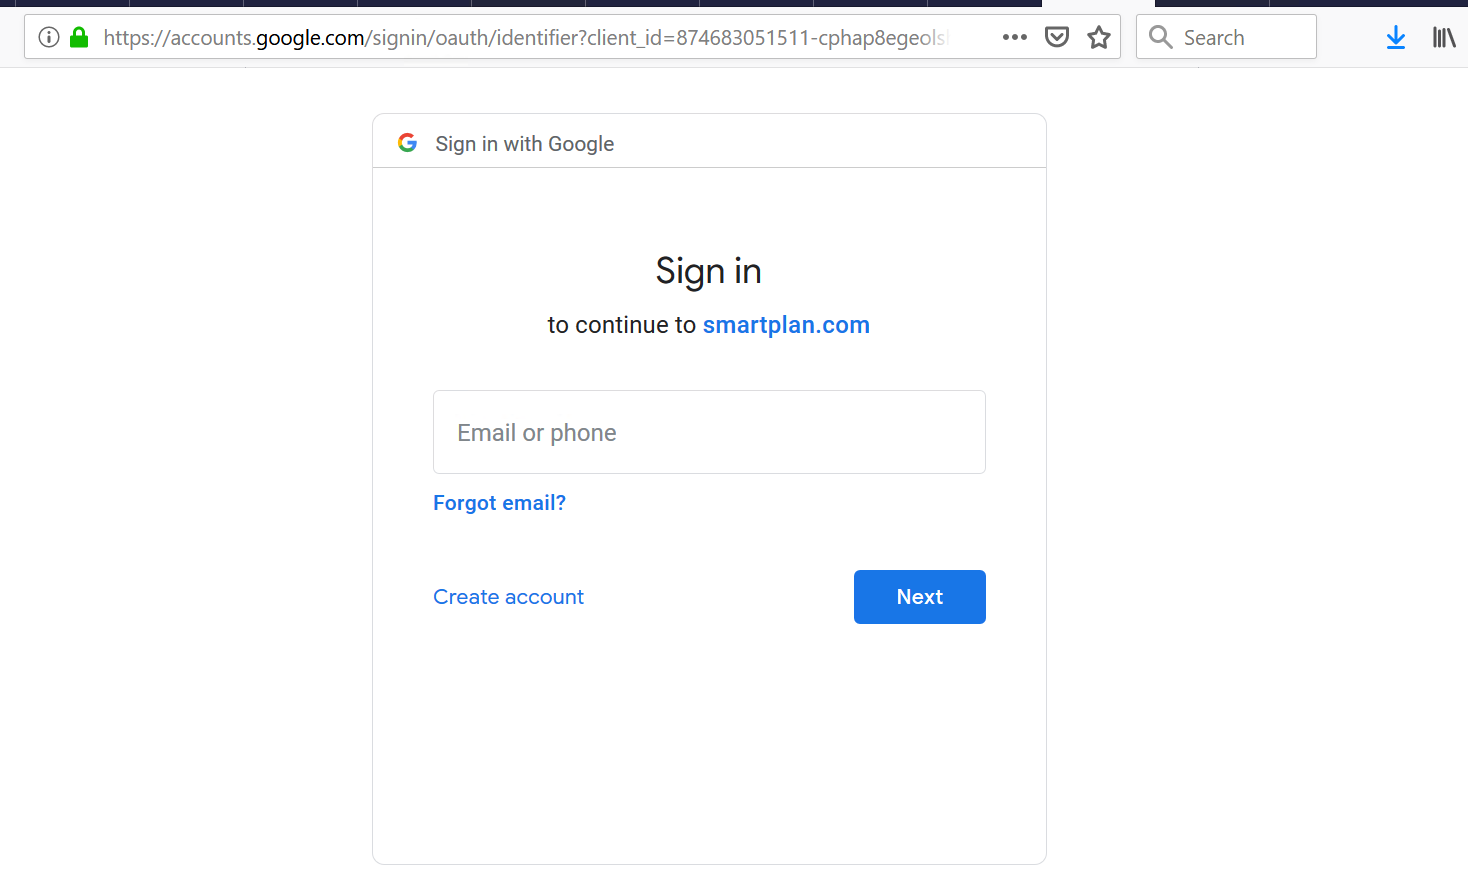
- Login to self-service. Click "Login with Google" button and you will be redirected to Google accounts login page.
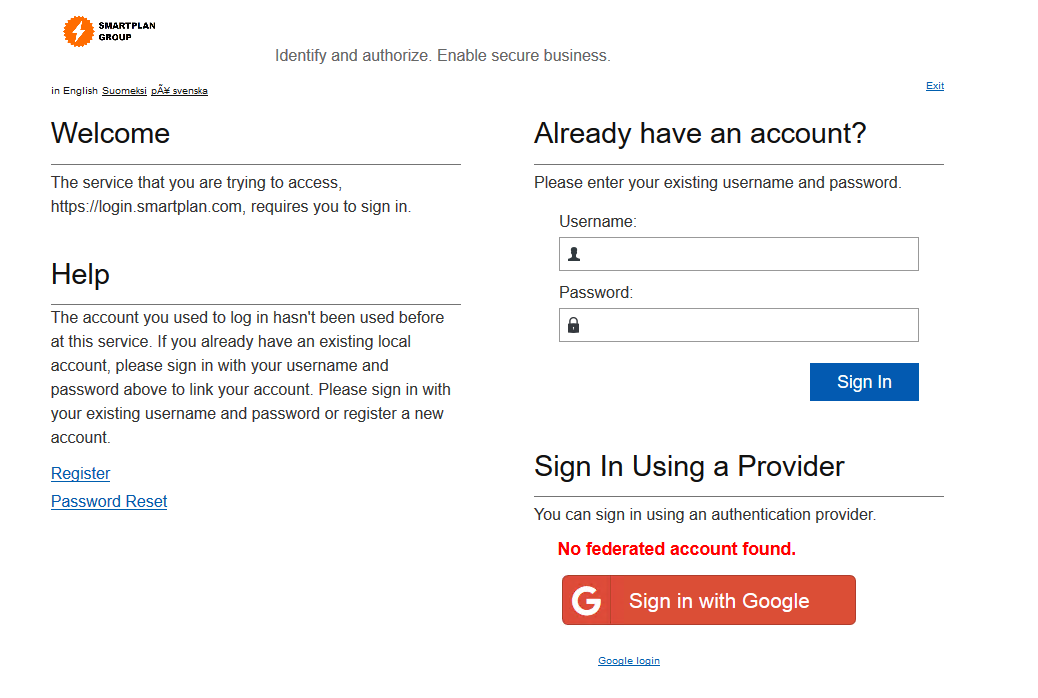
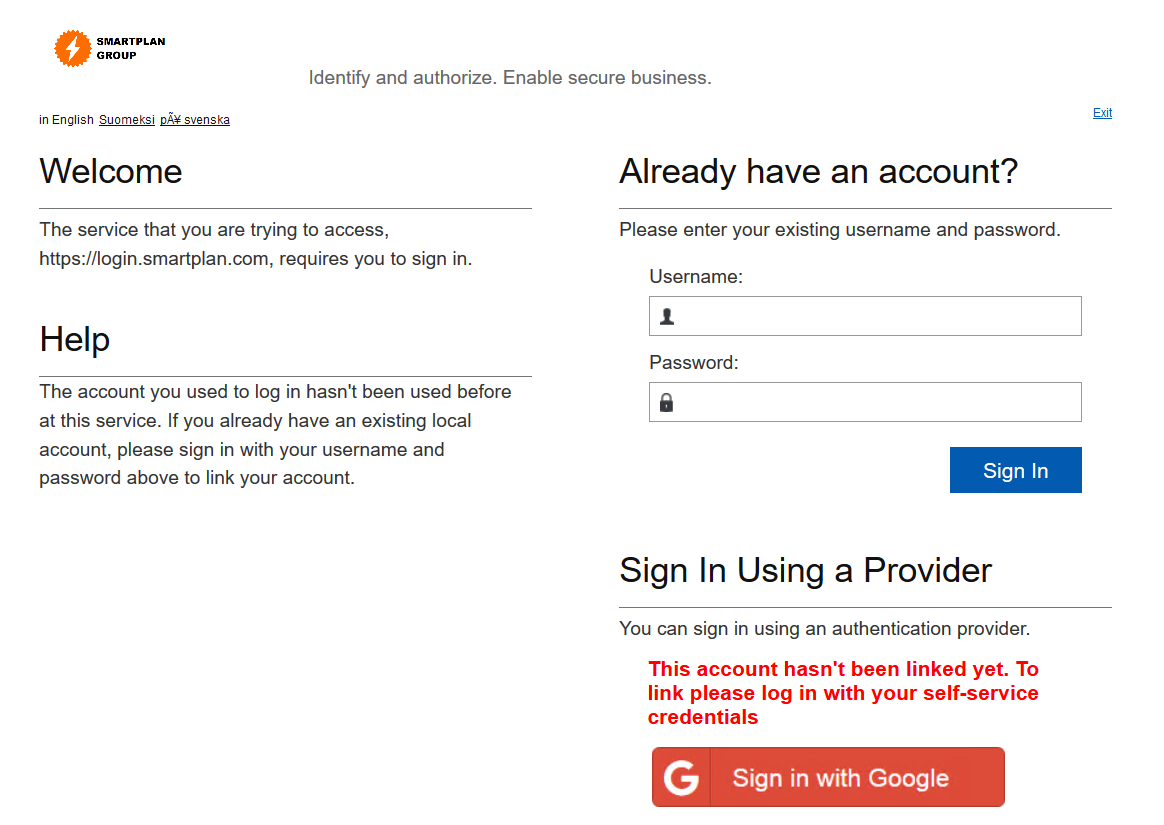
- Log in using some Google account and you will see the screen below. You are informed that user federation is not enabled (in red letters) so in this step you must log in with your CustomerID account one last time.
- After successful login, you're prompted to link your account. Tick the box "Remember this next time" and click "Continue"
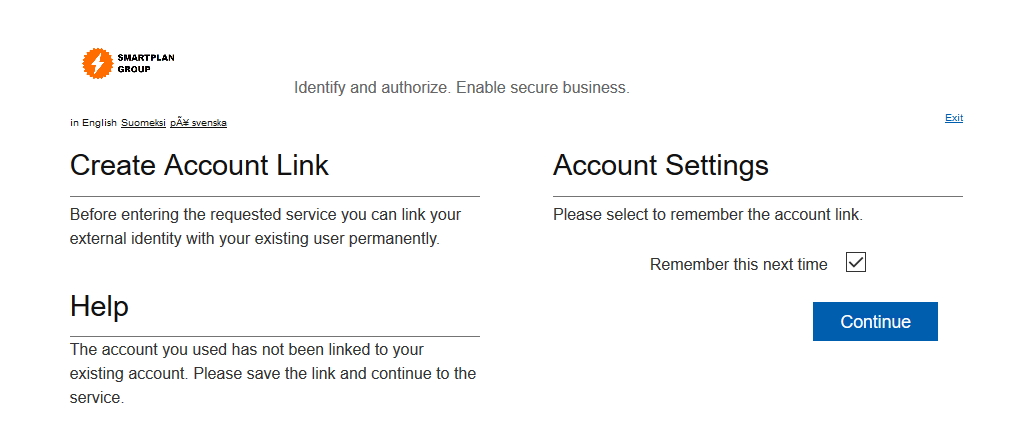
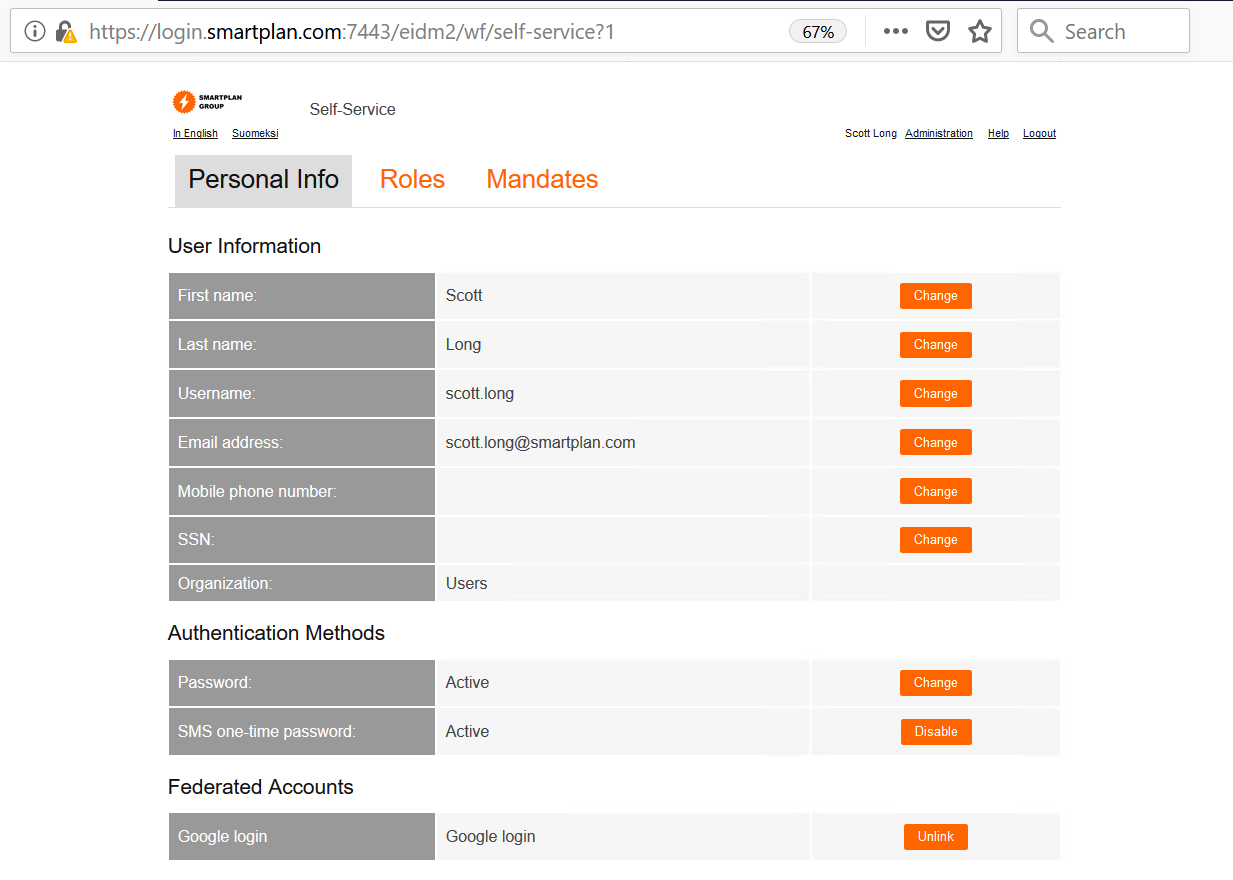
- You are now logged in and you can see the account linking settings at the bottom of the page under "Federated Accounts"
Now log out from CustomerID. Obs: You must logout from Google too.
Step 2: Verify that you can log in to CustomerID directly with a Google account
- Open self-service login page again https://login.smartplan.com:7443/eidm2/wf/self-service
- This time you will be able to log in directly using your Google credentials.
Step 3: Unlink your account
In the future, any user can unlink her own account from self service interface. Try this now.
*** END OF EXERCISES ***
Optional Exercises
Tailor and improve messages and texts for usability.
Part 1: Customise error page
If a user goes to SmartPlan self-service login page and sees a new button such as Google, will be curious and will try to log in. After a successful Google authentication, the user will be redirected to a page saying in red "No federated account found" (which you have already seen before). This error message and the other elements of that page can be customised to add more context to your specific use case.
We will do two changes:
Change texts
Default text Customised text No federated account found This account hasn't been linked yet. To link please log in with your self-service credentials In order to do this, you must edit C:\Program Files\Ubisecure\ubilogin-sso\ubilogin\custom\messages\errors.properties file. Add the line shown below.
errors.properties# user driven federation FEDERATION_MISSING = This account hasn't been linked yet. To link please log in with your self-service credentials
Remove links. Below you can see built-in default values for C:\Program Files\Ubisecure\ubilogin-sso\ubilogin\custom\messages\federation.properties
Default values for federation.propertiesMENU_LOGIN_TITLE = Already have an account? MENU_LOGIN_TEXT = Please enter your existing username and password. MENU_HELP_TITLE = Help MENU_HELP_TEXT = The account you used to log in hasn't been used before at this service. If you already have an existing local account, please sign in with your username and password above to link your account. Please sign in with your existing username and password or register a new account. MENU_HELP_LINKS = <li><a href="javascript:view.navigate('register.account')">Register</a></li><li><a href="javascript:view.navigate('password.reset')">Password Reset</a></li> PASSWORD_HELP_TITLE = Help PASSWORD_HELP_TEXT = The account you used to log in hasn't been used before at this service. If you already have an existing local account, please sign in with your username and password above to link your account. If you don't have an account, please create one by registeringObserve the second screenshot in Part 3 and notice how each setting matches the UI. Now edit the following two lines:
Default values for federation.propertiesMENU_HELP_LINKS = MENU_HELP_TEXT = The account you used to log in hasn't been used before at this service. If you already have an existing local account, please sign in with your username and password above to link your account.
Restart Ubilogin Server.
- Run the workflow again to verify changes
Part 2: Customise account linking settings inside self-service UI
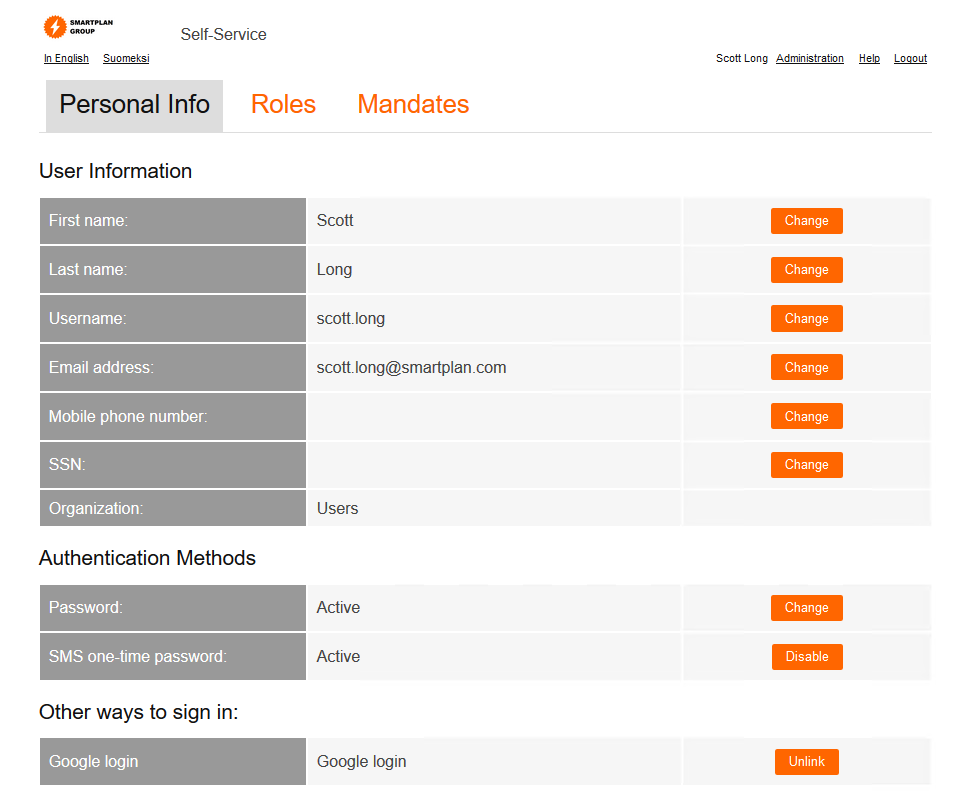
Once you log in to SmartPlan self-service you will be able to see account link settings, and if you wish it unlink your account. Let's change "Federated Accounts" that you saw on Part 3 for "Other ways to sign in."
These texts are configured in C:\Program Files\Ubisecure\customerid\application\custom\messages_en.properties. Open the file and edit it as seen below.
customerid\application\custom\messages_en.propertiesselfService.personal.federation = Other ways to sign in: admin.userInfo.userFederations = Other ways to sign in for this user:
- Restart Wildfly
- Log in to SmartPlan self-service again and you will see the changes in the UI.
Info table
For more information, please see "Language keys for User Driven Federation" section in page User driven federation - CustomerID
File udf.ldif
Extra Documentation
For more information on configuring please read:
User driven federation - CustomerID