| Info |
|---|
These are the upgrade instructions to the latest release: SSO 9.0. If you are upgrading to a SSO 8.x.x version, please check the upgrade instructions for that particular release. |
...
| Note |
|---|
NOTE: If the solution contains additional components UbiloginCertAP and/or UbiloginWSIDP it is recommended to stop these services prior stopping the Ubiloginserver service whenever stated in the step list. UbiloginCertAP and UbiloginWSIDP services can be started after starting the Ubiloginserver service. |
SSO Cluster
The diagram below describes an SSO cluster configuration to be updated.
High availability is achieved by using two SSO instances so that there is one active SSO node, and another, passive, as high availability option if another SSO node is not available. A reverse proxy is used to switch the traffic in case of failures. In case of high-performance setup, the traffic load can be distributed between both SSO nodes by the reverse proxy.
Note that LDAP content is replicated between the SSO instances, but both SSO nodes use their own LDAP (LDAPs can be installed also on their own nodes).
A reverse proxy is configured to use primarily SSO 1 node, and SSO 2 node only when SSO 1 node is not available. During the update operation, the reverse proxy is used to switch traffic away from an SSO node that is being updated while the other SSO node is still operational.
 |
|---|

Clustered SSO Update
Update Procedure Overview
...
- Find out which SSO node is the schema master
- Use the Active Directory Schema snap-in to connect an AD LDS instance
- Identify the schema master
- Configure the reverse proxy server to route the production traffic only to the SSO 2 node
- Setup both SSO nodes for the activity test
- Optional: Test through the reverse proxy server which SSO node is active
- Disable traffic from the reverse proxy server to the SSO 1 node
- Test through the reverse proxy server which SSO node is active
- Disable the replication
- Stop the Ubiloginserver process from the SSO 1 node
- Disable outbound and inbound replication from the SSO 2 node
- Disable outbound and inbound replication from the SSO 1 node
- Configure the metadata clean up for the retired AD LDS instances in the SSO 1 node
- Clean up the metadata from the SSO 1 node using the dsmgmt tool
- Remove the SSO 2 node server object from the SSO 1 node using the ADSI Edit tool
- Update the SSO 1 node
- Use document: Upgrade on Windows - SSO
- Test the functionality of the updated SSO 1 node
- Configure Proxy to route production traffic only to SSO 1 Server
- Route the traffic towards the SSO 1 node
- Optional: Export session information from the SSO 2 node's directory and import to SSO 1 node's directory
- Setup SSO 1 node for the activity test
- Test through the reverse proxy server which SSO node is active
- Remove the services and the AD LDS from the SSO 2 node
- For the version to be removed, check Check Java 8 environment variables
- Stop SSO and Accounting Service Windows services
- Remove SSO and Accounting Service Windows service configurations
- Remove the AD LDS from the SSO 2 node
- Enable the replication in the SSO 1 node
- Update the SSO 2 node
- Install Java 11 to the SSO 2 node
- Execute the steps in the document AD LDS clustering setup (node 2) - SSO
- Install the new SSO version to the SSO 2 node
- Update Tomcat configuration by reinstalling it to the SSO 2 node
- See also Check Single node installation finalization
- Test the functionality of the updated SSO 2 node
- Enable traffic from the Reverse Proxy to route production traffic to SSO 2 node in addition to the SSO 1 node
...
| Code Block | ||||
|---|---|---|---|---|
| ||||
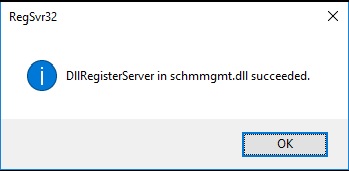
regsvr32 schmmgmt.dll |
|
| Click the OK button |
| Code Block | ||||
|---|---|---|---|---|
| ||||
mmc |
|
|---|
| File - Add/Remove Snap-in... |

|
|---|
| Available snap-ins - Active Directory Schema - Add - OK |

|
|---|
| Active Directory Schema - Change Active Directory Domain Controller (Do not mind the possible connection error). |

|
|---|
This Domain Controller or AD LDS instance - <SSO_Node _Name>:<LDAP Port> Highlight the SSO Server name - OK |

|
|---|
| If you get this dialog - click the OK button |

b. Identify the schema master
|
|---|
| Active Directory Schema - Operations Master |

|
|---|
| Verify the schema master and click the close button. |

Step 2. Configure the Reverse Proxy to route the production traffic only to the SSO2 node
...
| Code Block | ||||
|---|---|---|---|---|
| ||||
cd /d "C:\Program Files\Ubisecure\ubilogin-sso\ubilogin\webapps\ROOT\ C:\Program Files\Ubisecure\ubilogin-sso\ubilogin\webapps\ROOT\notepad index.html |
|
|---|
| Type: Node<SSO_node_number> |

Update the ubilogin server.
...
b. Optional: Test which SSO node is active through the reverse proxy server (NOTE, in high-performance configuration where both SSO nodes are always active you can skip this step.)
|
|---|
Write the uas.url to the browser (found from the win32.config file). Check which node responses. |

| Note |
|---|
NOTE, the certification error in the browser window above is due to the self-assigned certificate used in the test environment. |
...
d. Test which SSO node is active through the reverse proxy server
|
|---|
Write the uas.url to the browser (found from the win32.config file). Verify that the correct node responses. |

Step 3. Disable the Replication
...
Connect to the ADSI Edit tool.
|
|---|
Start - Windows Administrative Tools - ADSI Edit Rick click ADSI Edit - Connect to... |

Define the connection settings
|
|---|
Select a well known Naming Context - Configuration Select or type a domain or server - localhost:389 |

Remove the NTDS settings object under the SSO 2 node if it exists.
|
|---|
ADSI Edit - <SSO_2_node> - NTDS Settings - Delete Click the Yes button. |

Remove the SSO 2 node object.
|
|---|
ADSI Edit - <SSO_2_node> - Delete Click the Yes Button. File - Exit |

Step 5. Update the SSO1 node
...
| Code Block | ||||
|---|---|---|---|---|
| ||||
cd /d "C:\Program Files\Ubisecure\ubilogin-sso\ubilogin\webapps\ROOT\ C:\Program Files\Ubisecure\ubilogin-sso\ubilogin\webapps\ROOT\notepad index.html |
|
|---|
| Type: Node<SSO_node_number> |
Update the ubilogin server.
...
d. Test which SSO node is active through the reverse proxy server
|
|---|
Write the uas.url to the browser (found from the win32.config file). Check which node responses. |
Step 7. Remove the services and AD LDS from the SSO 2 node
...
d. Remove the AD LDS from the SSO 2 node
|
|---|
| Start - Control Panel - Programs - Uninstall a program - AD LDS Instance UbiloginDirectory - Uninstall |

|
|---|
| Click the Yes button. |

|
|---|
Click the Skip button if you get this message (the replication is not on at this point in the SSO 2 node). |

|
|---|
| Click the OK button. |

Step 8. Enable replication in the SSO 1 node
...
c. Install the new SSO version to the SSO 2 node.
Copy the Ubisecure SSO configurations from the SSO 1 node to the SSO 2 node.
- In practice, this means that the SSO installation folder (C:\Program Files\ubisecure\ubilogin-sso) is copied as such
- Check the win32.config file's parameter ldap.url to see if the LDAP has been installed in the localhost. If the directory (LDAP) connection is something else than "localhost" (LDAPs are installed on their own separate nodes) then modify the C:\Program Files\ubisecure\ubilogin-sso\ubilogin\config\settings.cmd file's LDAP URL parameters on the SSO node 2.
- set LDAP_URL=ldap://<IP address of the LDAP server 2>:389
- set LDAP_URL_HOSTNAME=<IP address of the LDAP server 2>
- set LDAP_URL_PORT=389
d. Update Tomcat configuration by reinstalling it (DON’T RUN setup.cmd on SSO node 2):
| Code Block | ||||
|---|---|---|---|---|
| ||||
C:\Program Files\Ubisecure\ubilogin-sso\ubilogin>config\tomcat\install.cmd Keystore already exist in c:\Program Files\Ubisecure\ubilogin-sso\ubilogin\custom\tomcat\keystore.pfx 5 File(s) copied 776 File(s) copied [SC] ChangeServiceConfig SUCCESS [SC] ChangeServiceConfig2 SUCCESS [SC] ChangeServiceConfig SUCCESS The UbiloginServer service is starting.. The UbiloginServer service was started successfully. Ubilogin Server started at https://www.example.com/ubilogin/ |
e. See also Check Single node installation finalization. For the new Java installation you must need to import SSO certificate to Java trust store.
...