Lab 1.6: Delegated role management using mandates
- Keith Uber
- Former user (Deleted)
- Former user (Deleted)
- Sami Lindgren
The purpose of this module is to show you how to delegate mandates to other users so they can perform selected functions you choose
- CustomerID installed
Overview of this lab
We will use CustomerID administrative interface to configure delegated role management using mandates. In a nutshell, these are the four main steps:

Instructions
Part 1: Create Users
In order to create users:
Log in as Scott Long (SmartPlan Admin). This user was created during Lab 1.1
Enable adduser workflow. In order to do that, edit the following on eidm2.properties file:
eidm2.propertiescreateuser.workflows = adduser registration.1 = adduser registration.1.enabled = false registration.1.tupas.disabled = true registration.1.approval = false registration.1.methods = [ { "name" : "password.2", "mandatory" : "true", "visible" : "false", "default" : "true" } ] registration.1.userinfo.fields = firstname, surname, email, password registration.1.organizations = { "path" : "Users"} registration.1.summary.fields = firstname, surname, emailFurther explanation of configuration parameters is on page Create user workflow configuration - CustomerID
- Restart the Wildfly service.
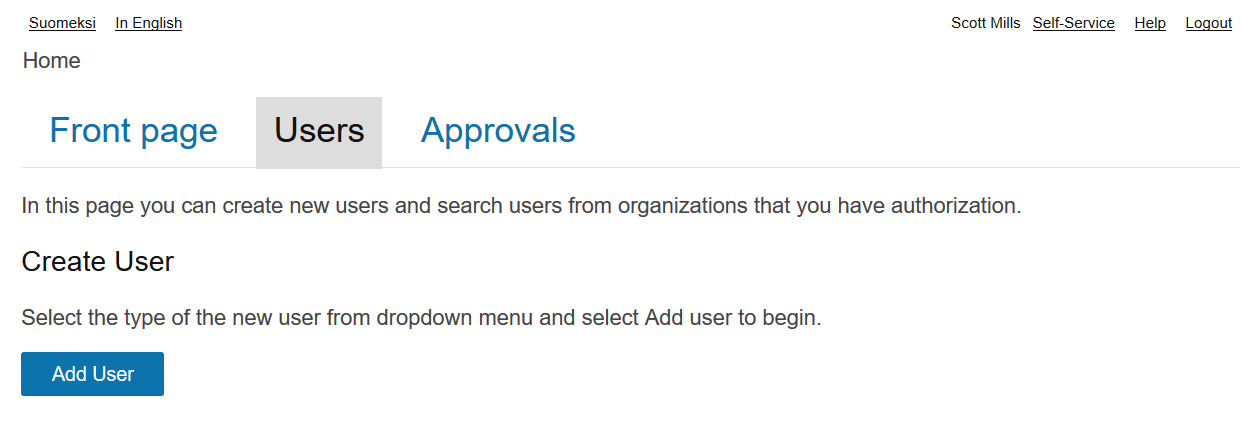
- Log in as Scott Long and open "Users" tab
- Now the button "Add User" should be visible. Click on it:
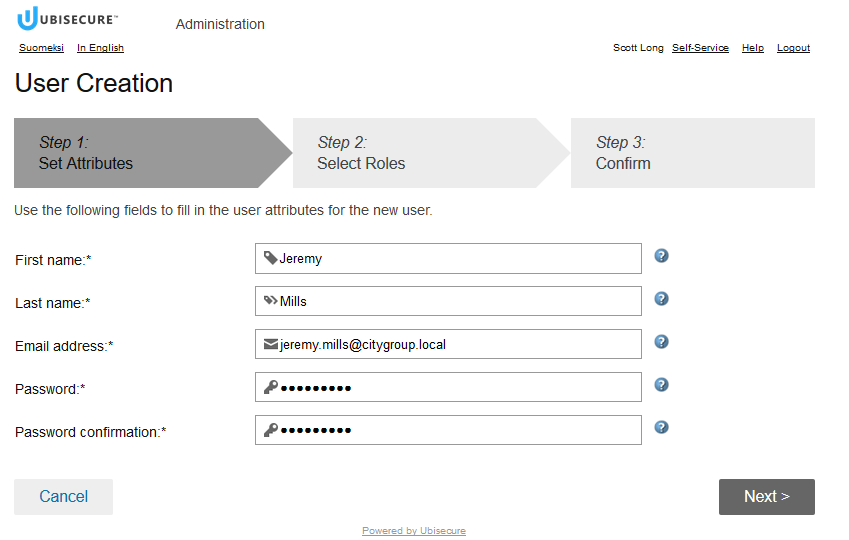
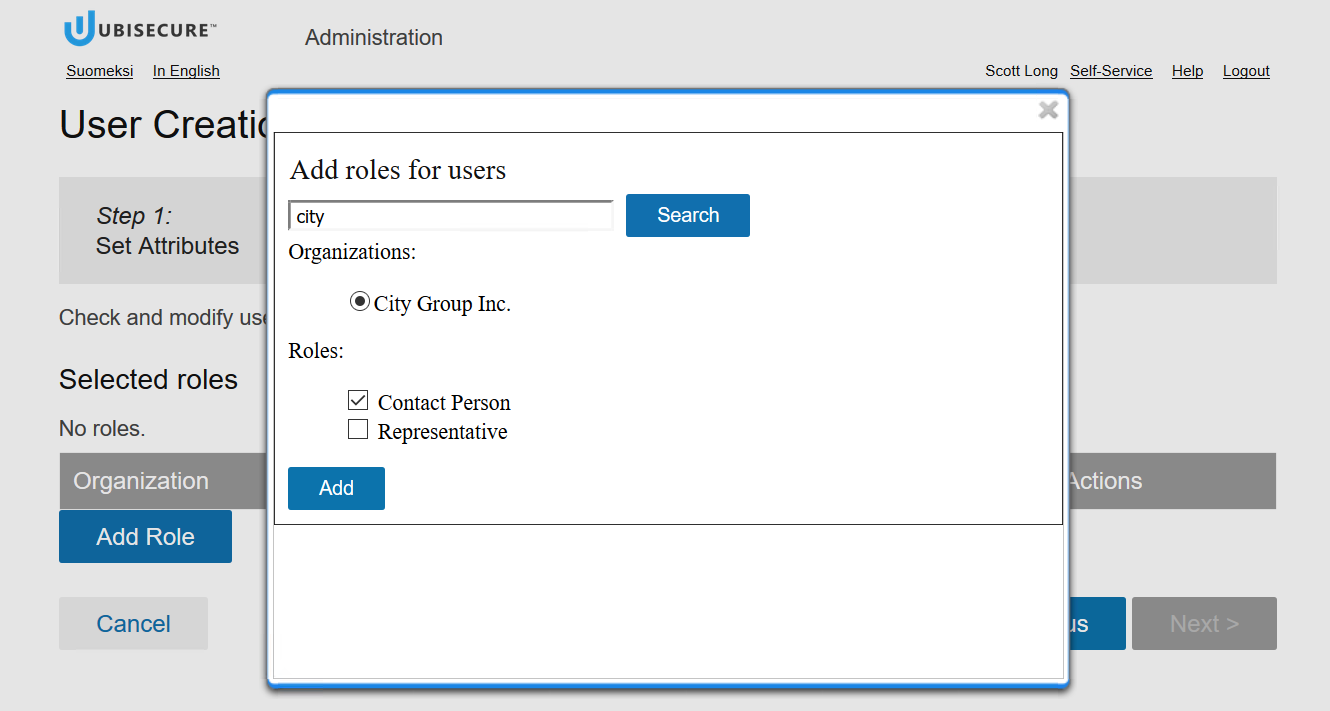
- Create Jeremy Mills user and give him contact person role for City Group Inc as shown on the following images. The password must contain both numbers and letters.
- In order to continue, on the next step you must select a role. Type the company name in the Search box.
- Now log in as Jeremy Mills to verify the user has been created.
Part 2: Create Service
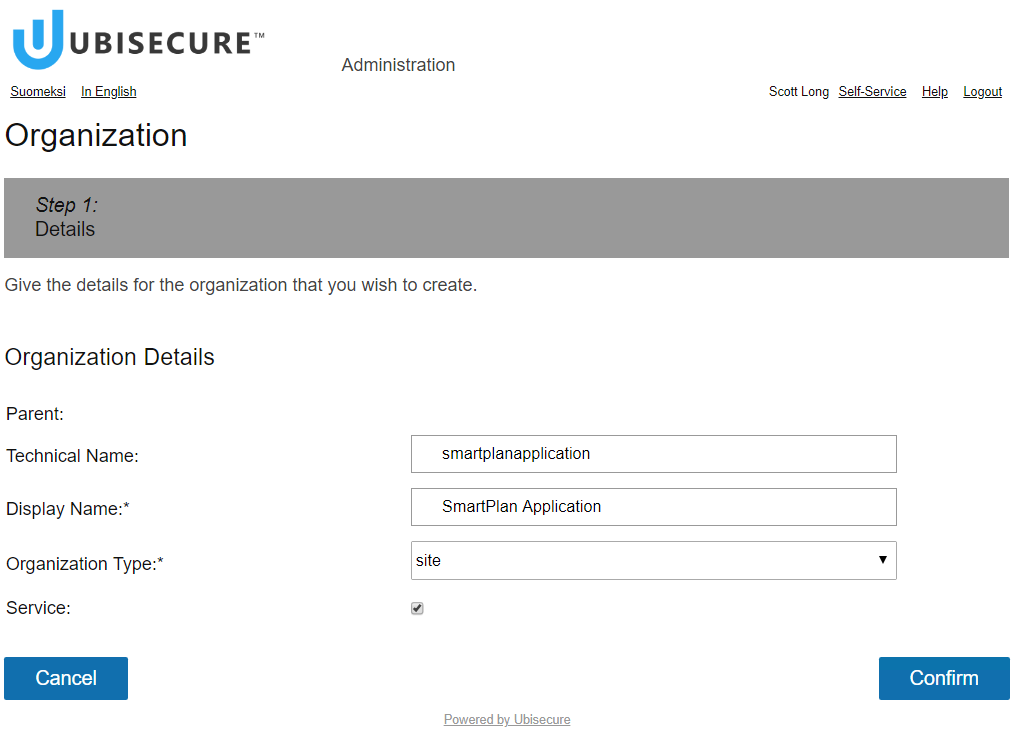
The goal of this section is creating a new organisation using the following values:
Technical Name | smartplanapplication |
| Display Name | SmartPlan Application |
| Organization Type | site |
| Service | true |
Do not use spaces in technical name.
- Log in to CustomerID as an administrator Scott Long. From the "front page" you will see the button to create a new organisation.
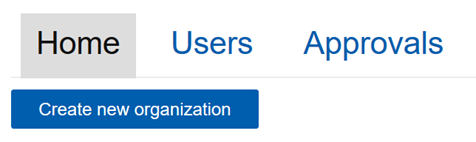
- Once you select "Create new organisation," the next screen will be:
Part 3: Define Mandate
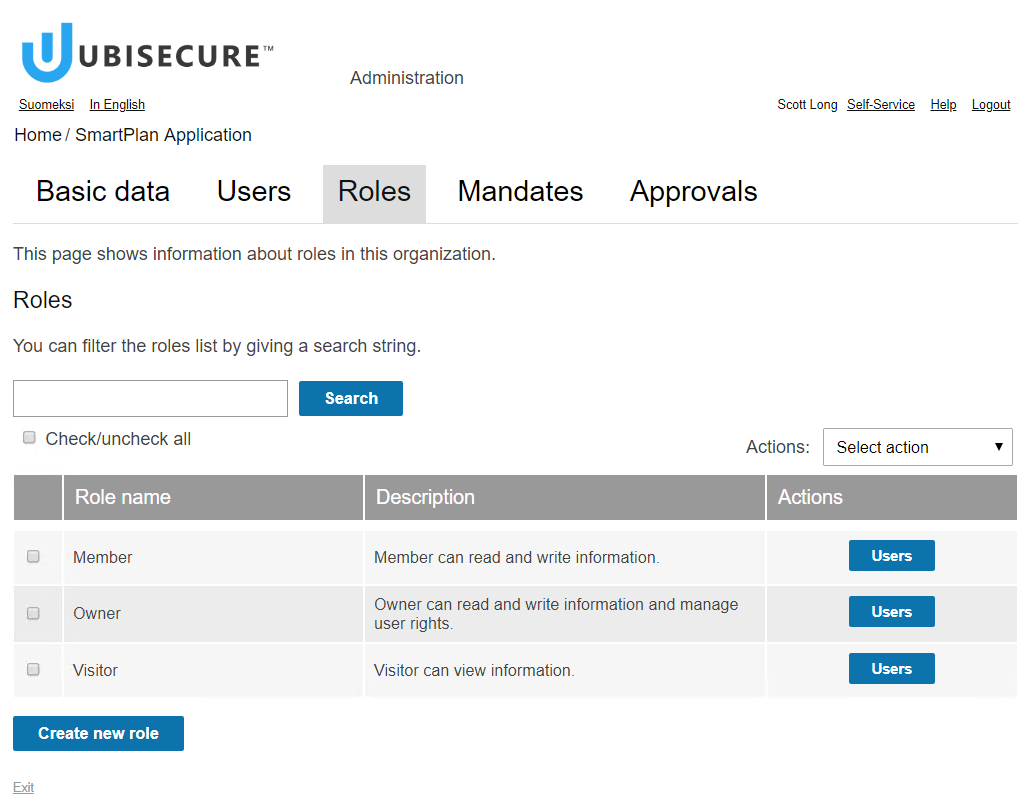
Ubisecure Identity Server uses roles and mandates. This is how roles look in the My SmartPlan administration interface for SmartPlan Application service. Observe "Description" column:
Step 1: Mandates basic configuration
Now it's time to understand how mandates work in real:
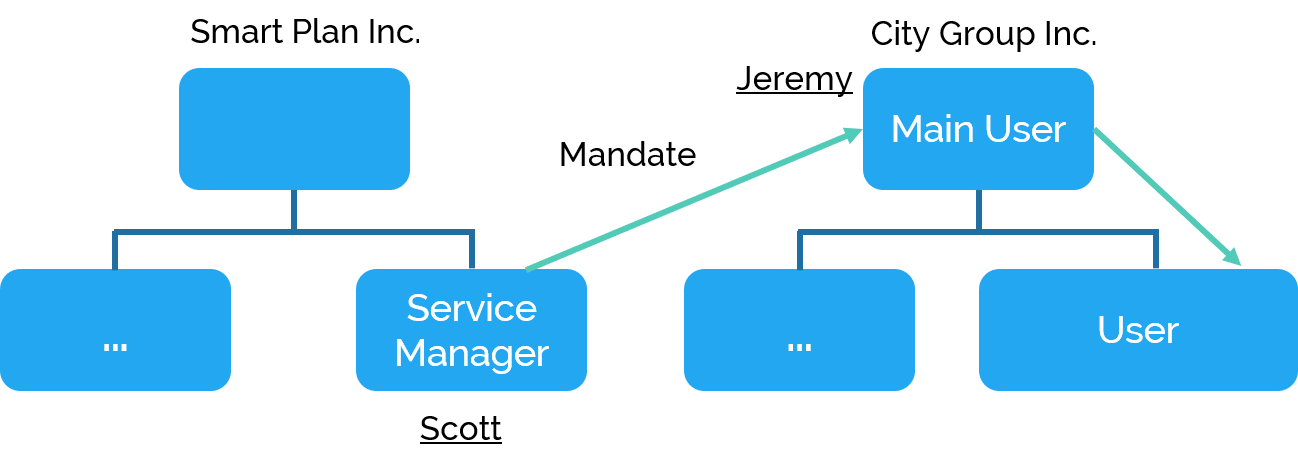
What is the difference between a role and a mandate?
Role
Examples:
| Mandate
Examples:
|
Mandates can be configured to require approval by an organisation administrator. We will disable this for today.
Allowed roles must be defined in the custom\eidm2.properties configuration file.
general.admin.organization.users.includerolemembers = true

mandate.roles.allowed = owner,member,visitor

mandate.receiver.approval = false
Restart the Wildfly service.
Permissions control who can create, assign, read and delete mandates.
Before you create mandates, do the following instructions
In our environment, we have added a custom role called mainuser (display name: Contact Person). Rights must be given to the mainuser role for accessing mandates.
Create a file C:\Program Files\Ubisecure\customerid\application\custom\permissions.properties.Add the following lines to the permissions.properties:
# *************************************************************************************************
# **********  Mandate Permissions                                                        **********
# *************************************************************************************************

# Mandate read permission
# - This permission defines those users who are allowed to read mandate information concerning
#   received mandates in the admin service.
mandate.read = inh:OrganizationMainUser, inh:mainuser

# Mandate approval permission
# - This permission defines those users who are allowed to approve received mandates in the admin
#   service.
mandate.approve = inh:OrganizationMainUser, inh:mainuser

# Mandate removal permission
# - This permission defines those users who are allowed to remove either mandate actuators or the
#   received mandate in the admin service.
mandate.remove = inh:OrganizationMainUser, inh:mainuser

# Mandate creation permission
# - This permission defines those users who are allowed to create new mandates in the admin
#   service.
mandate.create = inh:OrganizationMainUser, inh:mainuser

# User mandate information read permission
# - This permission defines those users who are allowed to read the mandate information concerning
#   organization users in the admin service.
user.read.mandates = inh:OrganizationMainUser, inh:mainuser

# User mandate information removal permission
# - This permission defines those users who are allowed to remove mandates from organization users
#   in the admin service.
user.mandates.remove = inh:OrganizationMainUser, inh:mainuser

# Admin access permission
# - This permission defines those users who are allowed to access the admin service.
access.admin = any:OrganizationMainUser, abs:eIDM/eIDMMainUser, any:mainuser

# Admin access permission for organizations tab (main tab / frontpage tab)
# - This permission defines the users who are allowed to access the organization list tab in the
#   admin service interface front page.
access.admin.organizations = any:OrganizationMainUser, abs:eIDM/eIDMMainUser, any:mainuser

# Admin access permission for users tab
# - This permission defines the users who are allowed to access the user search / list tab in the
#   admin service interface front page.
access.admin.users = any:OrganizationMainUser, abs:eIDM/eIDMMainUser, any:mainuser

# Admin access permission for approvals tab
# - This permission defines the users who are allowed to access the approval tab in the admin
#   service interface front page.
access.admin.approvals = any:OrganizationMainUser, abs:eIDM/eIDMMainUser, any:mainuser

# Organization read permission
# - This permission defines those users who are allowed to read organization information in the
#   admin service.
# - You may also define field specific read permissions by adding the field name after
#   organization.read.
# - Field specific permissions override the general permission.
organization.read = inh:OrganizationMainUser, inh:Superuser, inh:owner, inh:mainuser
Restart the Wildfly service for the changes to take effect.
Obs: Further explanation of configuration parameters is on page Internal access control (permissions) - CustomerID
Step 2: Create organisation mandate
Create a mandate including the Online Service Member role.
- In the Administration interface, open "SmartPlan Application" service.
- Click on "Mandates" tab.
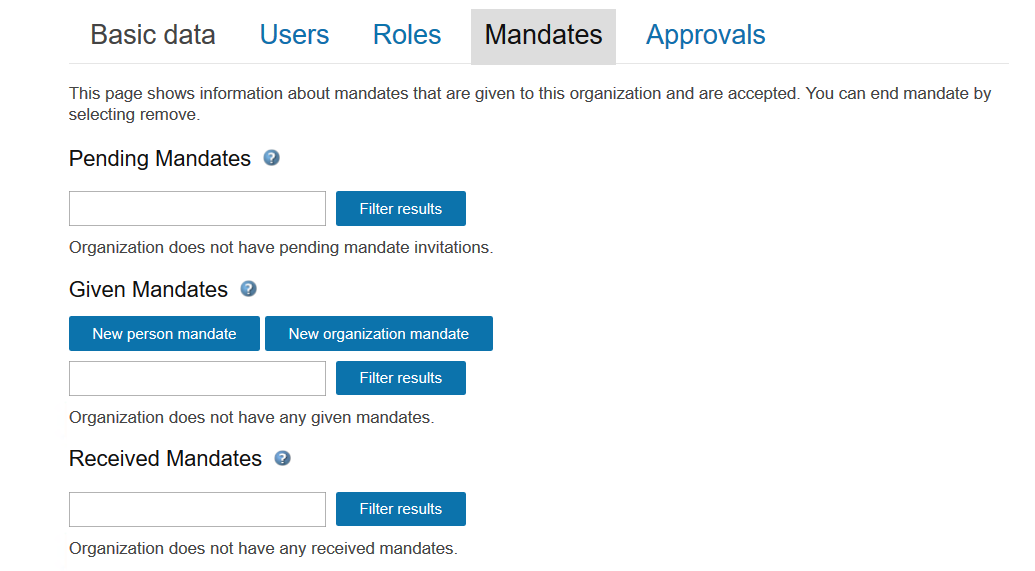
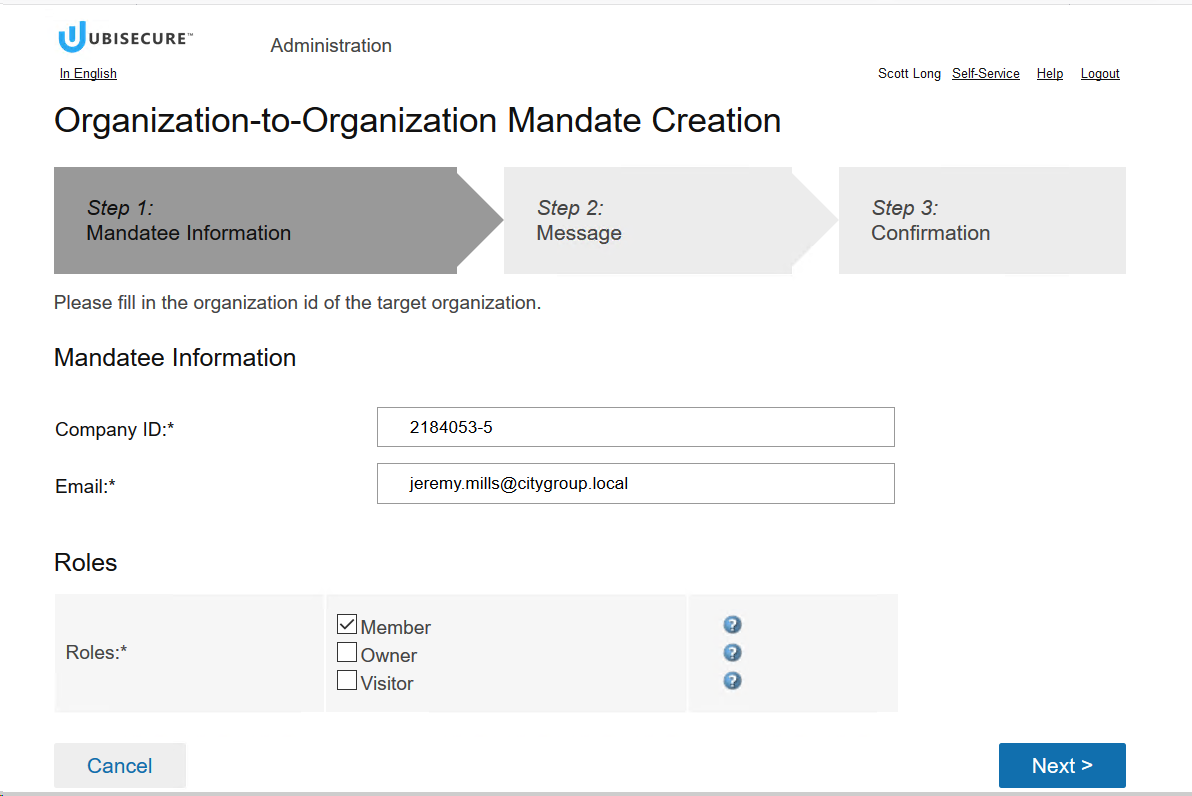
- Select "New organization mandate"
- Set City Group Inc. as receiver of the mandate. Company ID: 2184053-5
- Choose role "Member" to be included in the mandate
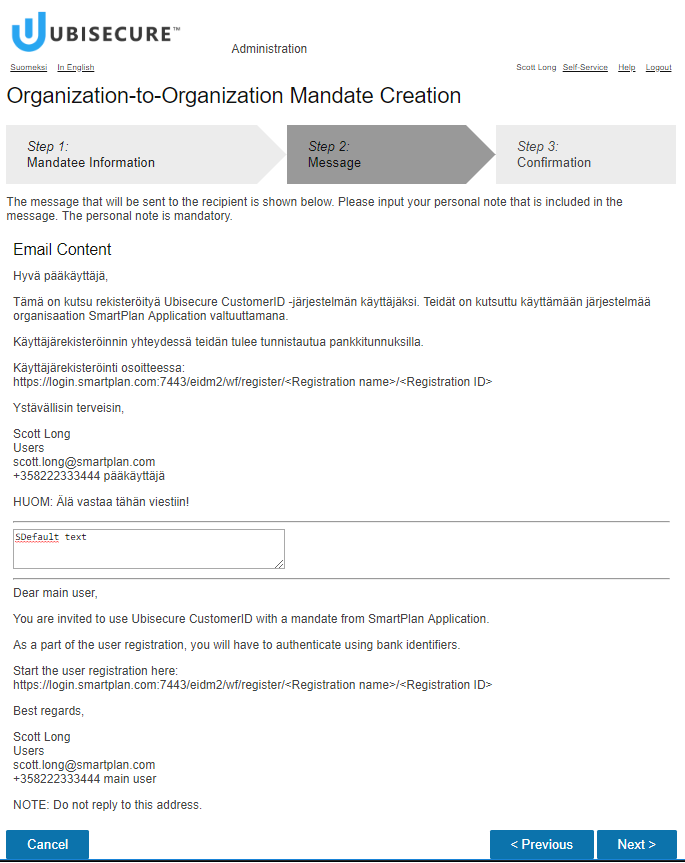
- In the second step you will be able to customise the message
- Then a confirmation
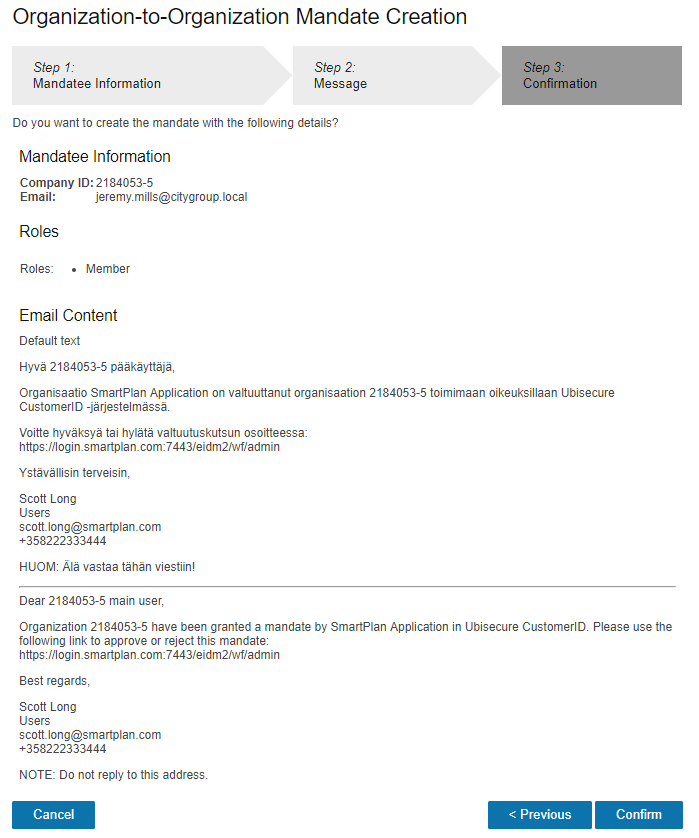
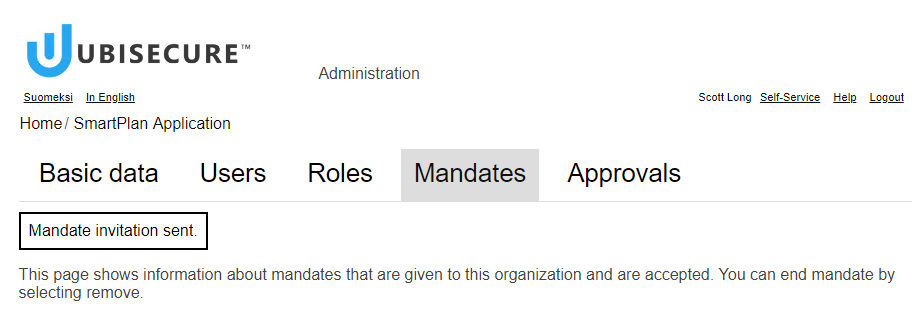
- Finally you will see "Mandate invitation sent" at the top.
Step 3: Delegation
- Log in to My SmartPlan as Jeremy Mills, make sure you are in the administrative interface
- In the Customer Organisations choose the City Group Inc.
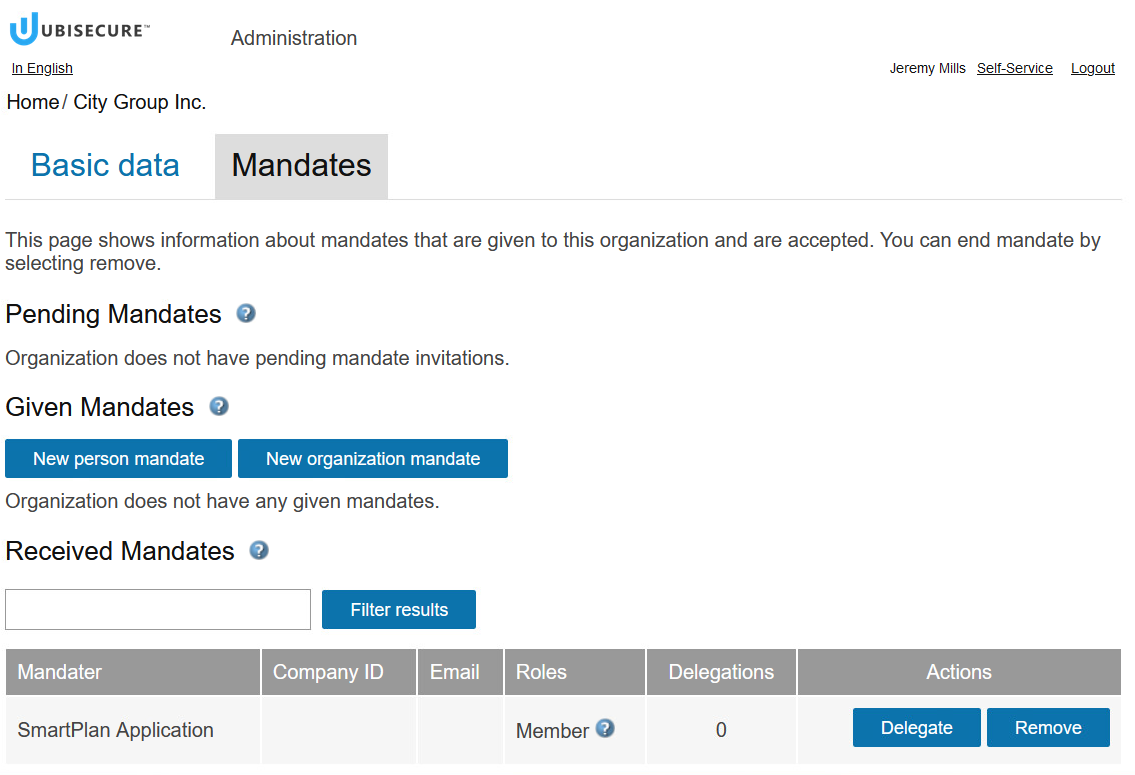
- Open City Group Mandates tab.
- Even Jeremy must receive the role through delegation in order to use it. Click Delegate.
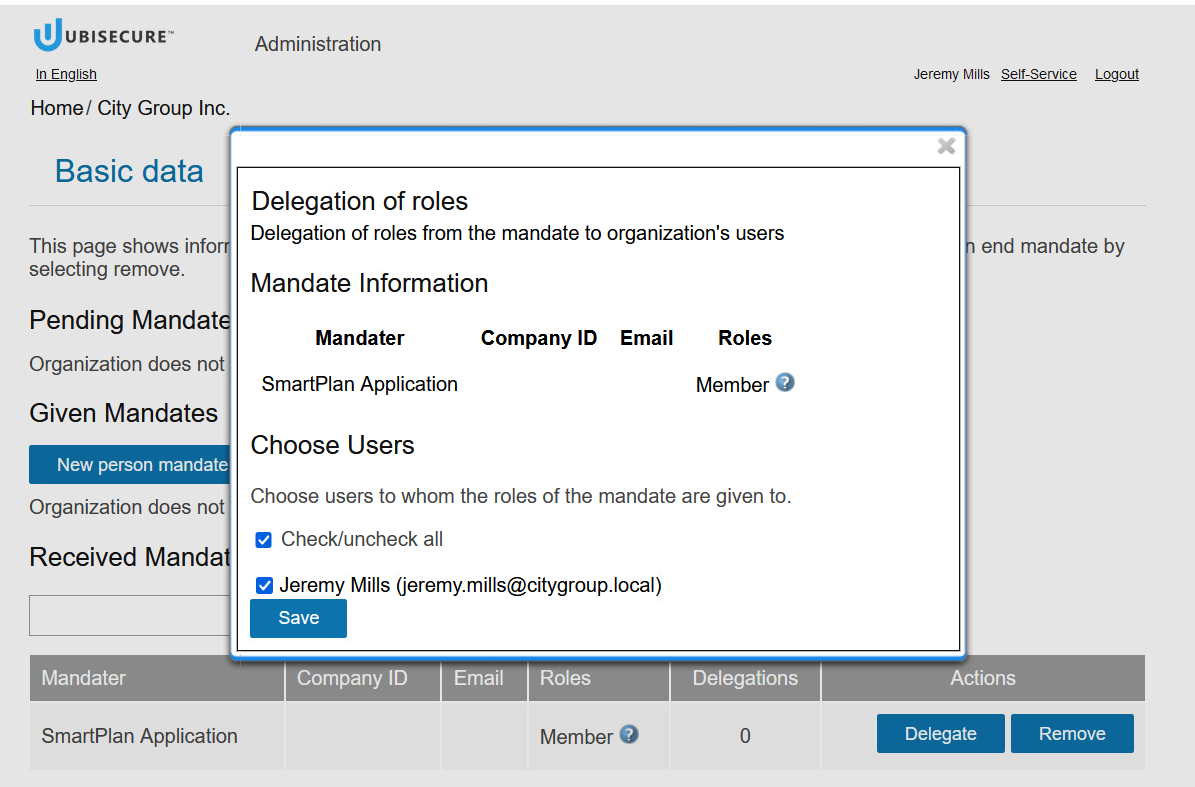
- Choose the user(s) who will receive the mandate. If the mandate contains more than one role, all roles contained in the mandate are given.
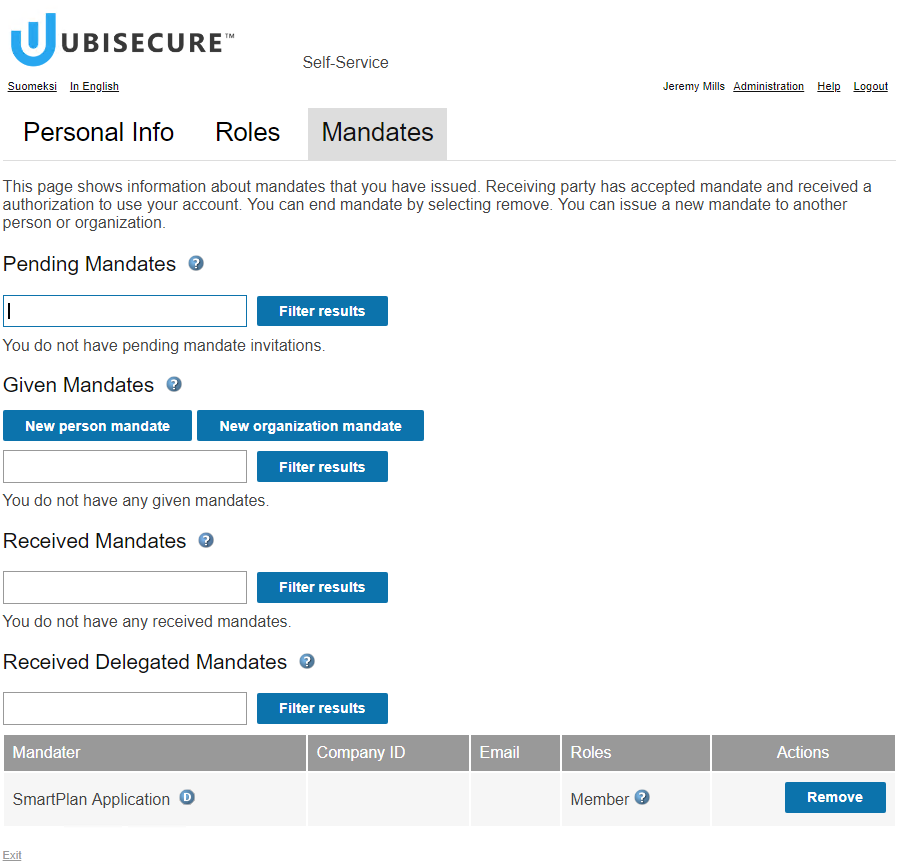
- Jeremy can also see his personally received mandates in the self service interface. Mandates can be searched and filtered easily.
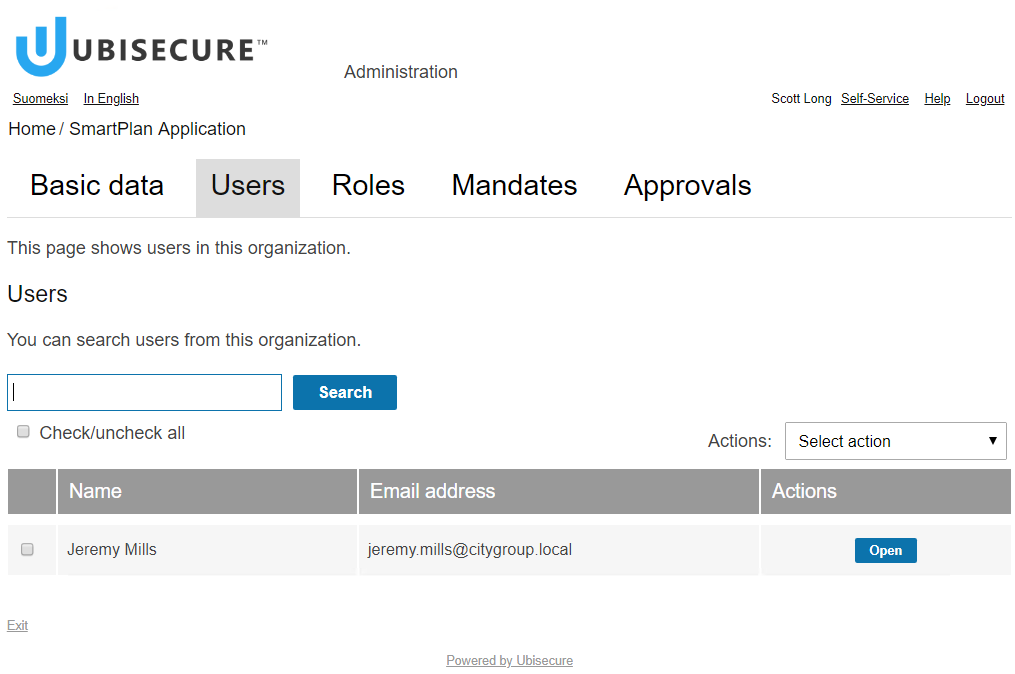
- As a service owner, also Scott can see who has been given access to the SmartPlan Application service. Log in as Scott Long, choose the Administration view, choose SmartPlan Application Users tab, and see that now Jeremy Mills is listed as a user for the service.