Lab 1.5: Configuring CustomerID data model
- Keith Uber
- Former user (Deleted)
- Sami Lindgren
- Former user (Deleted)
The purpose of this module is to:
- Get you started with configuring CustomerID
- Give you an overview of organisations, roles
- CustomerID installed
Overview

The first steps when setting up delegated role and user management:
- Define what types of services and organisations this system will manage
- Define what roles these services and organisations need to operate
- Migrate customer organisations from e.g. existing CRM system
- Create organisation users using role invitation by email. The user confirms their own email address by clicking the link and sets their own password
Configure organisation types
- You can use organisation types to model:
- A customer organisation with various roles
- An online service (SmartPlan Application) with various roles
- Outcome: Organisation type to be used when creating companies
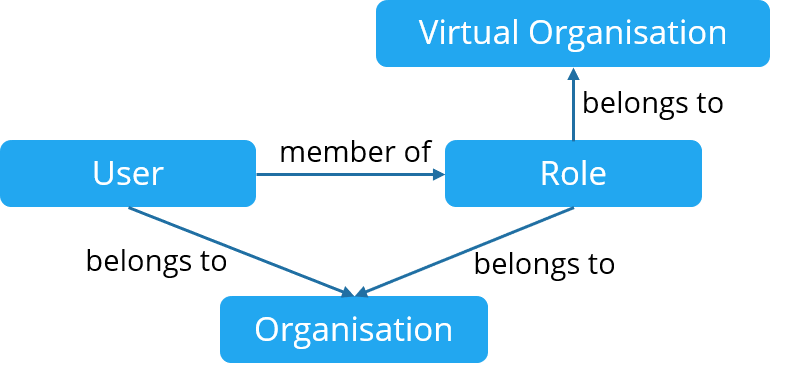
There are two types of organisations: physical and virtual.
- Organisations are used for storing user accounts
- Virtual organisations are used to model organisations and services.
- In virtual organisations, the users are not physically located in any of the projects but they are part of them through roles.
The system will read the correct values from eidm2_generated.properties file. During system setup, the file eidm2_generated.properties is read first and the eidm2.properties is read and overwrites any settings in eidm2_generated.properties.
Wondering what "eidm" stands for?
eidm is obsolete name for CustomerID. It meant "extranet Identity Management"
Part 1: Configuring Organisation Types
Step 1: Configuring Customer Organisations
company to hold customer organisation userscompany organisation has two roles, Contact Person and Representative, represented by the technical names mainuser and user respectively.Edit C:\Program Files\Ubisecure\customerid\application\custom\eidm2.properties
eidm2.propertiesorganization.type.name.1 = company organization.type.company.1 = mainuser organization.type.company.2 = user
Copy C:\Program Files\Ubisecure\customerid\tools\examples\custom\messages_en.properties to C:\Program Files\Ubisecure\customerid\application\custom\ and then add the following lines to the file.
messages_en.propertiesorg.label.company = Customer Organization org.label.company.plural = Customer Organizations
Copy C:\Program Files\Ubisecure\customerid\tools\examples\custom\roles.properties to C:\Program Files\Ubisecure\customerid\application\custom\ and then add the following lines to the file.
roles.propertiesen.friendlyName.mainuser = Contact Person en.description.mainuser = The main user of the company. en.friendlyName.user = Representative en.description.user = Employee of the company.
Step 2: Configuring Service Organisations
Create a new organisation type to hold SmartPlan Application roles
This service has three roles: Owner, Member and Visitor
Edit C:\Program Files\Ubisecure\customerid\application\custom\eidm2.properties
eidm2.propertiesorganization.type.name.2 = site organization.type.site.1 = owner organization.type.site.2 = member organization.type.site.3 = visitor
Edit C:\Program Files\Ubisecure\customerid\application\custom\messages_en.properties
messages_en.propertiesorg.label.site = Service org.label.site.plural = Services
Edit C:\Program Files\Ubisecure\customerid\application\custom\roles.properties to define what each role name is
roles.propertiesen.friendlyName.visitor = Visitor en.description.visitor = Visitor can view public information. en.friendlyName.member = Member en.description.member = Member can read private information. en.friendlyName.owner = Owner en.description.owner = Owner can write information and manage user rights.
Activate all changes by restarting Wildfly:
Restart of Wildfly is required when changes are made to CustomerID system configuration and localization text files
To restart Wildfly, execute this sequence in the command prompt:
net stop Wildfly
net start Wildfly
or via Windows graphical user interface as seen in the picture:

Part 2: Configuring Organisation and user attributes
Step 1: Create Custom Organisation Attributes
Custom organisation attributes are added dynamically to the schema as used. If used, localisation must be given.
Define language text key for the new attribute in C:\Program Files\Ubisecure\customerid\application\custom\messages_en.properties
messages_en.propertiesorganization.crmid = CRM ID registerWizard.organization.crmid = CRM ID
Define the order of displaying custom fields on the organisation info page by modifying: C:\Program Files\Ubisecure\customerid\application\custom\eidm2.properties
eidm2.propertiesui.admin.organizationinfo.fields.order = technicalname, friendlyname, crmid
Restart Wildfly
Log to CustomerID Administration interface https://login.smartplan.com:7443/eidm2/wf/admin as Scott Long. Select an organisation and observe the order of attributes:
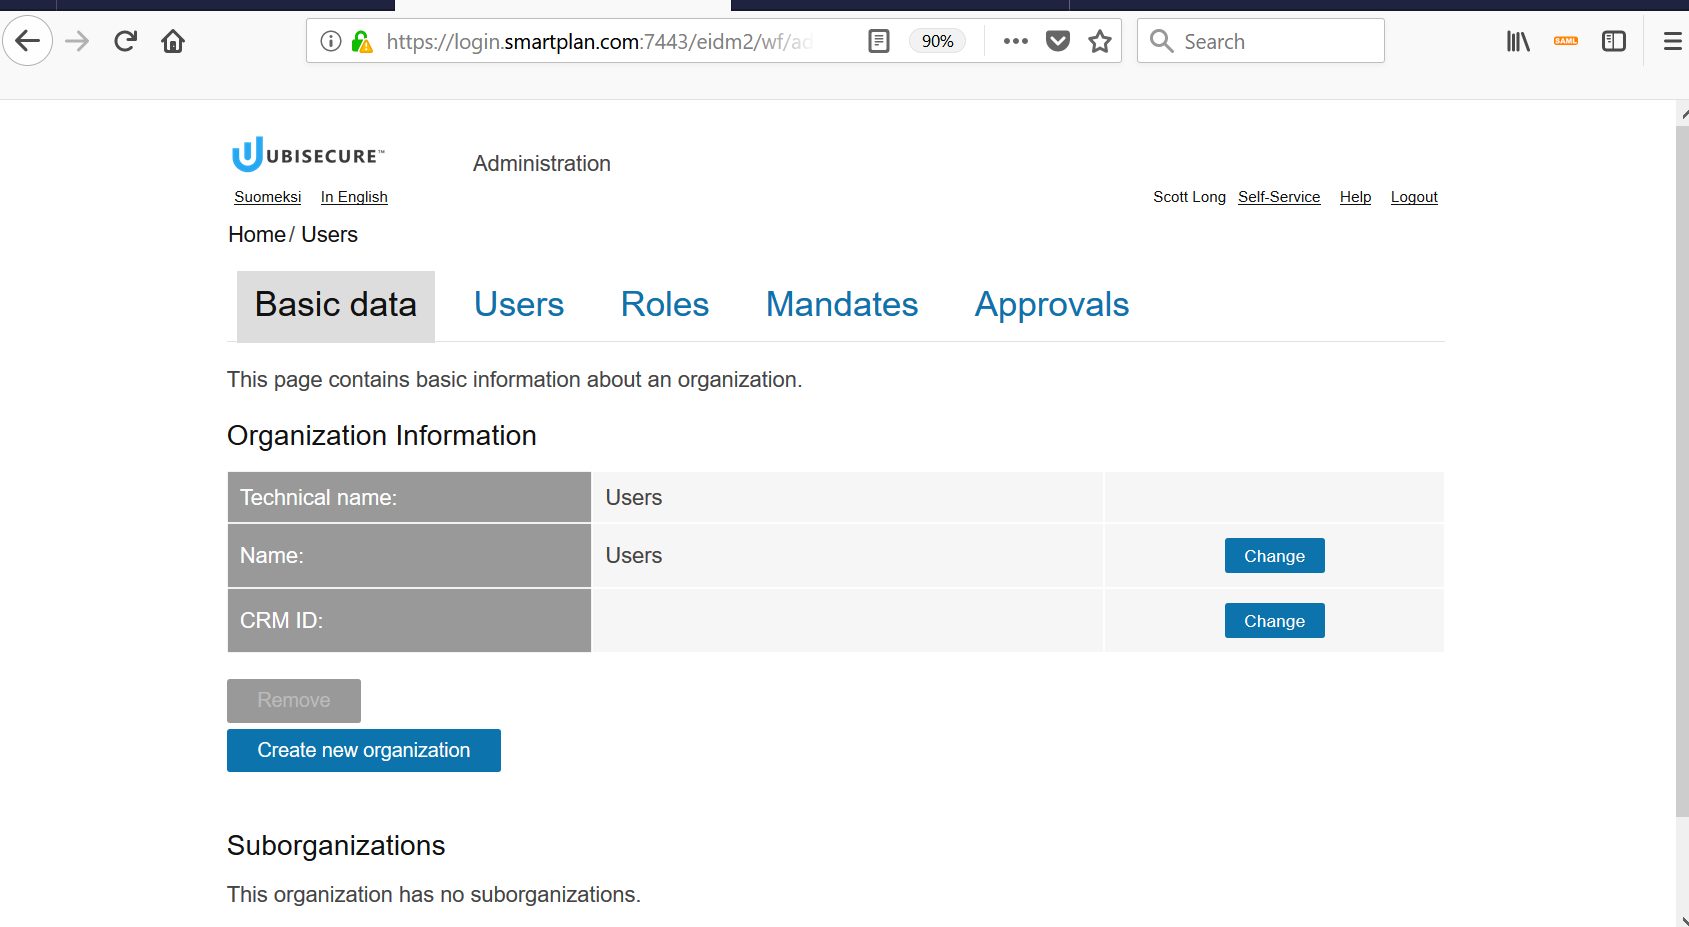
As you can observe, there are only administrative organisations such as "Users." The next step is to create customer organisations (companies) in the system.
Part 3: Migrate customer organisations
Step 1: Customer Data Integration with Import Tool
- City Group
- Electric Green Cabs
The VAT number (such as 2184053-5) of the customer organisation will be used as the unique identifier.
Go to directory C:\Program Files\Ubisecure\customerid\tools\examples\importtool and create a text file crm.import containing the entries shown on the next table
crm.import# City Group entity: organization id: 2184053-5 organizationType: company crmid: 73476543 friendlyName: City Group Inc. # Electric Green Cabs entity: organization id: 4638229-4 organizationType: company crmid: 33241231 friendlyName: Electric Green Cabs Inc.
Open the command prompt. In C:\Program Files\Ubisecure\customerid\tools directory, run the following command:
import.cmd examples\importtool\crm.import
Successful execution will show a message like this:
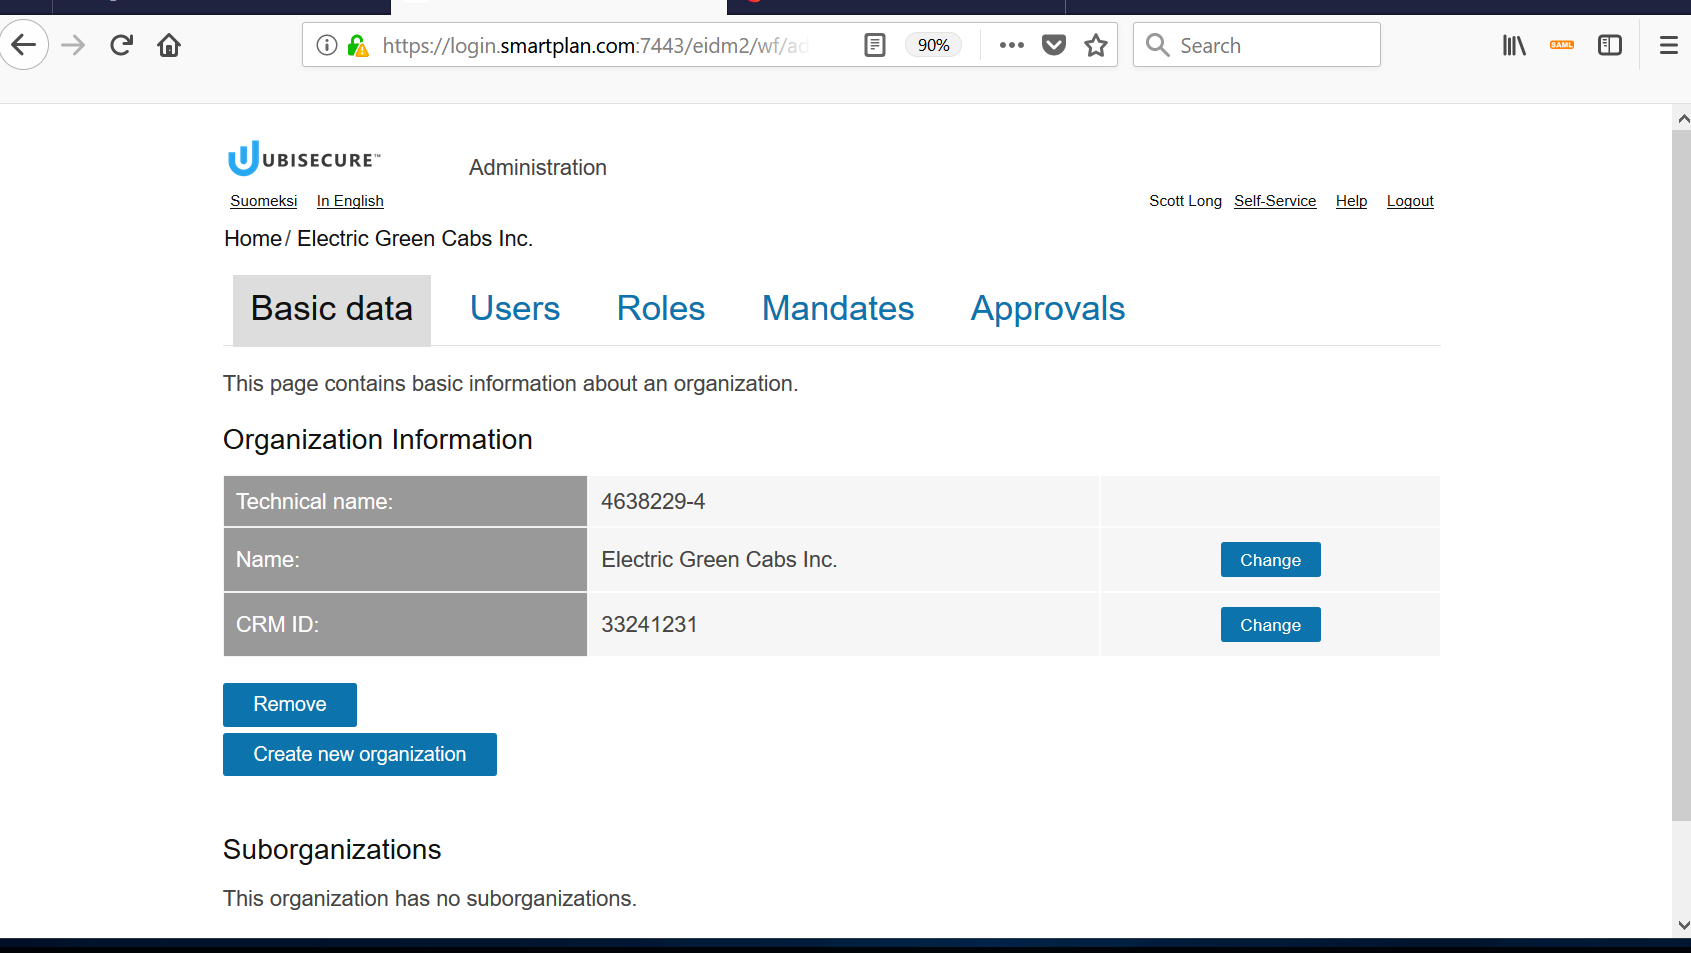
ImportTool 5.0.31Create '2184053-5': OKCreate '4638229-4': OK- Now log in, find the newly created organisation "Electric Green Cabs." Observe its attributes and their order as at the end of Part 2 (Technical name, Name, CRM ID).
Part 4: Create users by email based invitation
- By system or organisation administrator using the Customer ID administration user interface
- Add a user
- Send an email invitation
- By REST interface
- Add a user
- Send an email invitation
- User Self-registration
- Using Import tool
More Information
You can find more information about the CustomerID Data Model in this page: