Lab 2.4: Customisation and Localisation
The purpose of this module is to demonstrate customisation of the user interface and support for localisation.
This lab requires you have access to SSO and CustomerID administrative interfaces.
Overview
- Colours and Logos
- Internationalisation and localisation
- Terms and Conditions
SSO customisation
- In practice, customising Ubisecure SSO is reflected in the login screens of the customer application
- UI customisation is mainly based on the web agent (application)
- Language selections can be made by the user if multiple languages are enabled for the application in question
- Both the visual and internationalisation customisation can be based on the web agent requesting the authentication
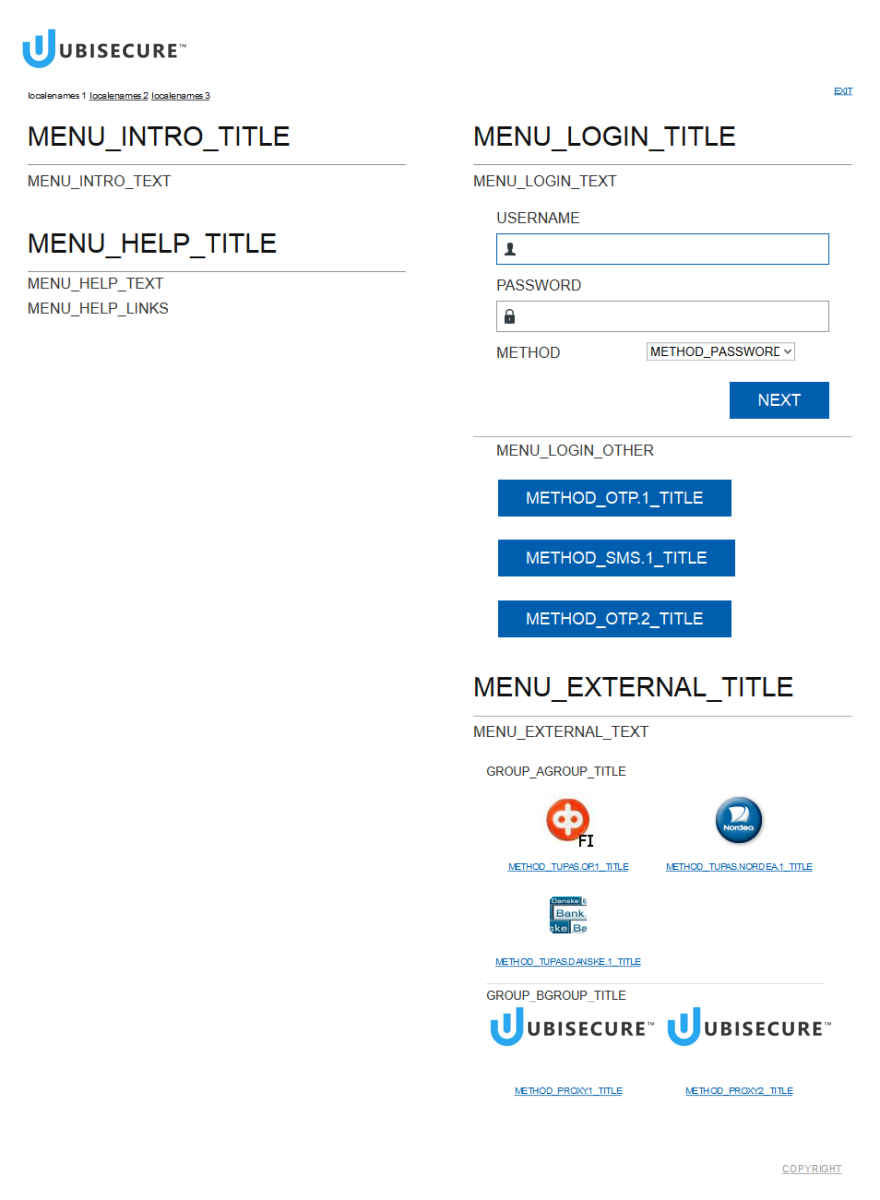
Page layout
The following image shows all the elements that can be customised in a SSO/CustomerID page:
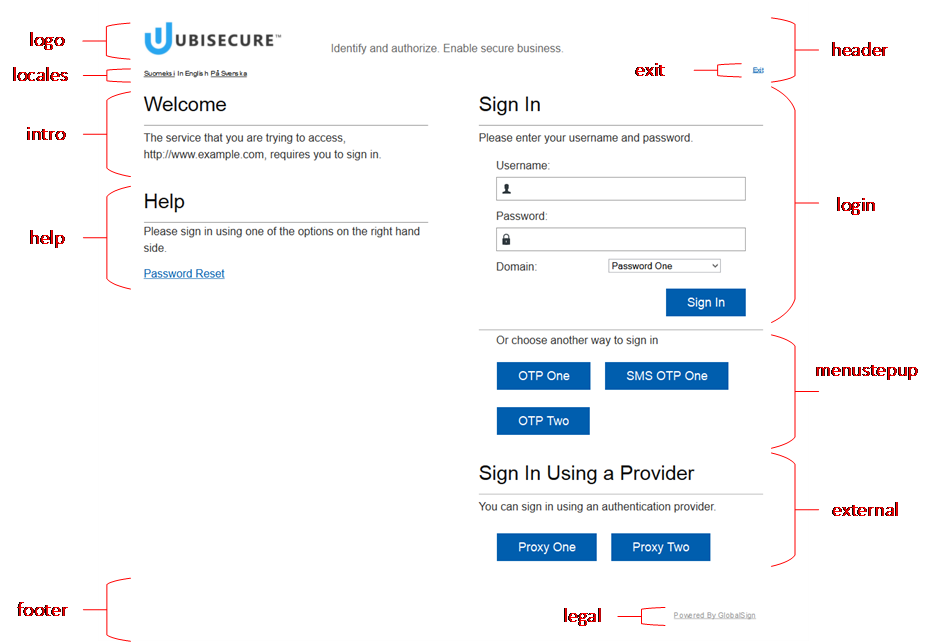
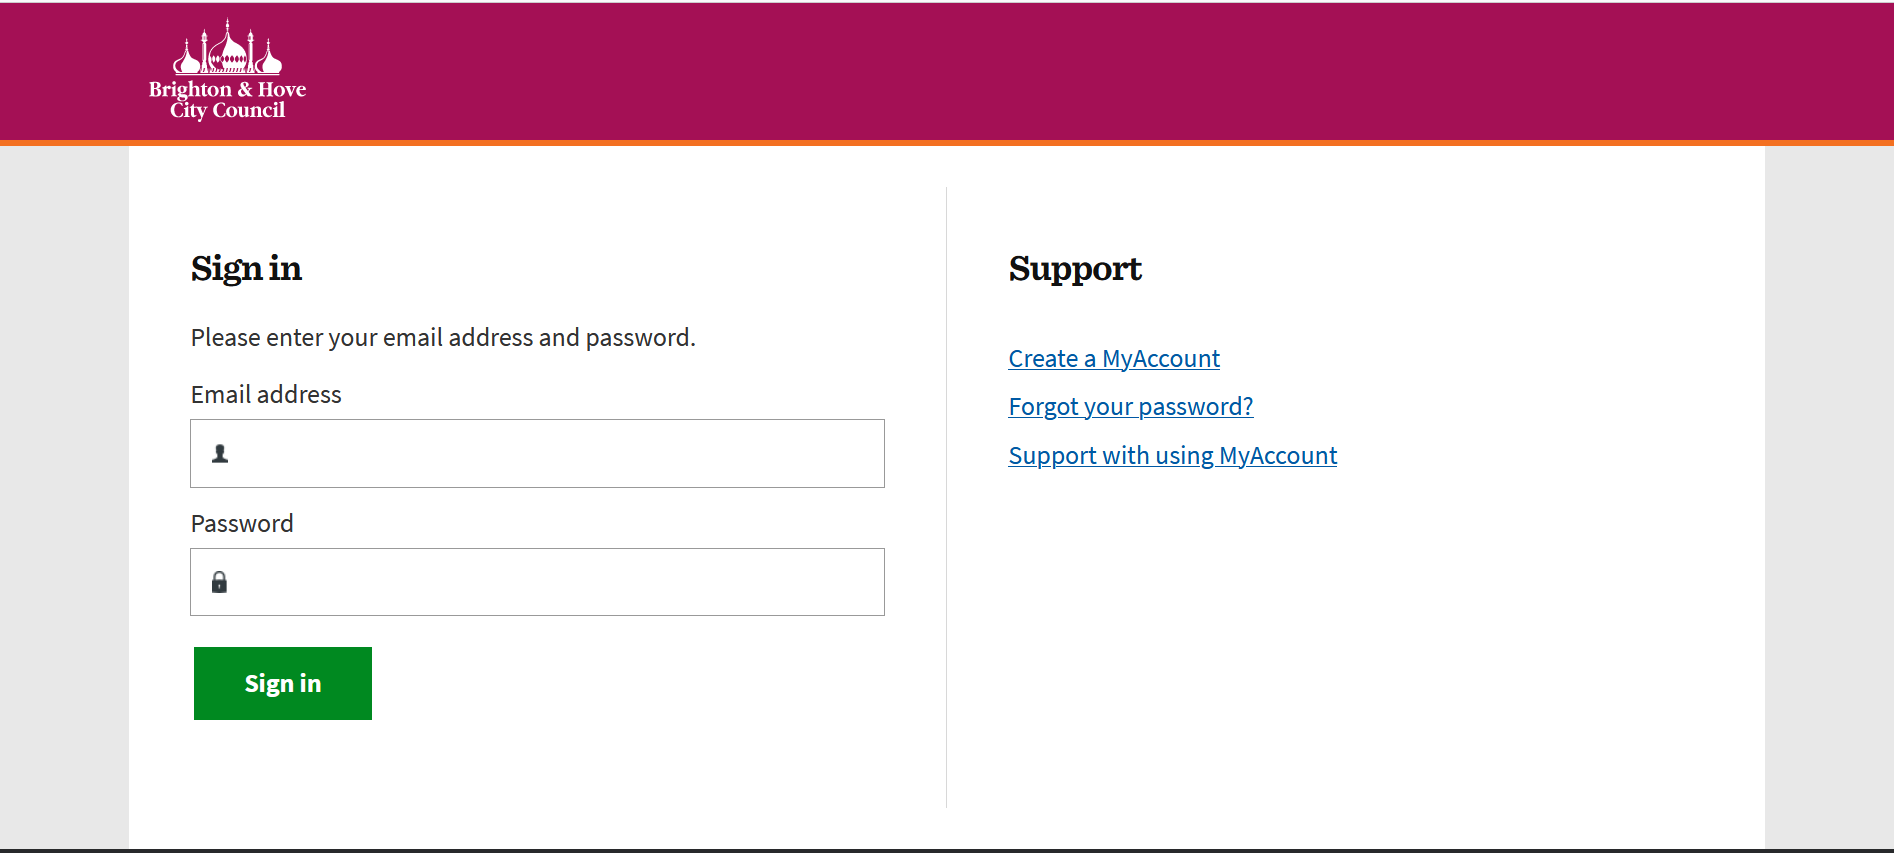
Example login screen
The following image is an example of a real user interface created by a UK customer, Brighton & Hove City Council. Observe and compare it with the previous image.
Homework
For more information about the Template API, see Template API - SSO
Customisation and localisation in practice
Now we'll have several exercises in which you will customise the user interface of the installation on your own computers.
Part 1: Colours and Logos – Login Screens
Step 1: Adding a new template
1. Add new template reference to
C:\Program Files\Ubisecure\ubilogin-sso\ubilogin\custom\template.index
2. Create new UI Template
In C:\Program Files\Ubisecure\ubilogin-sso\ubilogin\custom\templates\ copy the file default.properties to smartplan.properties.
Add the following line to smartplan.properties
3. Copy smartplan.svg to c:\Program Files\Ubisecure\ubilogin-sso\ubilogin\custom\resources\. First you have to create subdirectory \resources
md "c:\Program Files\Ubisecure\ubilogin-sso\ubilogin\custom\resources\"
copy "\\ubidemo.com\Ubidemo\Software\IAM Academy\smartplan.svg" "c:\Program Files\Ubisecure\ubilogin-sso\ubilogin\custom\resources\"
smartplan.svg = resources/smartplan.svg
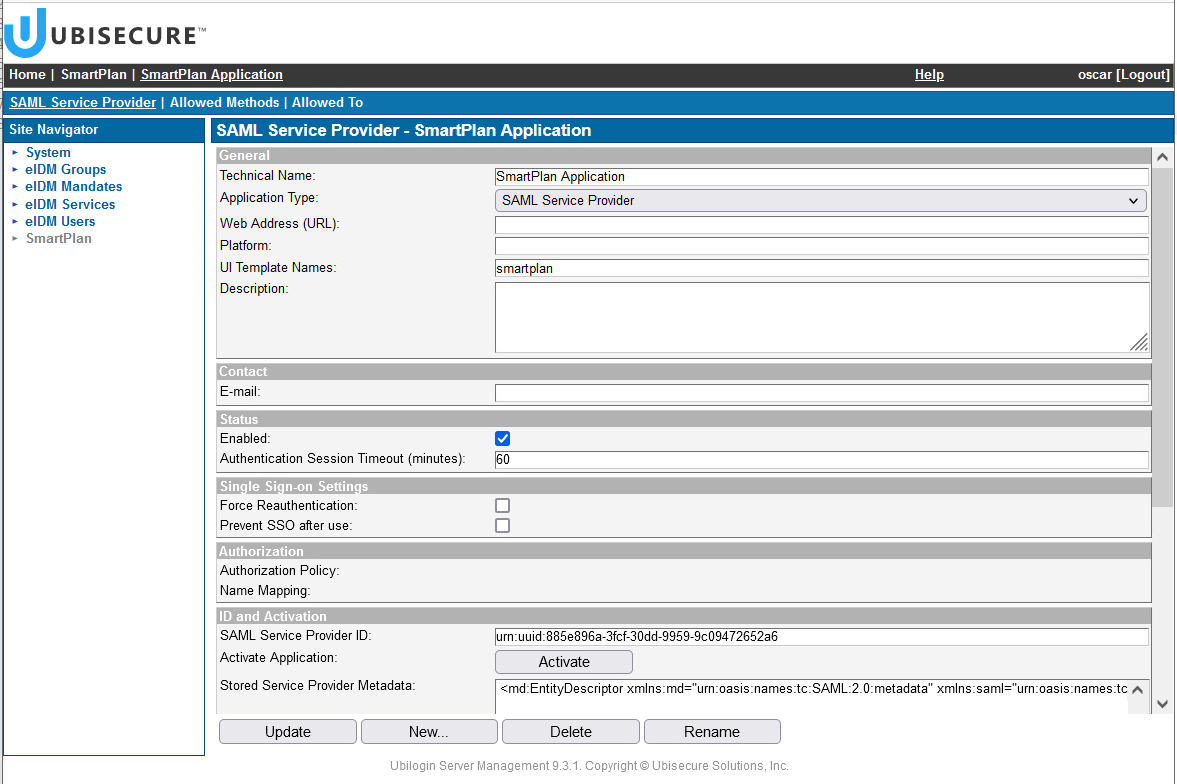
Step 2. Configuring templates to applications
1. Now add the new template to Smartplan application. This will assign all your modifications (saved as template "smartplan") to the SmartPlan application, which controls the login user interface. On SSO Management console, open: SmartPlan, Applications and SmartPlan Application. Write smartplan in the field "UI Template Names." Click "Update."
2. Also, add the template to the CustomerID Adminstration interface.
The CustomerID Administration application is located in the "eIDM Services" site, under Applications. It is called eidm2.
Before:
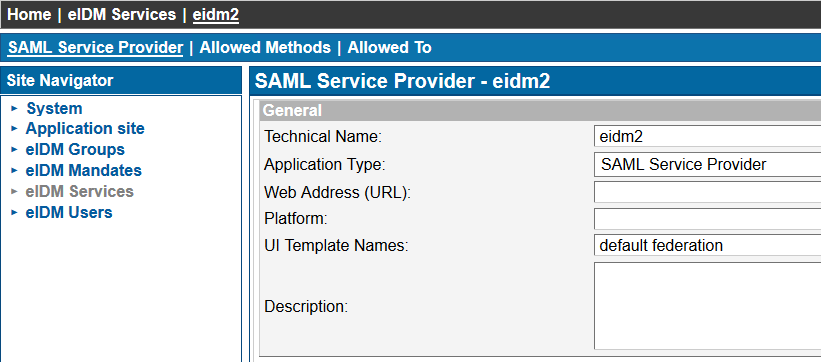
After:
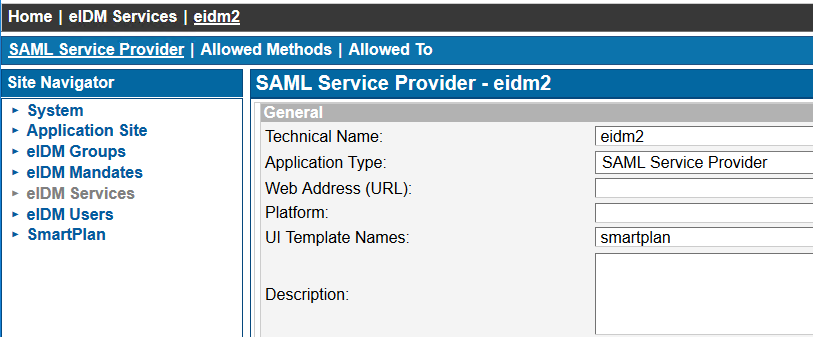
Press Update.
3. Finally, restart UbiloginServer service. The changes can take a few minutes to take effect.
In the future, you can follow the same steps to add a template for any application.
Step 3. Verify the login screen changes
Go to SmartPlan application to verify the changes in the login screen:
http://localhost:8090/smartplanapplication/
Part 2: Colours and Logos – CustomerID User Interface
Step 1: Change colours
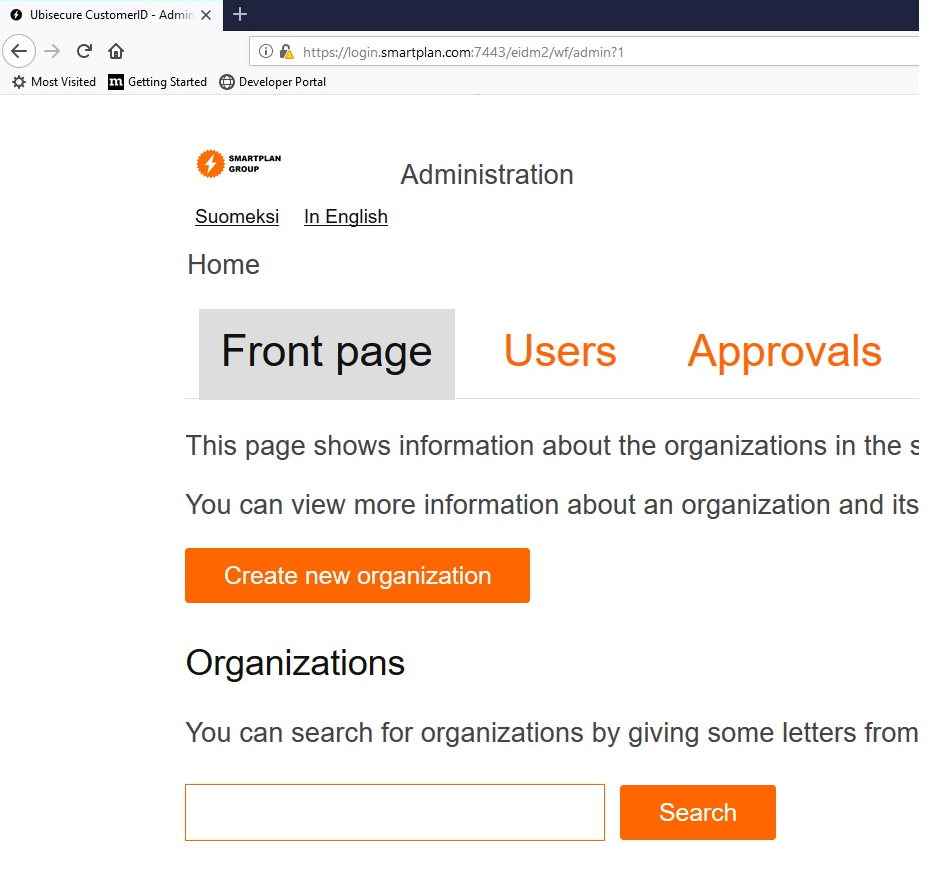
3. Go to Customer ID user interface.
https://login.smartplan.com:7443/eidm2/wf/admin
The user interface will change from blue to orange elements:
Step 2: Modify favicon
Modify CustomerID's favicon
Copy the new favicon.ico file from the IAM Academy Software folder on your Desktop into C:\Program Files\Ubisecure\customerid\application\custom\favicon.ico
copy "\\ubidemo.com\Ubidemo\Software\IAM Academy\favicon.ico" "C:\Program Files\Ubisecure\customerid\application\custom\"
Step 3: Modify logo
In order to modify CustomerID's default logo, you must use a PNG/JPG file. SVG is not a valid format.
Copy and rename the logo file smartplan.png from the IAM Academy Software folder on your Desktop to C:\Program Files\Ubisecure\customerid\application\custom\logo.png
copy "\\ubidemo.com\Ubidemo\Software\IAM Academy\smartplan.png" "C:\Program Files\Ubisecure\customerid\application\custom\logo.png"
Step 4: Verify the changes in the Customer ID user interface.
1. Restart the Wildfly service.
2. Reload the Customer ID user interface window. Note! You might have to clear the browser cache and restart the browser before modifications take effect.
Note
Here you can see some tips and tricks to get rid of the old favicon icons and replace them with new ones.
Part 3: Internationalisation and localisation
Login Screen
Login screen has the following customisation options:
Step 1: Messages
message.index file holds an index of UI message files. Ubisecure SSO comes pre-configured with default (English) texts for all supplied authentication methods. To override the default uas, or errors messages, add an entry named uas, or errors to message.index.- Copy directory C:\Program Files\Ubisecure\ubilogin-sso\tomcat\webapps\uas\WEB-INF\template\messages\ to C:\Program Files\Ubisecure\ubilogin-sso\ubilogin\custom\
- Add new references to C:\Program Files\Ubisecure\ubilogin-sso\ubilogin\custom\message.index as seen in the box below
This is for Swedish:
custom\message.indexuas = messages/uas.properties errors = messages/errors.properties uas_sv = messages/uas_sv.properties errors_sv = messages/errors_sv.properties
This is for Finnish/German:custom\message.indexuas = messages/uas.properties errors = messages/errors.properties uas_fi = messages/uas_fi.properties errors_fi = messages/errors_fi.properties uas_de = messages/uas_de.properties errors_de = messages/errors_de.properties
- Create a new properties file errors.properties in C:\Program Files\Ubisecure\ubilogin-sso\ubilogin\custom\messages folder
Add a string in the user interface to make the error message a bit more friendly.
errors.propertiesUSER_NOT_FOUND = Hey :) We didn't find you. Would you try again?
Now try to log in with a nonexistent user name, and observe the message that appears in red letters.
Add new languages to templates for selection. You must edit C:\Program Files\Ubisecure\ubilogin-sso\ubilogin\custom\templates\smartplan.properties file. (For reference, full values of default.properties file are in Template files page)
If you wish to localise to Swedish:smartplan.properties (To localise in Swedish)defaultlocale = sv locales = en, sv localenames = in English, på svenska
If you wish to localise to Finnish instead:smartplan.properties (To localise in Finnish)defaultlocale = fi locales = en, fi localenames = in English, Suomeksi
If you wish to localise to German instead:smartplan.properties (To localise in German)defaultlocale = de locales = en, de localenames = in English, Deutsch
Go to the login screen of the My Smart Plan application to see the changes.Note, if the Nordic letters don't display properly, change the encoding of the smartplan.properties file to ANSI in the text editor.
Optional exercise: Add a new language to a template
Repeat the step 5 to add a new language.
Default options for uas.properties and errors.properties
Full default options for default uas.properties and errors.properties are available in documentation
Step 2: CustomerID Workflows
Change the default language to either Finnish or Swedish. In order to do this, edit C:\Program Files\Ubisecure\customerid\application\custom\eidm2.properties
If you wish to localise to Swedish:custom\eidm2.propertiesdefault.locale = sv locales = en, sv localeName.en = in English localeName.sv = på svenska
If you wish to localise to Finnish:custom\eidm2.propertiesdefault.locale = fi locales = en, fi localeName.en = in English localeName.fi = Suomeksi
If you wish to localise to German:custom\eidm2.propertiesdefault.locale = de locales = en, de localeName.en = in English localeName.de = Deutsch
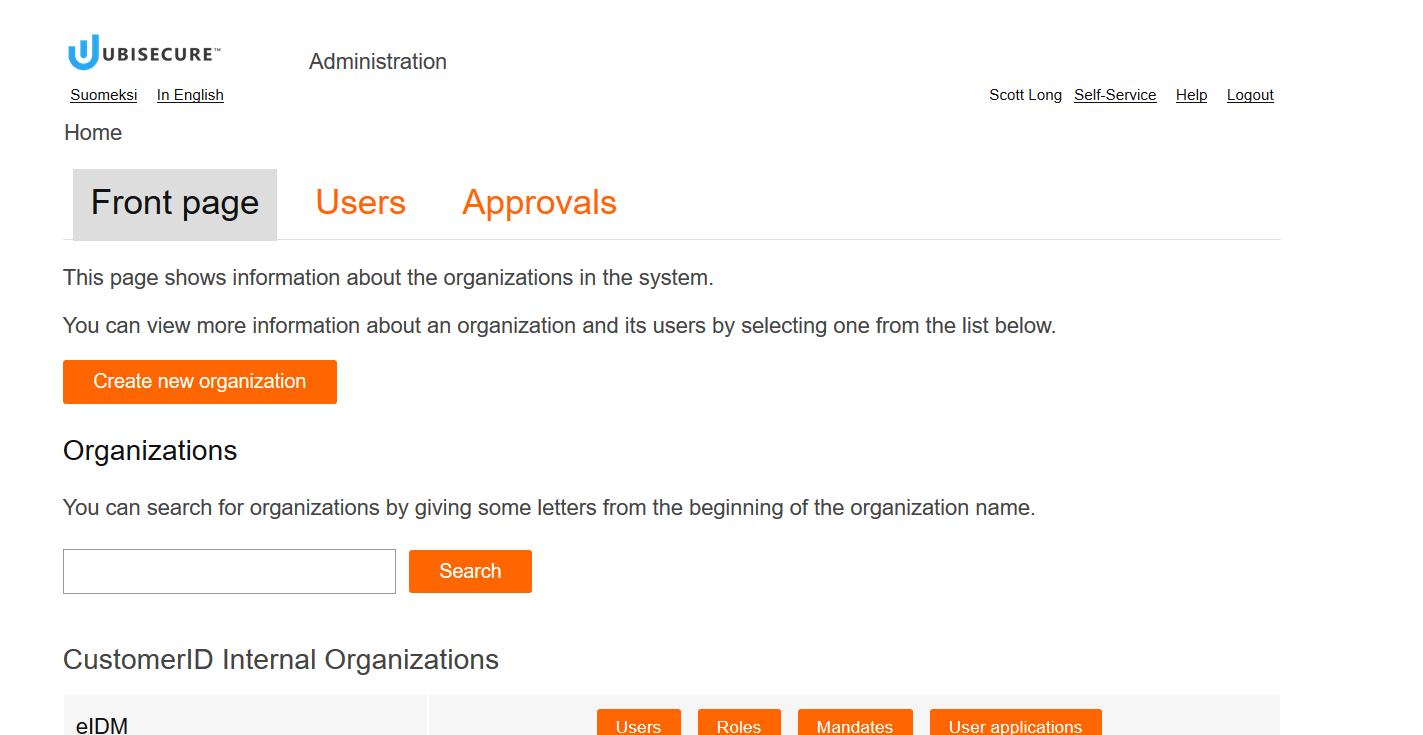
Change the default texts in the "Front Page" that appears in CustomerID Administrative Interface. The steps are:
Copy file C:\Program Files\Ubisecure\customerid\application\custom\messages_en.properties to file messages_de.properties (for German) in the same directory.
Modify some texts in messages_de.properties (or messages_fi.properties or messages_sv.properties),
for example in German: admin.frontpage.welcometext1 = SmartPlan Organisationen
for example in Finnish: admin.frontpage.welcometext1 = SmartPlan järjestelmän organisaatiot
or in Swedish: admin.frontpage.welcometext1 = SmartPlan organisationer- Restart the Wildfly service.
- Go to the CustomerID front page to verify the change.
Step 3: Role and attributes
Localised role descriptions. Edit C:\Program Files\Ubisecure\customerid\application\custom\roles.properties
First observe the contents of the file. Then localise SmartPlan role descriptions by editing the custom roles.properties configuration.
If you wish to localise to German:roles.propertiesde.friendlyName.mainuser = Kontakt de.friendlyName.user = Verantwortlicher
If you wish to localise to Finnish:roles.propertiesfi.friendlyName.mainuser = Yhteyshenkilö fi.friendlyName.user = Edustaja
If you wish to localise to Swedish:
roles.propertiessv.friendlyName.mainuser = Kontakt sv.friendlyName.user = Representativ
Localised attribute descriptions. By editing the custom messages_de.properties (or messages_fi.properties or messages_sv.properties) file add the line:
If you wish to localise to German:
messages_de.propertiesorganization.crmid = Kundennummer
If you wish to localise to Finnish:
messages_fi.propertiesorganization.crmid = CRM ID
If you wish to localise to Swedish:
messages_sv.propertiesorganization.crmid = Kundnummer
Restart the Wildfly service.
Step 4: Terms and Conditions
Create the file terms_sv.html (or terms_de.html in German or terms_fi.html in Finnish), which are the Terms and Conditions in Finnish or Swedish, on directory C:\Program Files\Ubisecure\customerid\application\custom This will be used in later exercise.
terms_de.html<!DOCTYPE HTML PUBLIC "-//W3C//DTD HTML 4.01//EN" "http://www.w3.org/TR/html4/strict.dtd"> <html> <body> SmartPlan terms in German </body> </html>terms_fi.html<!DOCTYPE HTML PUBLIC "-//W3C//DTD HTML 4.01//EN" "http://www.w3.org/TR/html4/strict.dtd"> <html> <body> SmartPlan terms in Finnish </body> </html>terms_sv.html<!DOCTYPE HTML PUBLIC "-//W3C//DTD HTML 4.01//EN" "http://www.w3.org/TR/html4/strict.dtd"> <html> <body> SmartPlan terms in Swedish </body> </html>
The terms and conditions are shown during the registration workflows when the "acceptTerms" option is configured.
Technically, the URLs for the above files will be:
https://login.smartplan.com:7443/eidm2/res/terms_sv.html
Part 4: Discovery and Template APIs
Step 1: Discovery UI API
Enable third-party implementations of
- authentication method selection user interfaces
- dynamic handling of identity provider selection
Examples:
- Mobile application selection
- Java-script method selection implementation in SP application
Below an example of calling Discovery UI API.
- https://login.smartplan.com:8443/uas/discovery?entityID=urn:uuid:7d9e12e3-9dbf-3576-802c-a5c67cef65c8&template=smartplan&locale=en (this link will not work on your environment as it depends on the entityID. See below how to edit for you own application)

Now do it yourself!
You can use the following URL to fetch information for SmartPlan application and smartplan template:
https://login.smartplan.com:8443/uas/discovery?entityID=<entityID>&template=smartplan&locale=en
Replace <entityID> with the value given for SmartPlan Application on SSO Management console:

Step 2: Template API
Template API allows for a consistent and safe reference method to elements required for providing custom user experiences
Examples
- Dynamically showing currently supported authentication methods within a third-party application
Benefits
- Reducing redirections
- Faster user experience
- Consistent API across future product releases
Examples:
To get the page logo in Finnish for the template named default:
To get the logo in Finnish for the authentication method called sms.otp.1 (Obs: this call will not work in the current environment as we didn't configure method-image):