Lab 2.3: Using the CustomerID REST API
The purpose of this module is to show you how to use the CustomerID REST API to do basic query functions for integration to external services.
- CustomerID installed
- POSTMAN
Overview
We will use CustomerID REST API interface to query organisation and user information.
Refer to the API reference documentation at APIs - CustomerID.
There are several versions of CustomerID REST API. Note that each version adds functionality and does not replace the older ones. So you can use operations of all REST API versions when appropriate.
Preliminary tasks
For this lab, we first temporarily set a simple REST API password. Add following to eidm2.properties and then restart Wildfly:
# REST API credentials
rest.username = restuser
rest.password = restpass
In this lab we specify the API credential in query parameters. In production environments we recommend using HTTP Basic Auth to avoid credentials written in log files.
Instructions
List users
https://login.smartplan.com:7443/customerid-rest/services/2.1/users/?username=restuser&password=restpass
This operation shows all users IDs of CustomerID, for example:
<?xml version="1.0" encoding="UTF-8" standalone="yes"?>
<Users xmlns="http://schema.ubisecure.com/customerid/api" inResponseTo="/2.1/users/" method="GET">
<Id>6225612a-02c4-4f5c-b875-bbb23379a6f2</Id>
<Id>1f216754-e009-4153-9e58-f6dd1ccdfefb</Id>
<Id>980a4aa3-8dac-4365-af75-58028d2353eb</Id>
<Id>d6cb9cea-b807-49a6-9746-99608591d89e</Id>
<Id>d69ce890-76a2-40be-8677-3ec951954b25</Id>
<Id>9bfba31b-5047-4baf-941c-e88ce15707e3</Id>
</Users>
Query user info
Pick one user ID from the output of previous step, such as 6225612a-02c4-4f5c-b875-bbb23379a6f2, and use it in the query user command below:
https://login.smartplan.com:7443/customerid-rest/services/2.1/users/6225612a-02c4-4f5c-b875-bbb23379a6f2?username=restuser&password=restpass
The individual user information will be shown:
<?xml version="1.0" encoding="UTF-8" standalone="yes"?>
<User xmlns="http://schema.ubisecure.com/customerid/api" inResponseTo="/2.1/users/6225612a-02c4-4f5c-b875-bbb23379a6f2" method="GET" type="user">
<Attribute name="id">
    <Value>6225612a-02c4-4f5c-b875-bbb23379a6f2</Value>
</Attribute>
<Attribute name="firstname">
    <Value>Leena</Value>
</Attribute>
<Attribute name="surname">
    <Value>Laine</Value>
</Attribute>
<Attribute name="cn">
    <Value>cd4b6658-b4c5-4e39-82e9-aa19e73bb42f</Value>
</Attribute>
<Attribute name="login">
    <Value>leena.laine</Value>
</Attribute>
<Attribute name="email">
    <Value>leena.laine@example.com</Value>
</Attribute>
<Attribute name="organization">
    <Value>Users</Value>
</Attribute>
<Attribute name="status">
    <Value>Enabled</Value>
</Attribute>
</User>
Query user by email address
https://login.smartplan.com:7443/eidm2/services/user/Users?username=restuser&password=restpass&email=leena.laine%40example.com
<user>
   <id>https://login.smartplan.com:7443/eidm2/services/user/Users/a3cf6833-f3dd-4a24-ba38-cebc55191571</id>
   <organization>https://login.smartplan.com:7443/eidm2/services/org/Users</organization>
   <organizationFriendlyName>Users</organizationFriendlyName>
   <status>Enabled</status>
   <attributes>
      <uid>leena.laine</uid>
      <firstname>Leena</firstname>
      <surname>Laine</surname>
      <email>leena.laine@example.com</email>
      <cn>a3cf6833-f3dd-4a24-ba38-cebc55191571</cn>
      <organization>Users</organization>
   </attributes>
</user>
Query users by role membership
https://login.smartplan.com:7443/eidm2/services/role/2184053-5/mainuser?username=restuser&password=restpass&assignments=true&assignmentEntities=true
List organisations
https://login.smartplan.com:7443/eidm2/services/orgs/?username=restuser&password=restpass&assignments=true&assignmentEntities=true
Create new user
For this exercise, you have to use Postman (instead of your browser) and POST calls.
Create a new user to "Users" organisation
Please read the documentation for "Create User" on Ubisecure Developer Portal. The direct link for the call is: REST API 1.0 - CustomerID#CustomerID-MOD009CreateUser
The format of the URL is:
https://HOSTNAME/eidm2/services/users/ORGANIZATION/
The parameters you need in this API call are:
uid, email, firstname and surname.
If you also want to enable password, you must include parameters pwd and pwd.activated.
| Parameter | Accepted values | value |
|---|---|---|
| uid | String | |
| String | ||
| firstname | String | |
| surname | String | |
| pwd.activated | Boolean | true |
| pwd | String |
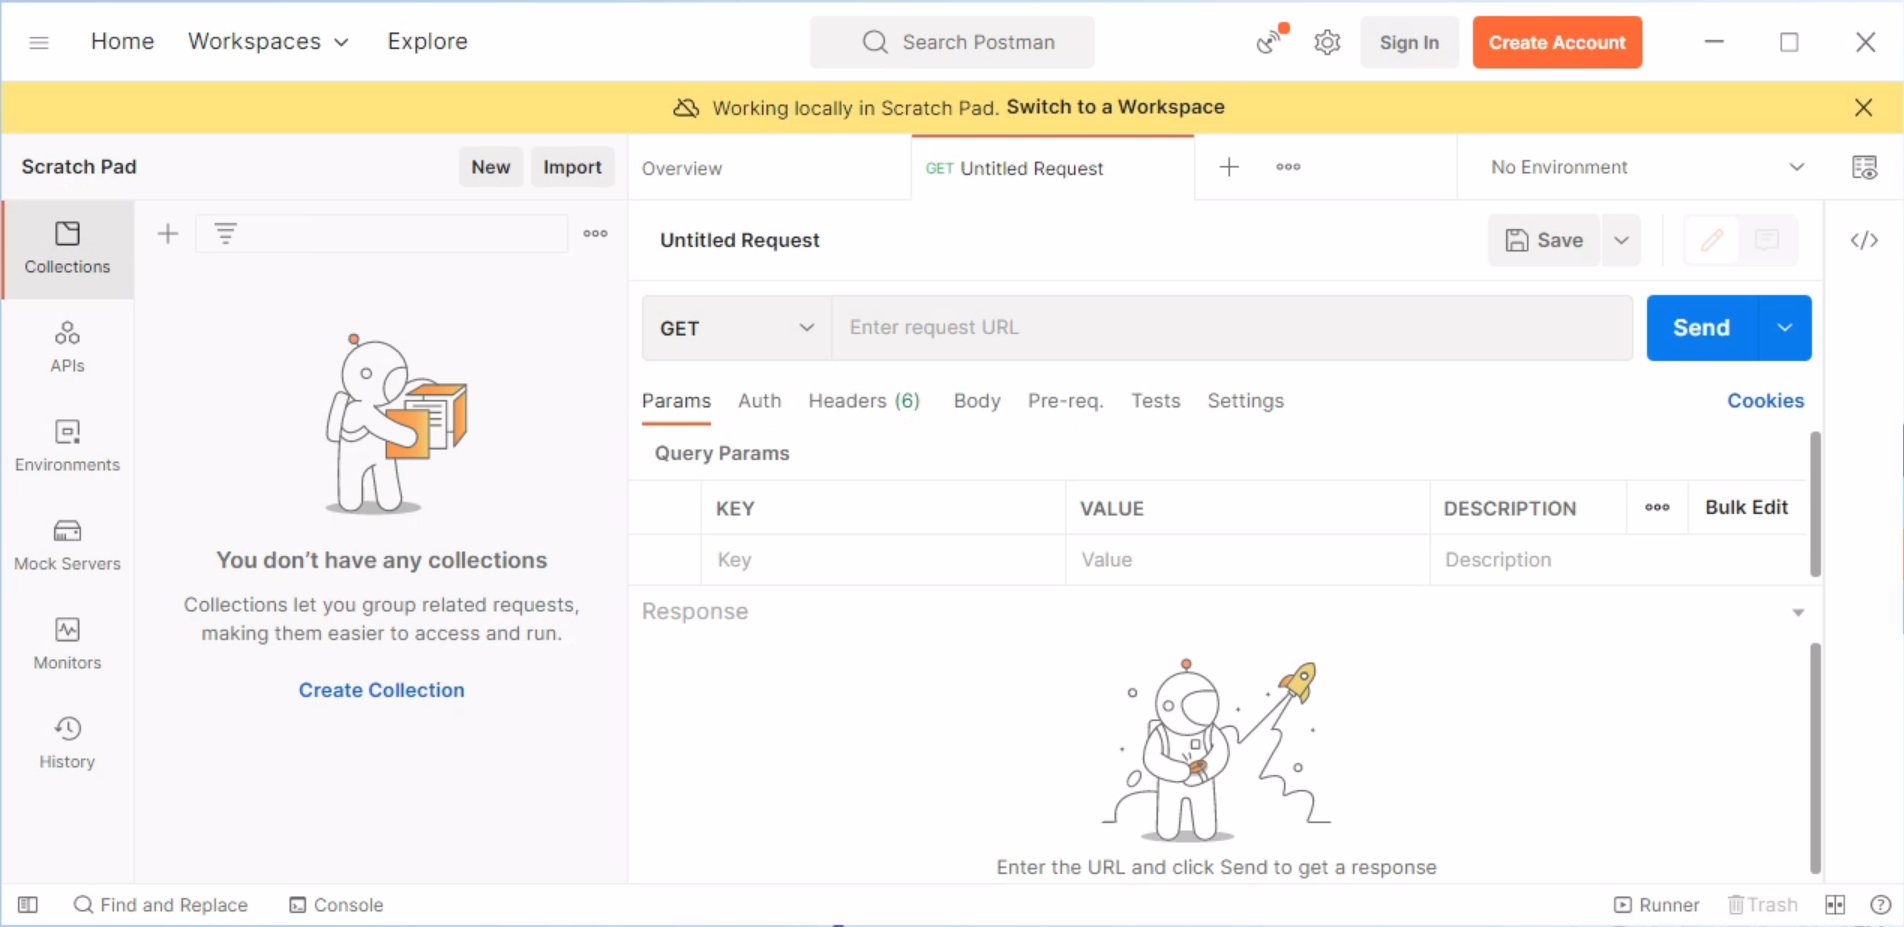
Open Postman
As you don't have any collections, you will use the Scratch Pad
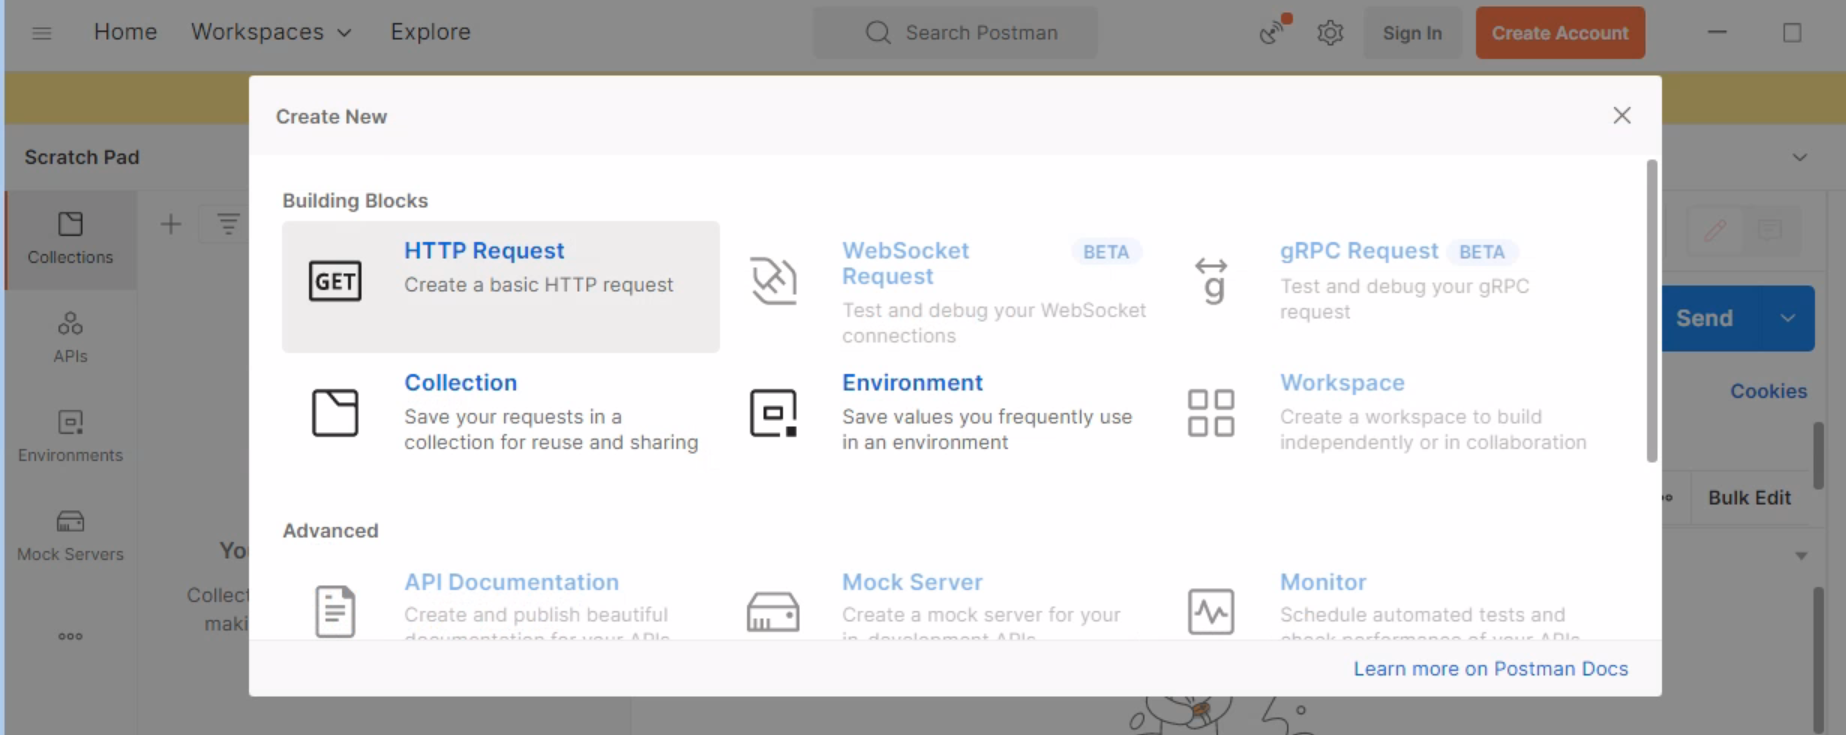
Click on "New" button and next select "HTTP Request"
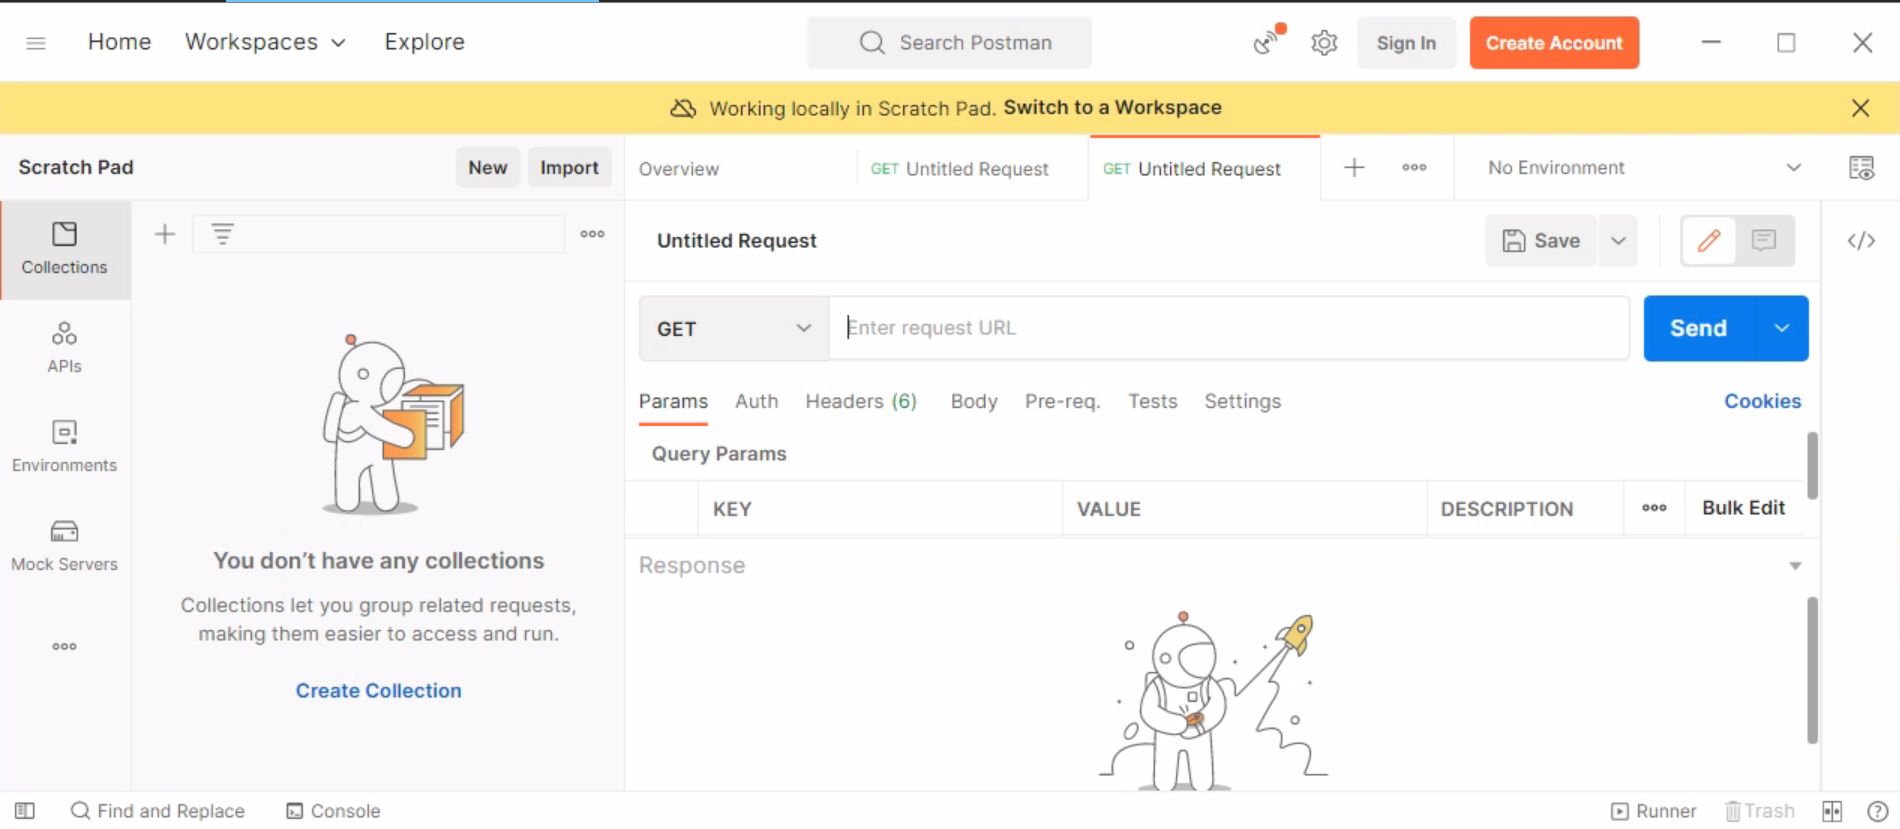
On the right side you will see a request, which by default appears as GET. Now you can edit this request to fit your task.
Hints:
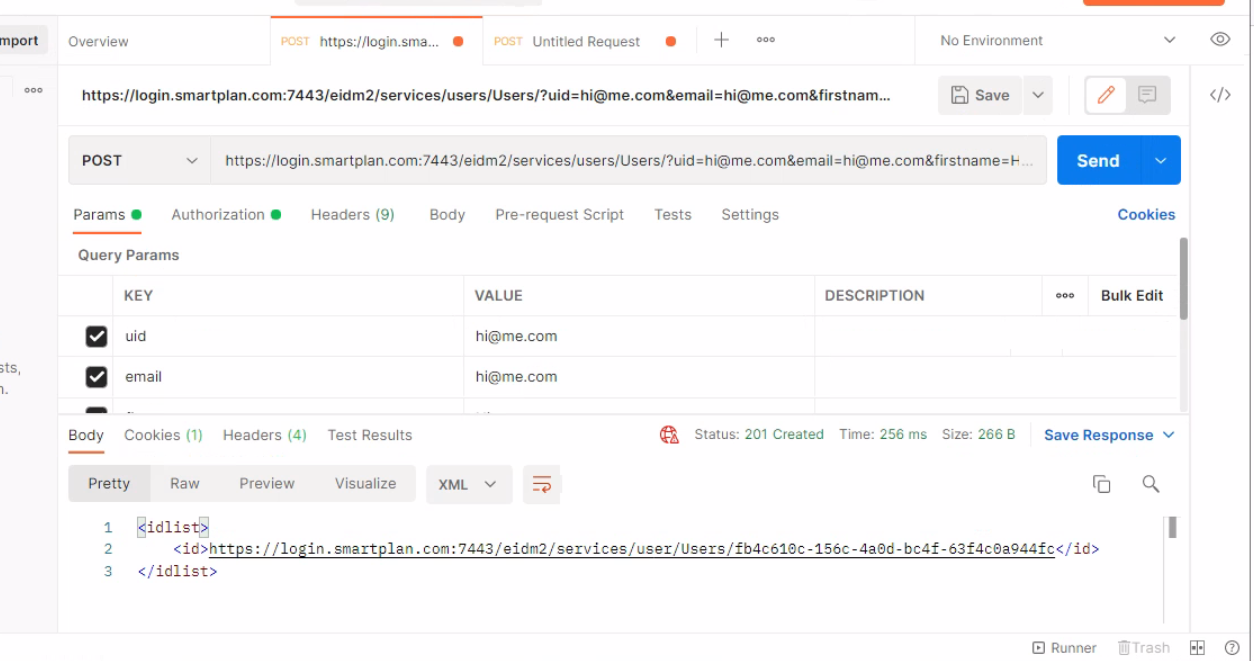
- The URL for this HTTP request becomes https://login.smartplan.com:7443/eidm2/services/users/Users/
- Use email address as both uid and email parameters. Choose any email, for instance hi@me.com
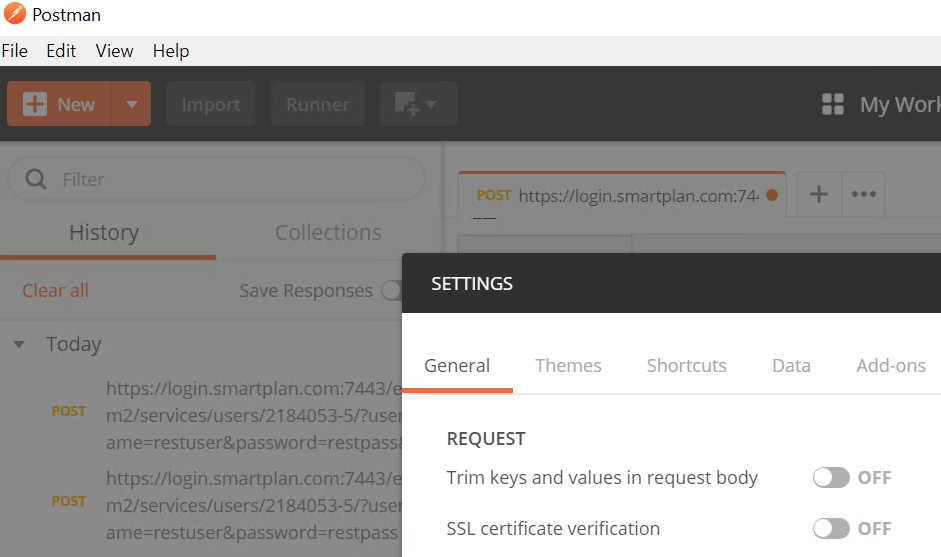
- In Postman settings, set SSL certificate verification OFF.
- On Authorization, select "Basic Auth"
Once the call is successful, you will see a response like this:
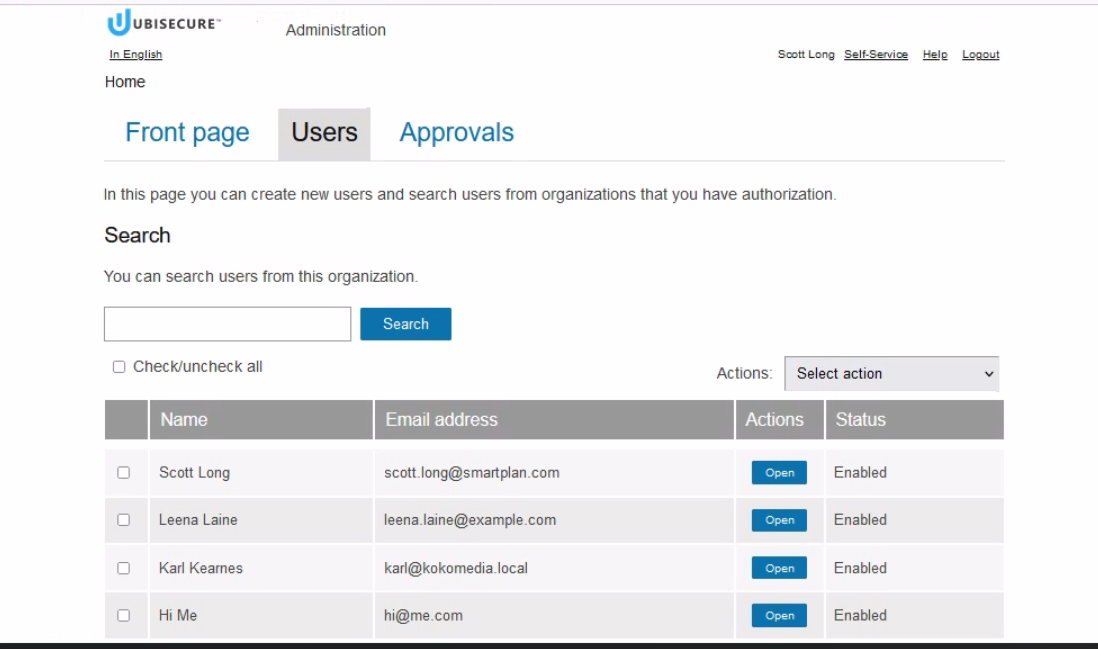
Finally, you can verify the new user was created. Log in to CustomerID administrative interface (using Scott Long user).
Go to the "Users" tab and you will find the new user at he bottom.
