OAuth 2.0 integration guide - SSO
Introduction
About This Document
This page is a guide for configuring and using OAuth 2.0 integration in Ubisecure SSO. This applies for OpenID Connect and Mobile Connect integrations as well.
It describes how a Ubisecure SSO Administrator can add and configure a trusted OAuth2 Relying Party.
Starting from SSO 8.5.0 we have added the possibility to include scope as attribute in the Authorization policy (related to step 7). In OpenID Connect and Mobile Connect use cases the following page describes how to Manage authorization policies - SSO in more detail.
Prerequisites
Before commencing, you need to know the redirect_uri address of the Relying Party to be connected. This the address to which the authorization response will be sent.
For browser based applications, this is typically a public internet facing address accessible by the end users.
For other client applications (using embedded browsers), this can be a non-existent address that is listened for by the application.
OAuth 2.0 Application Creation
Log in into Ubisecure SSO and follow the steps below to complete the task.
Start the configuration by creating a new site. Give a name to the site. E.g. 'Online web shop'.
Create a new application
Name it e.g. 'OAuth Application' or after the application, select Application type as 'OAuth 2.0' and check the 'Enable' check box. Click 'OK'
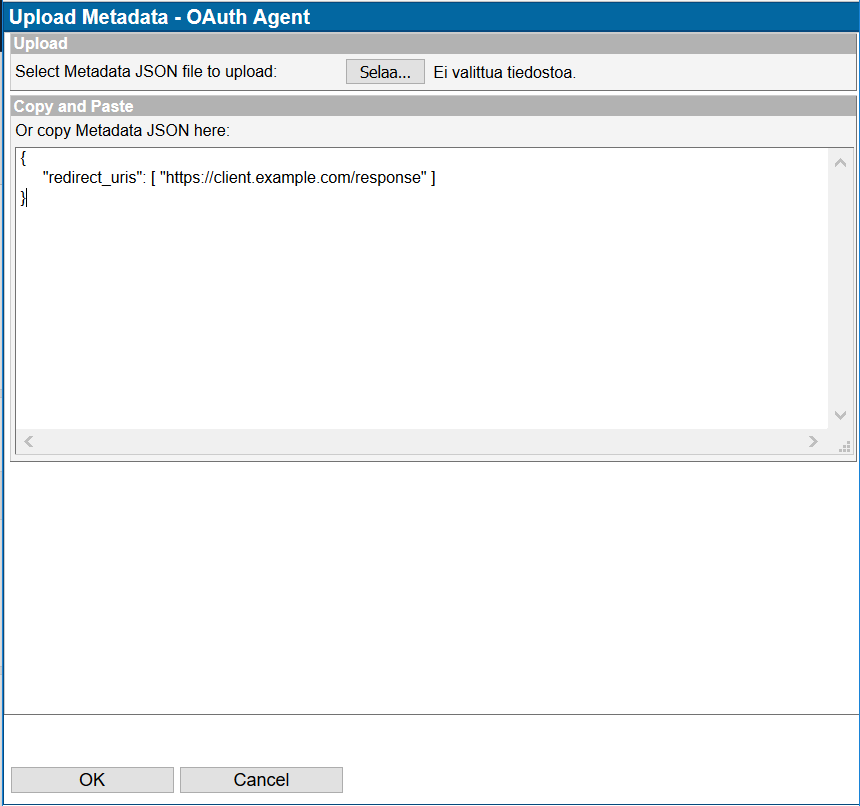
Upload the redirect_uris information into Application Metadata from a file in a following format. The redirect URL should be given by application development
{
     "redirect_uris": [ "https://client.example.com/response" ]
}
This JSON can either be uploaded from a file or copy and pasted into the activation window.
More than one redirect_uri can be given, for example if the same application is hosted at different domains. In the following example Authorization Requests will be allowed to a range of different address with or without https on a range of port numbers.
{
"redirect_uris":[
"https://localhost/authorised.html","https://localhost:8080/authorised.html","http://localhost/authorised.html",
"http://localhost:8080/authorised.html","http://localhost/test/authorised.html","http://localhost:8080/test/authorised.html",
"https://localhost/test/authorised.html","https://localhost:8080/test/authorised.html"
]
}
Once you have entered the redirect_uris information, click OK and then press on Activate. A new client_id and client_secret is generated and activated. Save this file and give it to the application development team configuring the Relying Party.You can also set the human readable client name into the metadata, when this is used instead of default service URL in the login screen. This is set by inserting the client_name in to the metadata. By default system uses this based on the locale setting, if this is not found, then it uses the default, without locale. If client_name is not found then the URL is used. ´Same logic goes with application logo that can be set in metadata. By default the system uses the image based on the locale setting, and then the default one without locale if it exists. Note that application logo usage is set in the properties file.
{
"redirect_uris": [ "https://client.example.com/response" ],
"client_name":"oauth-testiagent","client_name#fi":"oauth-testiagent-suomeksi", ",
"logo_uri":"http://hifkfotboll.fi/wp-content/uploads/2015/02/NetLogo.png",
"logo_uri#fi":"http://img-b.foreca.net/i/l/foreca_logo_small.gif"
}
Click ‘Update’ to save the configuration
Go to the ‘Authorization policies’ tab now, and create a new policy e.g. ‘Online web shop AP’. Go to ‘Attributes’ tab to add attributes
The following attributes can be added to the Application’s Authorization Policy
The Authorization Policy defines which attributes are available to a relying party in the id_token and the userinfo endpoint.
Because some attributes may be multi-valued, each attribute value is sent by default as a JSON array. If it is known that there is only one permitted attribute, set the attribute name in the “Single Value Attributes” sections of the Authorization tab. The format of the data will change in this case to a string.
More information related to attributes can be found from Manage authorization policies - SSO
Where possible, it is recommended to follow common specifications in attribute names. OpenID Connect defines specific attribute values at http://openid.net/specs/openid-connect-core-1_0.html#Claims .
[OPTIONAL] Defining single value attributes
Select the Application to use this authorization policy
Enable the authentication method for the application by checking the check box and press ‘Update’ -button below
Allow eIDMUser group to use this application and click ‘OK’
Now the Application is configured to use OAuth 2.0.
They have the earlier generated client_id and secret to the application development.
The information that an application developer needs are:
client_id | Contained in file generated when Activate is pressed |
secret | Contained in file generated when Activate is pressed |
| This publically available URL returns all of the required OAuth2 endpoints in JSON format. |
Compatibility flags
The following compatibility flags are supported for OAuth 2.0 applications.
| 8.4.1 | Specific application or system-wide | Controls JWT aud claim construction and validation policy. If set, the If not set, the |
| 8.5.0 | Specific application | Enables additional audit logging for OAuth 2.0 applications. Additional audit logging for OAuth 2.0 |
Finnish Trust Network specific configurations
Trusted OAuth 2.0 and OpenID Connect applications in Finnish Trust Network (FTN) can provide their friendly name to be shown in the login UI and sent as the display name for Authentication Methods by setting Configuration String AllowFtnSpname as true. To do this in the Management UI, add AllowFtnSpname=true to the last line in Configuration String.
| Configuration String | Since Version | Description |
|---|---|---|
AllowFtnSpname | 8.10.0 | Can be Controls whether or not the value of Authorization Request parameter If If Default is |
