Lab 1.2: Web Application Integration
- Keith Uber
- Risto Peltomäki
- Former user (Deleted)
- SSO installed
Overview
In a real case, your customers will have to connect one or more external services such as a CMS, ordering portal, support tools etc, which are called Service Providers (SP) in SAML terminology.
In this lab, we will do two types of web application integration:
- Use SAML 2.0 as the authentication framework and will connect to a Java sample application SmartPlan Application. This will represent the target service. Ubisecure SSO implements SAML Identity Provider (IdP) role.
- A simplified OpenID Connect integration using utility called OpenID Connect Tester.
Part 1: SAML integration
SAML Refresher Course
SAML 2.0 Overview
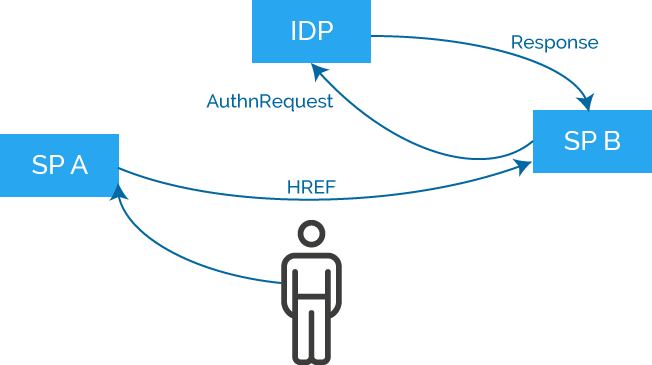
As you see in the diagram:
- User navigates to SP service with his web browser
- User doesn’t have an SP session. SP sends an AuthnRequest to IDP
- IDP authenticates the user either by using an existing session or by requesting user credentials
- IDP forms a SAML Assertion and sends it to SP within Response message
- SP receives the Response message and grants access to the service
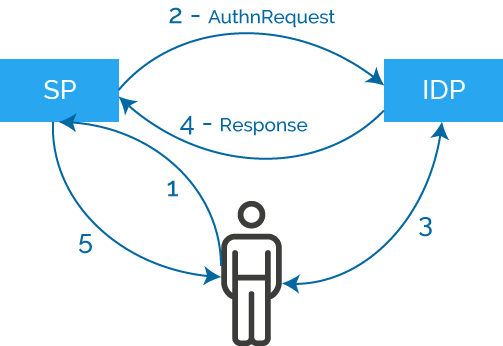
IDP: Identity Provider
SP: Service Provider
SAML 2.0 Metadata
SAML Metadata is an XML file describing how to communicate with a SAML SP or IDP
- Which SAML protocol features are used (profiles, bindings)
- Which HTTP addresses are used for messaging
- Which public key should be used for verifying message integrity and encryption
Ubisecure products build the metadata automatically
- Metadata is always available via a defined HTTP address
- SSO metadata is always in well-known address https://login.smartplan.com:8443/uas/saml2/metadata.xml
Example SSO Endpoint definition:

Integration of SAML SP application for Java with Ubisecure SSO
In summary, the main phases of integrating a SAML SP application for Java with Ubisecure SSO are:
- Generation of Service Provider metadata
- Application creation
- IdP metadata copied to application server
- Configure authentication and authorisation
- Sign in to the service
At the end of this lab, you will have successfully logged in to the web application SmartPlan Application by using password authentication. You will use this application later in Lab 2.5: Authorisation Policy and Lab 3.1: Federation Configuration.
The instructions are in the following section.
Instructions
- Install a separate Tomcat 9.0 on your system (in order to avoid potential conflicts with SSO's Tomcat installation). Use the 32-bit/64-bit Windows Service Installer file located on the "IAM Academy Software" folder accessible from your desktop.
During the installation, select port 8090 (or another that is not taken) for HTTP/1.1 Connector Port.
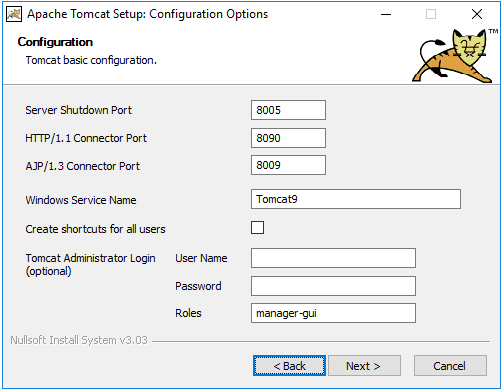
The path to install Java is: C:\Program Files\AdoptOpenJDK\jdk-8.0.275.1-hotspot\jre
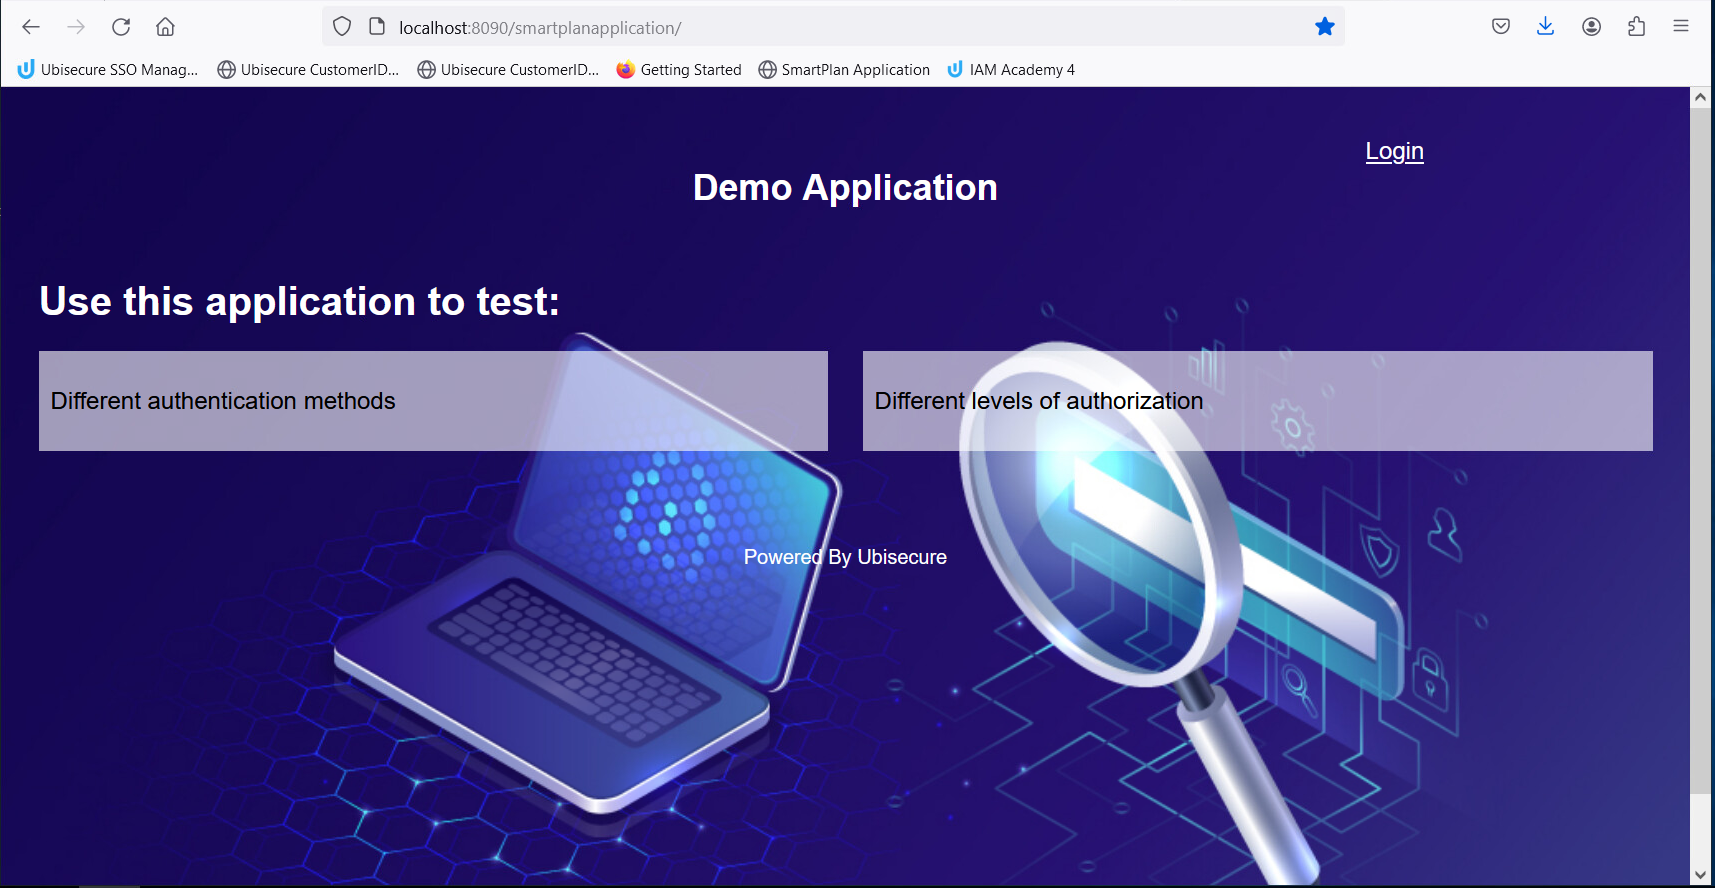
The system is running when the address http://localhost:8090/ answers as follows:
You can also modify the port number after installation. Do edit the file C:\Program Files\Apache Software Foundation\Tomcat 9.0\conf\server.xml
Install SmartPlan Application
The package is available at \\ubidemo.com\Ubidemo\Software\IAM Academy\ubisp-sample-2.7-smartplan.zip.
Unzip the package and extract all files into directory
C:\Program Files\Apache Software Foundation\Tomcat 9.0\webapps:
Create private and public keys:
cd /d "C:\Program Files\Apache Software Foundation\Tomcat 9.0\webapps\smartplanapplication\WEB-INF"
"C:\Program Files\AdoptOpenJDK\jdk-8.0.275.1-hotspot\jre\bin\java.exe" -jar lib/ubisaml2.jar Generate http://localhost:8090/smartplanapplication/spsso -o saml2/sp -y
Create service provider metadata:
cd /d "C:\Program Files\Apache Software Foundation\Tomcat 9.0\webapps\smartplanapplication\WEB-INF"
"C:\Program Files\AdoptOpenJDK\jdk-8.0.275.1-hotspot\jre\bin\java.exe" -jar lib/ubisaml2.jar Metadata saml2/sp -f sp-metadata.xml -y
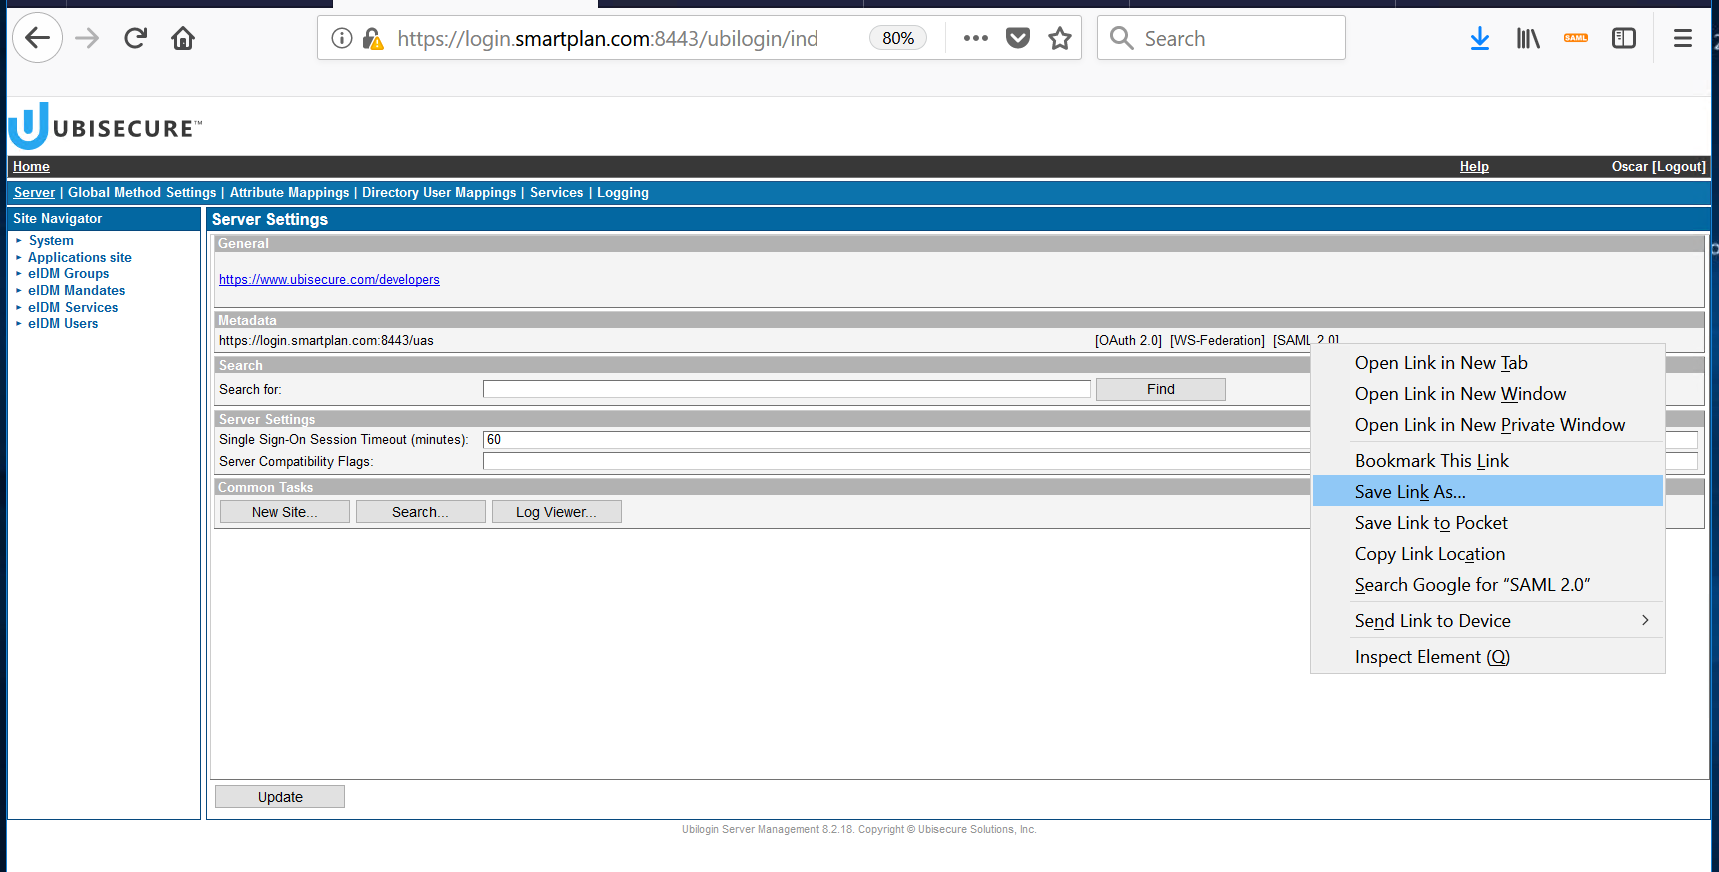
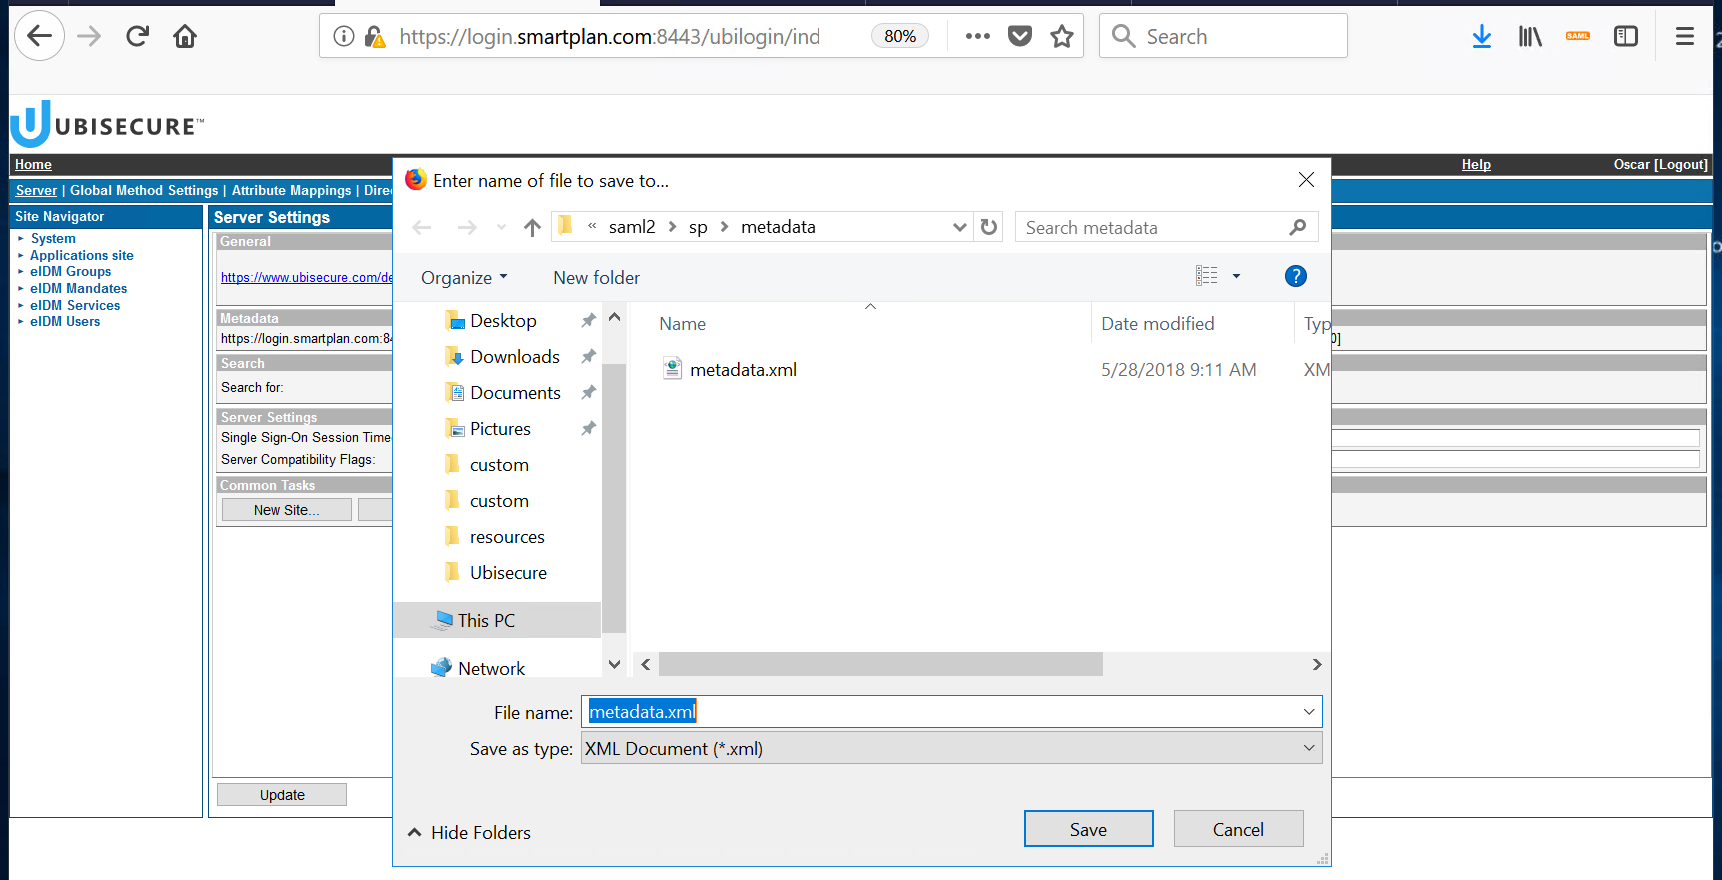
Open Ubisecure SSO management console https://login.smartplan.com:8443/ubilogin. Right click [SAML 2.0] to save the identity provider's SAML 2.0 metadata file (metadata.xml) to directory C:\Program Files\Apache Software Foundation\Tomcat 9.0\webapps\smartplanapplication\WEB-INF\saml2\sp\metadata\
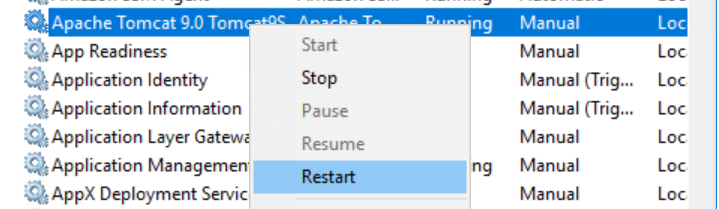
- Restart Apache Tomcat using Services. The application will re-read the configuration during startup.
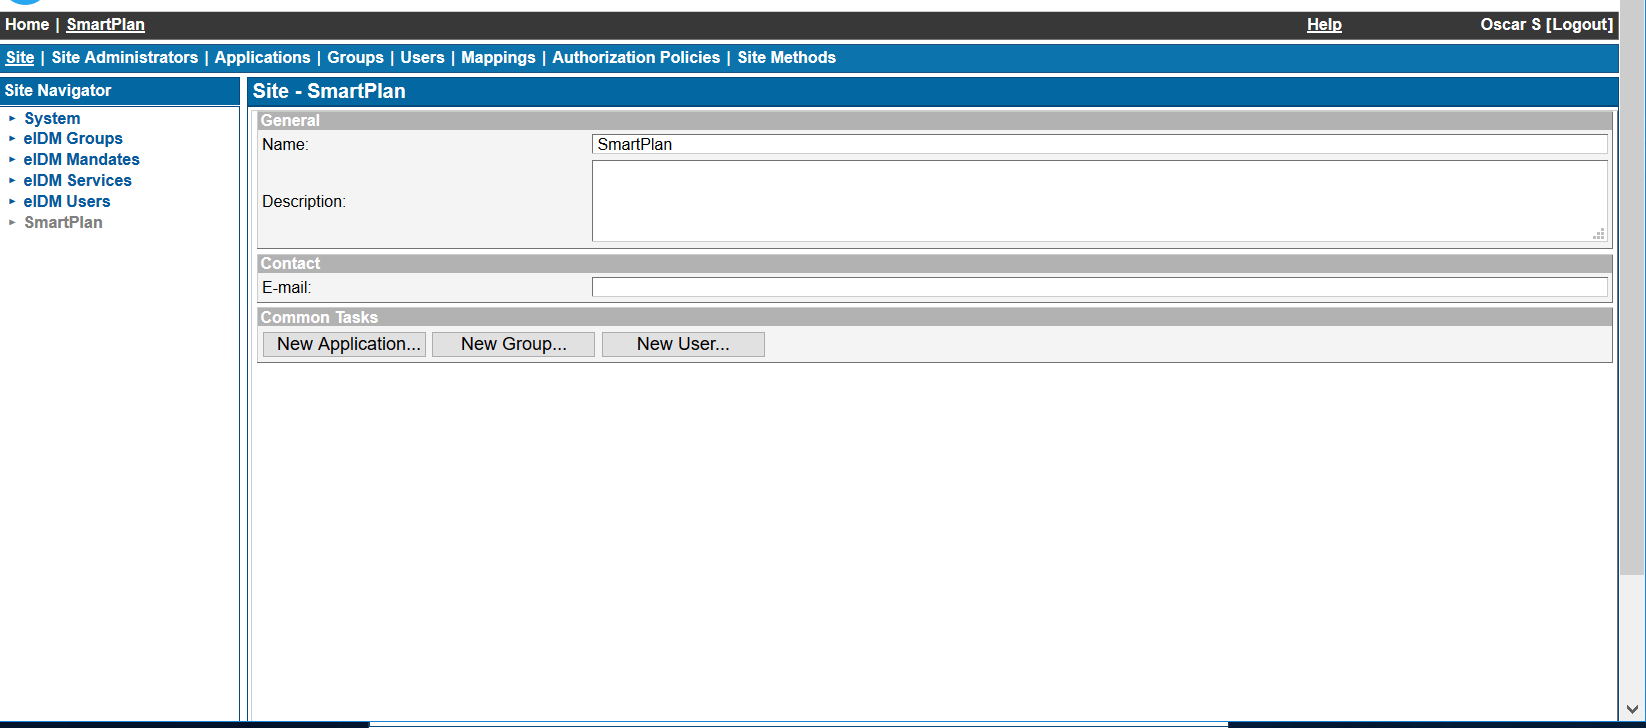
- Create an application in Ubisecure SSO management console.
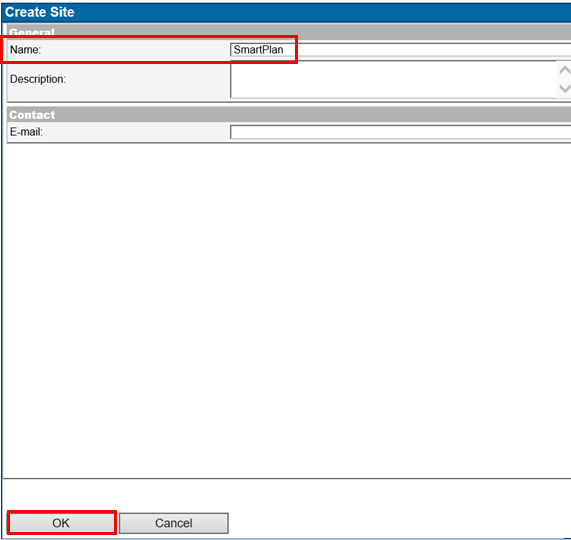
First, create a site ("SmartPlan" on the screenshot below).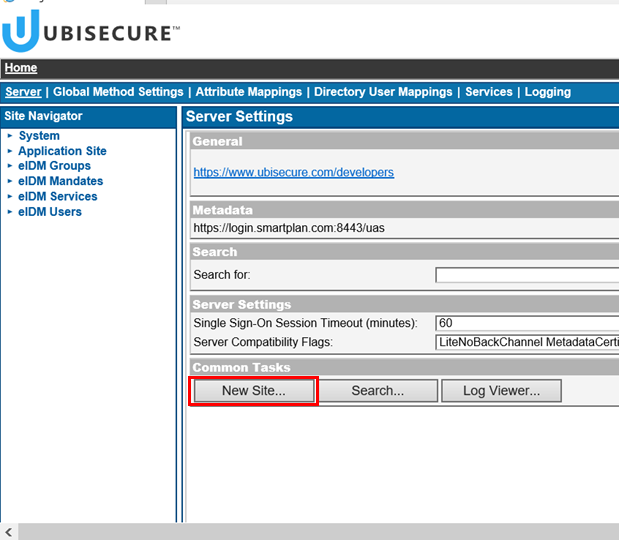
Select the site "SmartPlan", Site Methods, and select Add Methods... and choose the authentication methods that will need to be used on this site. For now, add "CustomerID Password."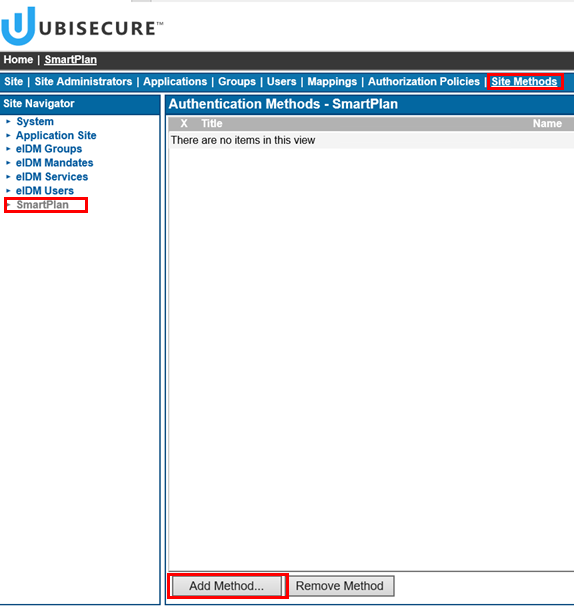
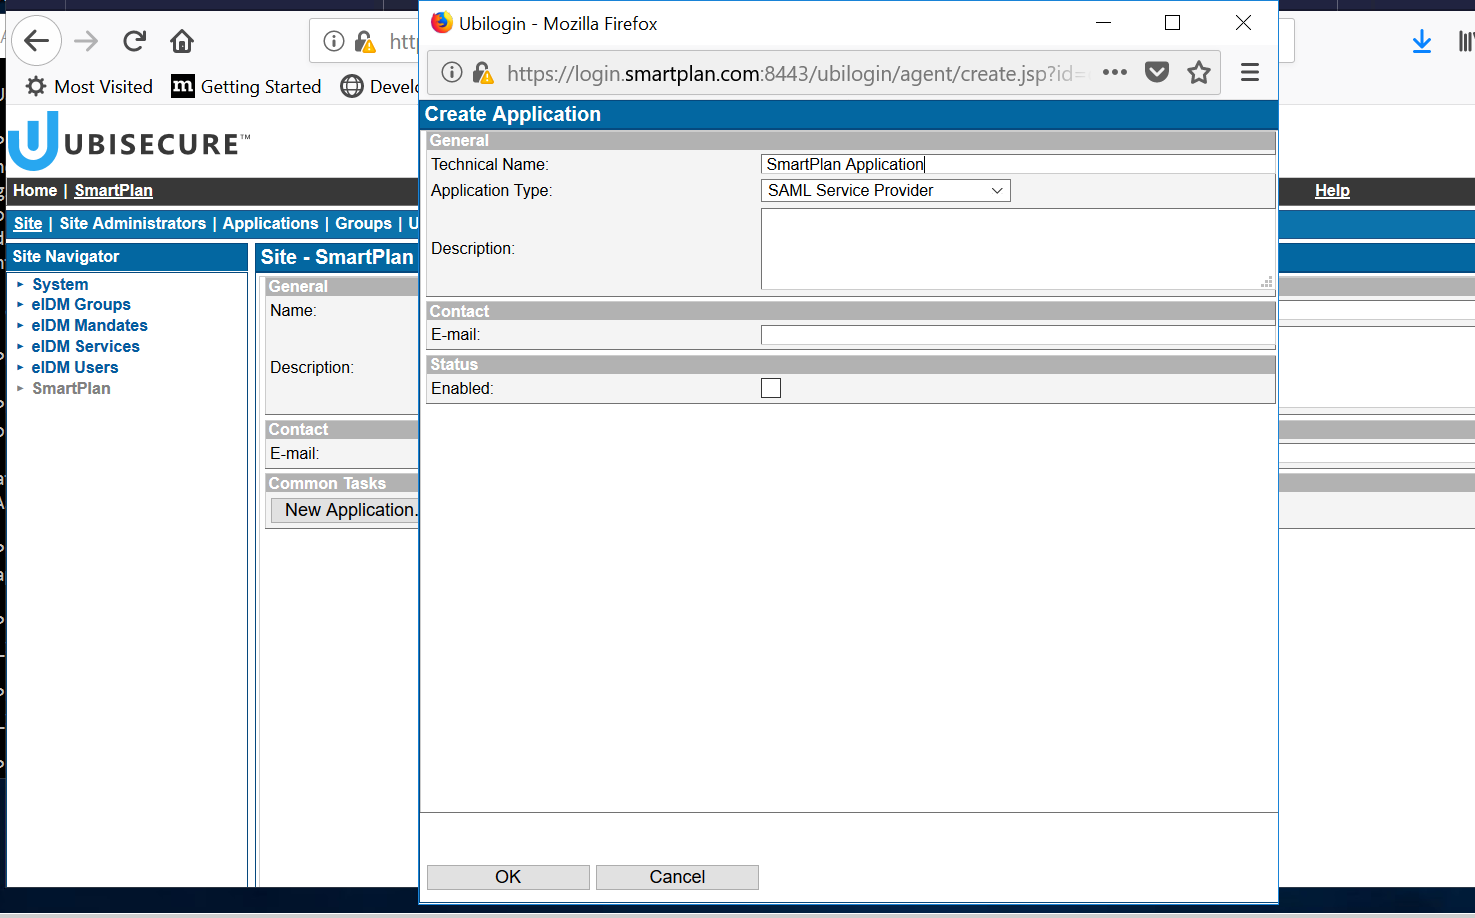
- Go back to "Site" tab and then click "New Application." When the popup window appears, write the name of your application (SmartPlan Application), select "SAML Service Provider" and click on "Enabled" box. Finally, accept with the "OK" button.
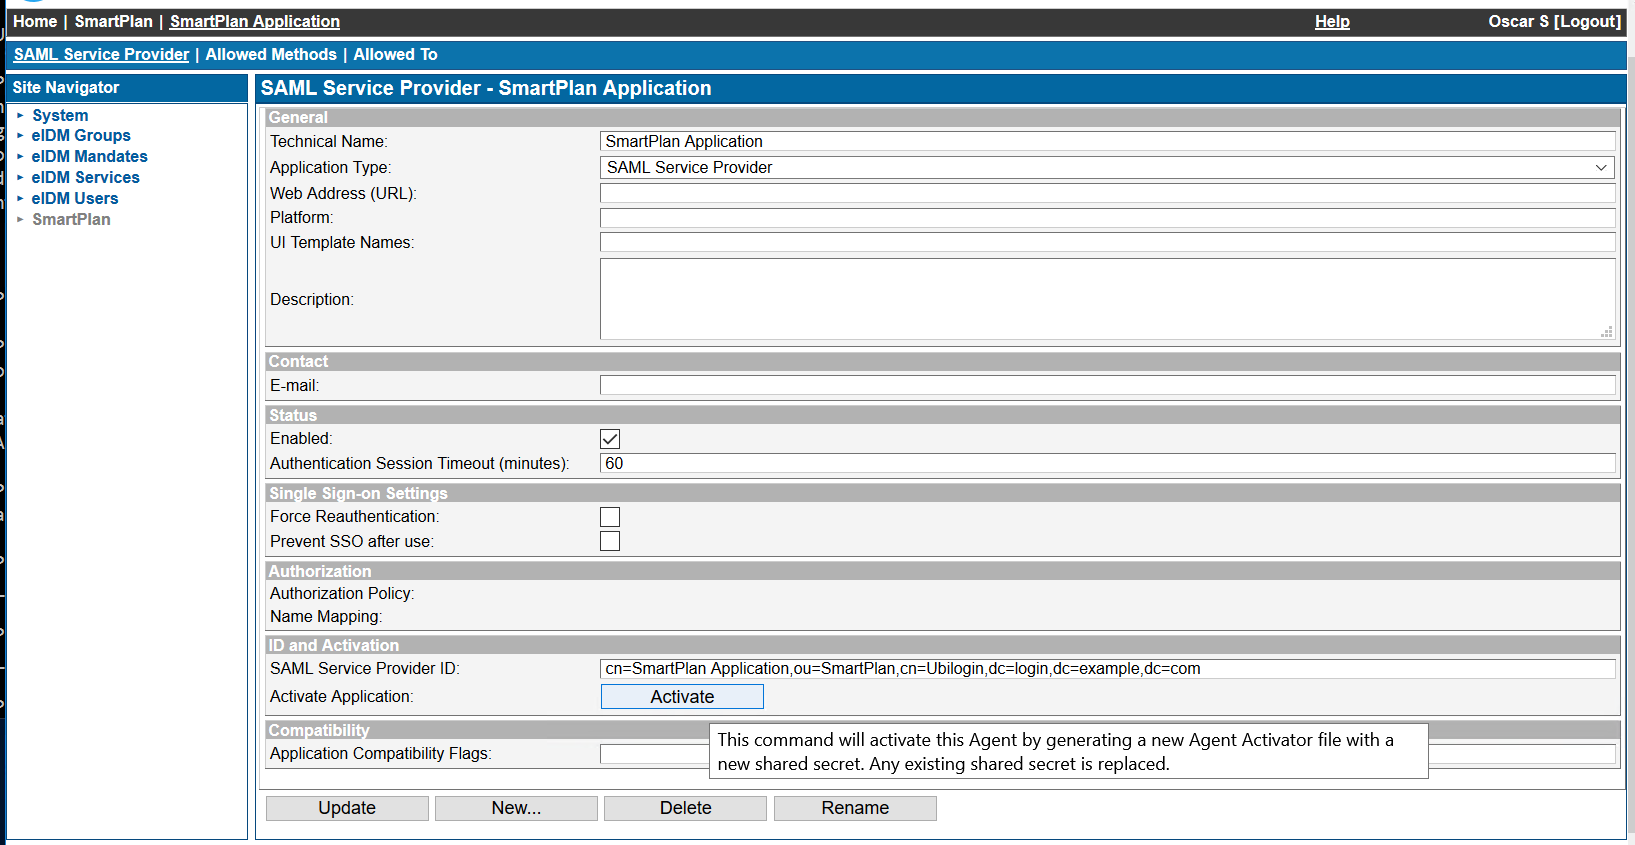
At "ID and Activation" press "Activate" and select the metadata from C:\Program Files\Apache Software Foundation\Tomcat 9.0\webapps\smartplanapplication\WEB-INF\sp-metadata.xml
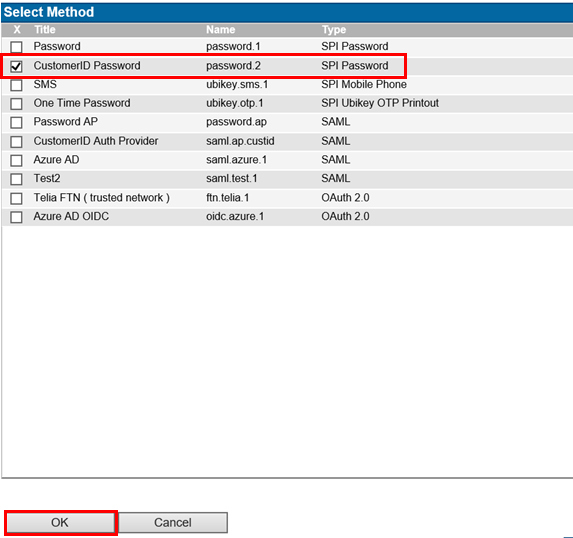
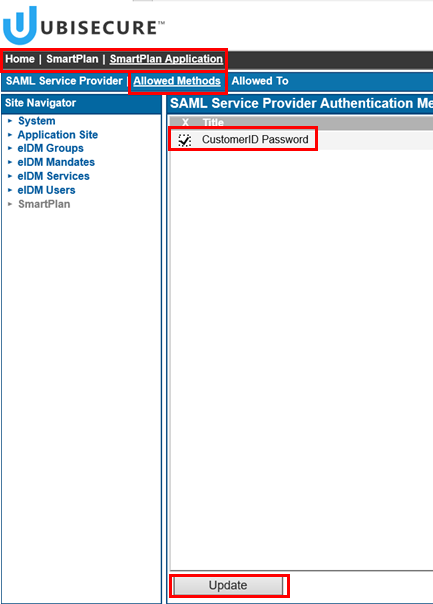
Press "Update" buttonThen go to "Allowed Methods" and add "CustomerID Password." Click "Update"
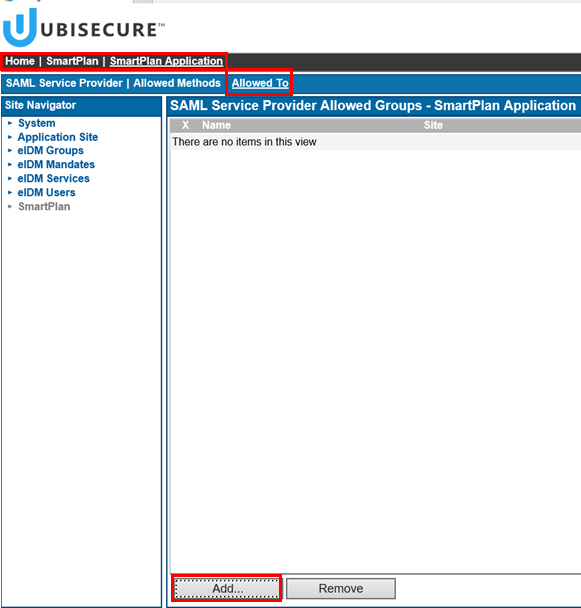
- Go to "Allowed to" and add "eIDMUser" group:

- Now open your browser:http://localhost:8090/smartplanapplication/ (Ignore security warning if you haven't installed HTTPS:)
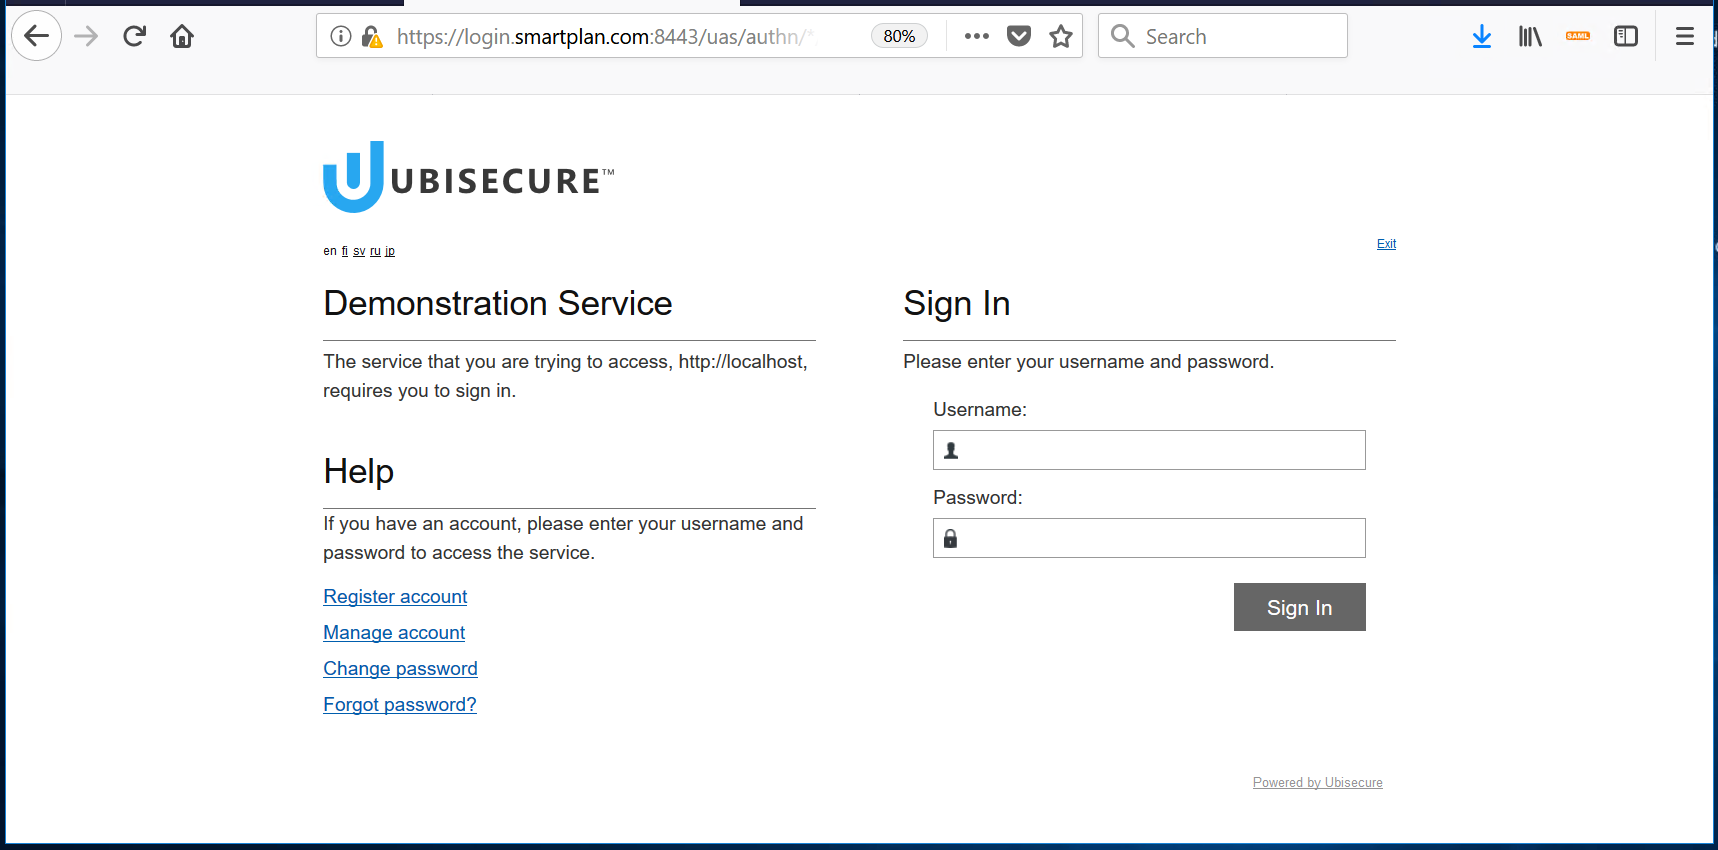
- Now log in with username scott.long@smartplan.com (imported as part of lab 1.1) using the configured authentication method:
- Finally, you will see a page like this which displays the user's id and the authentication methods. In Lab 2.4 (Authorisation Policy) you will learn how to send user attributes and display them in this page.

- You're done.
Additional information
Solicited and Unsolicited SAML Response
- AuthnRequest/Response sequence implements pull functionality
- In the picture SP B requests an assertion from IDP
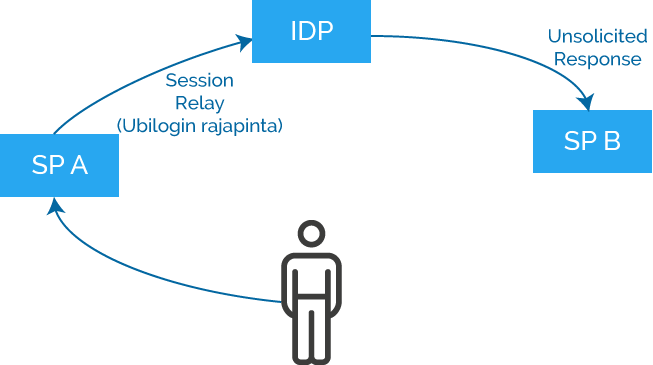
- Unsolicited Response sequence enables implementation of push functionality
- In the picture SP A requests IDP to send an Assertion to SP B
- SP B receives an Unsolicited Response message, i.e. a message it has not requested
Application integration methods:
In this lab we used SAML for integration. There are many compatibility flags to integrate diverse SAML applications
Other integration methods can be found under the link below.
Part 2: OpenID Connect integration
One of the main goals to installing SmartPlan application is to use it for testing any future configurations you do in the CIAM system.
Alternatively to SmartPlan application you can use a utility called OpenID Connect Tester.
The main differences are:
- It's based on OpenID Connect, instead of SAML.
- You don't need to install anything on the machine, everything is configured in the browser.
On this exercise, after you configure OpenID Connect Tester you will be able to analyze all the steps of an Authorization Code Flow.
For more information about this utility, visit OpenID Connect Tester GitHub page.
Instructions
Step1: Configure OpenID Connect Tester
- Open your browser and on a new tab open OpenID Connect Tester: https://psteniusubi.github.io/oidc-tester/
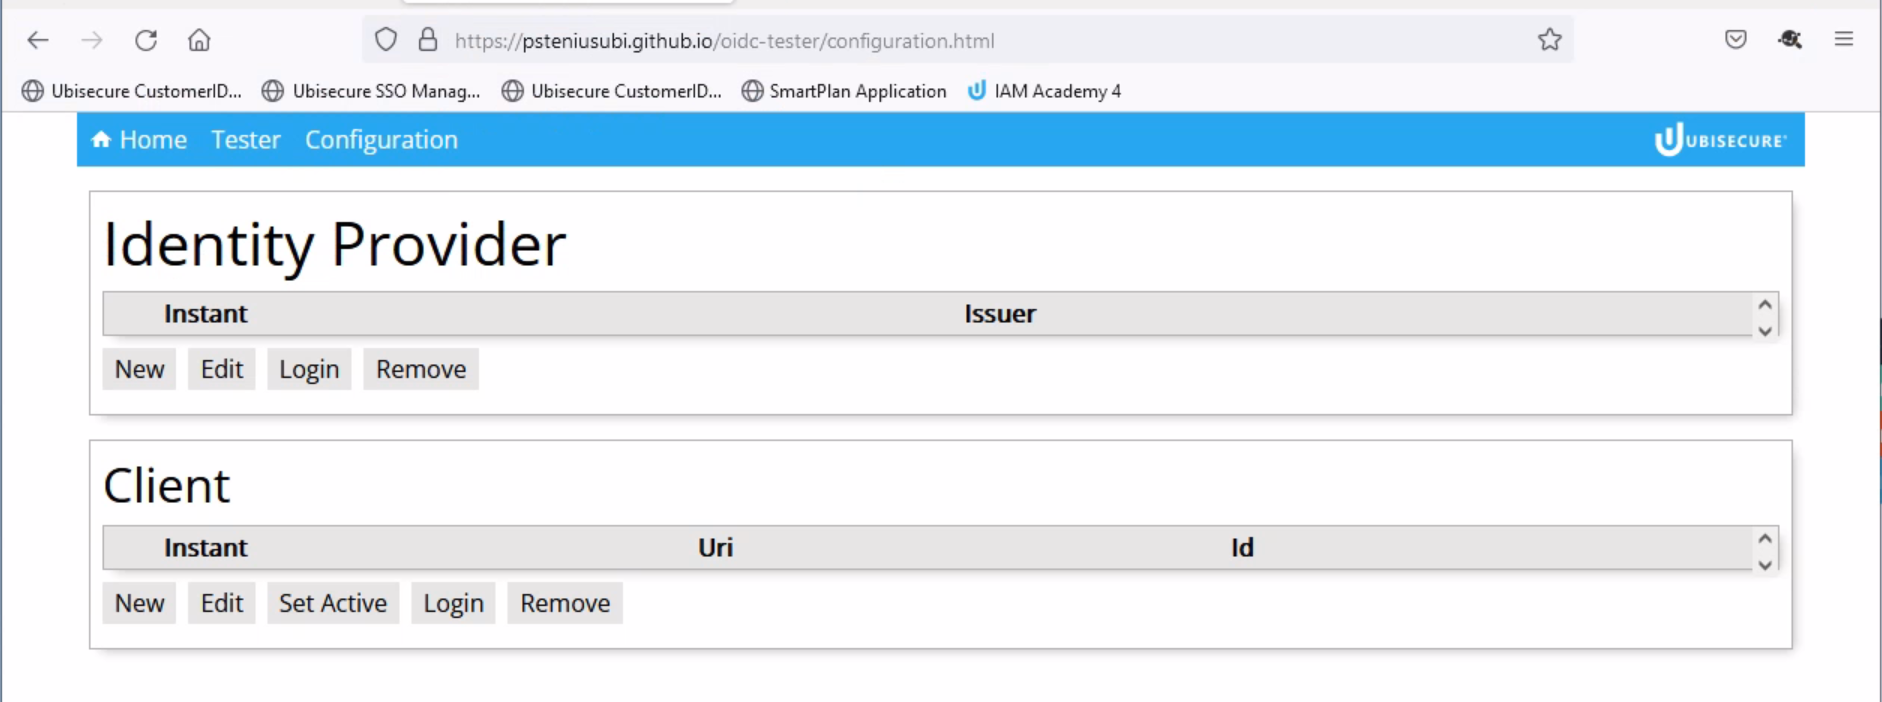
- Click on "Configuration" and you will see the page below (https://psteniusubi.github.io/oidc-tester/configuration.html)
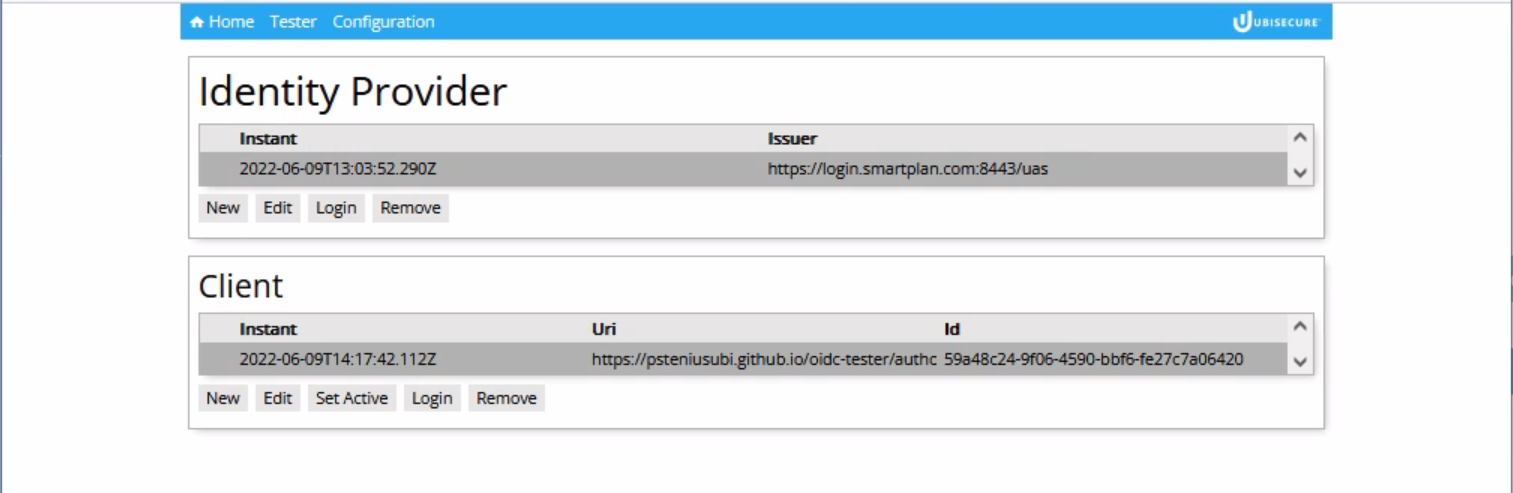
- Below Identity Provider click "New"
- Select "Issuer" field and input provider name: https://login.smartplan.com:8443/uas
- Then click "Fetch metadata"
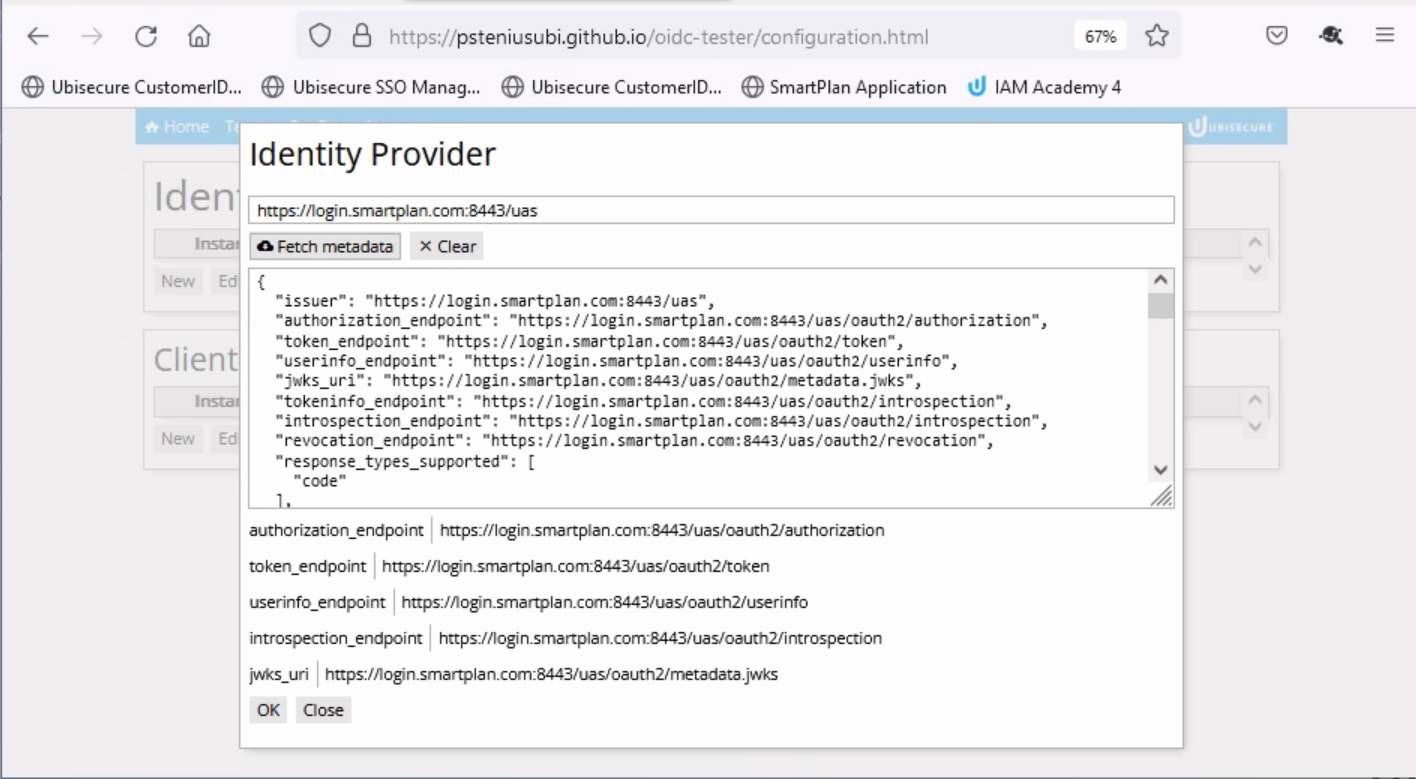
- Click "OK" so this new identity provider metadata will be saved.
- Below Client, click "New." Then click "Copy to Clipboard"
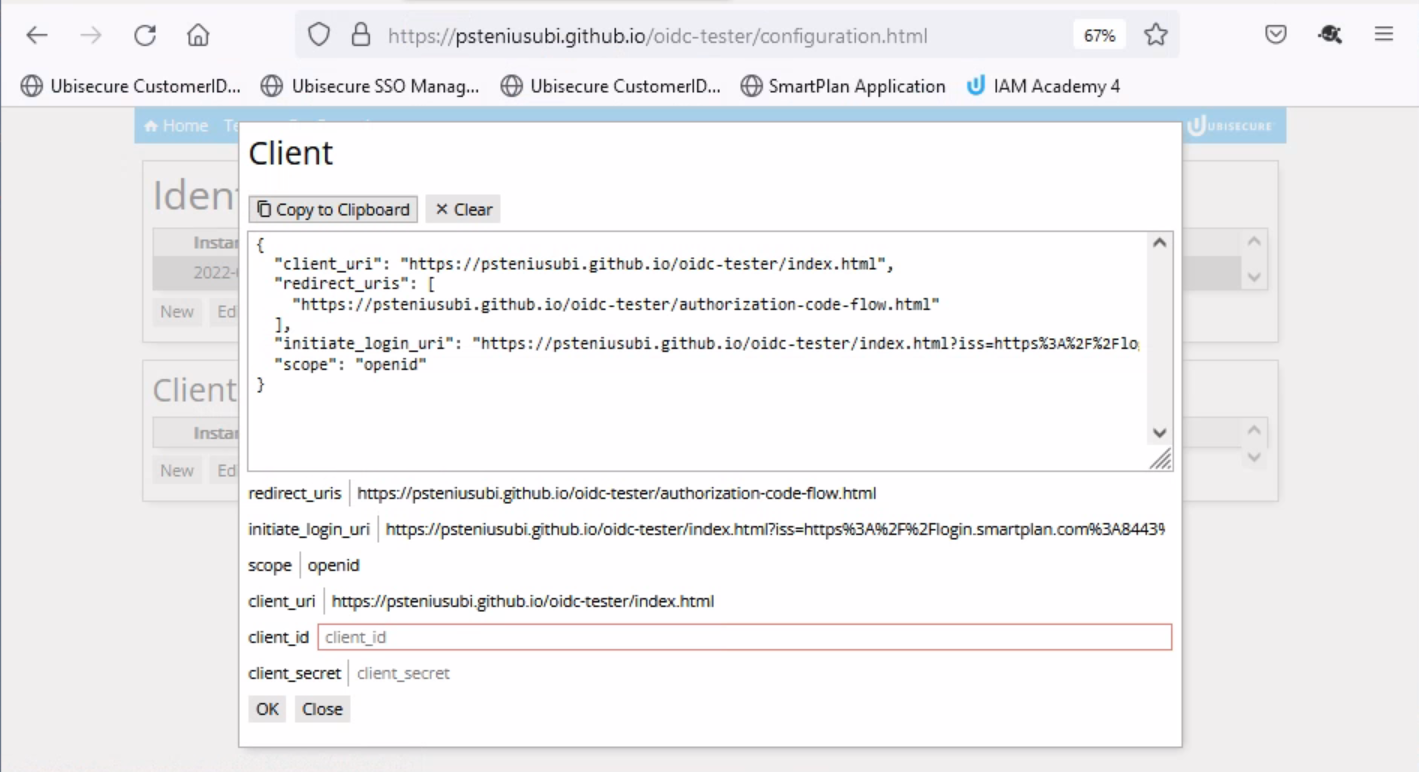
- On a different tab go to SSO Management Console, without closing OpenID Connect Tester.
- Select SmartPlan site, then "Applications" tab, and click on "New Application" button.

On the pop-up window, fill in the fields as seen below.
Technical Name: OpenID Connect Tester Application Type: OAuth 2.0 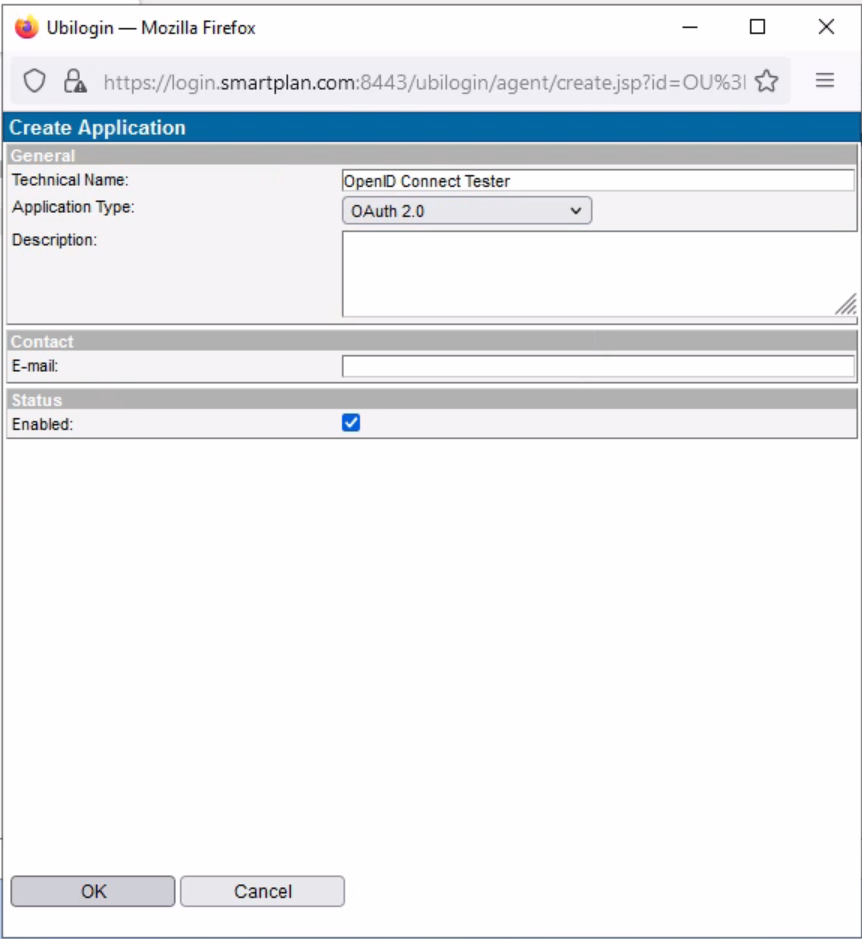
- Tick the "Enabled" box and press OK. Now the client has been created.
- On the "ID and Activation" section, click "Upload"
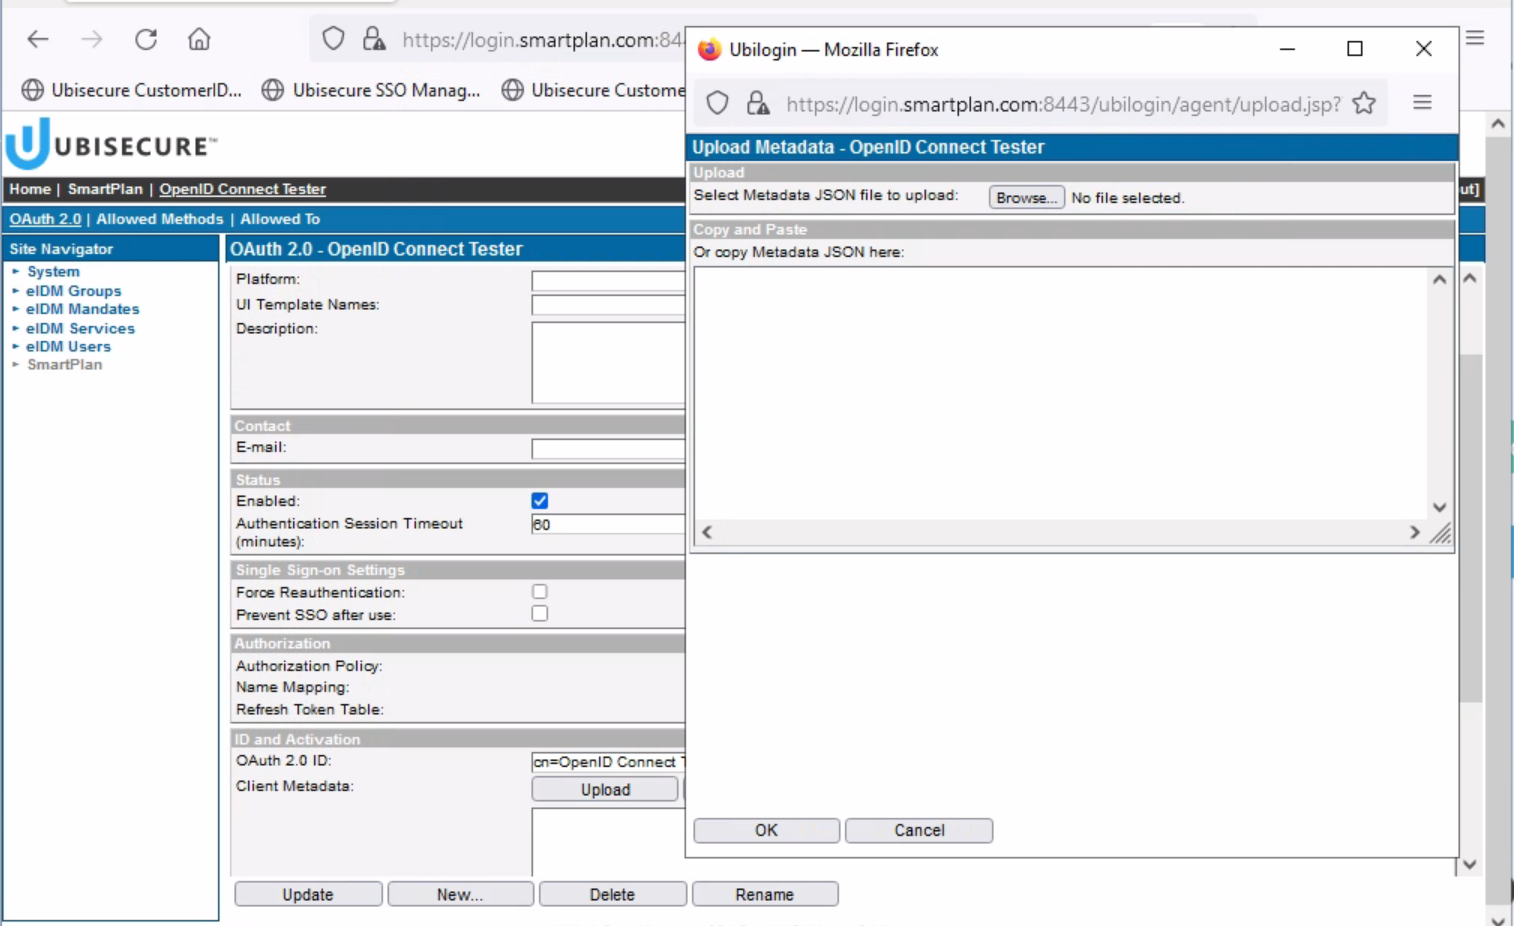
- Now you can enter the metadata from the identity provider.
- As you have copied that metadata from OpenID Connect Tester to the clipboard, simply paste (Control + v) to the box in the pop-up window.
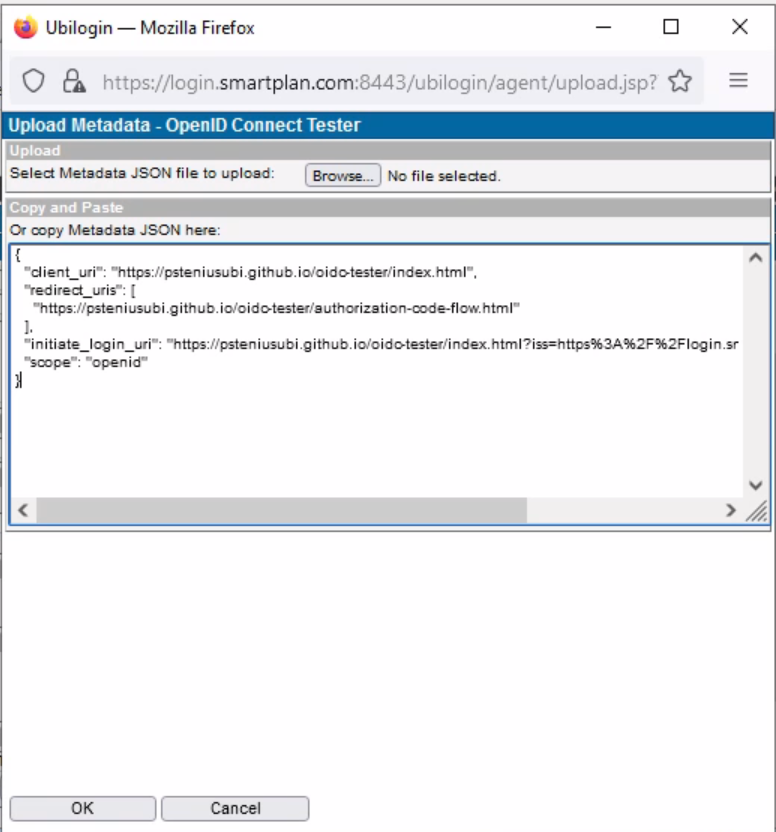
- Press OK button and the metadata will be saved
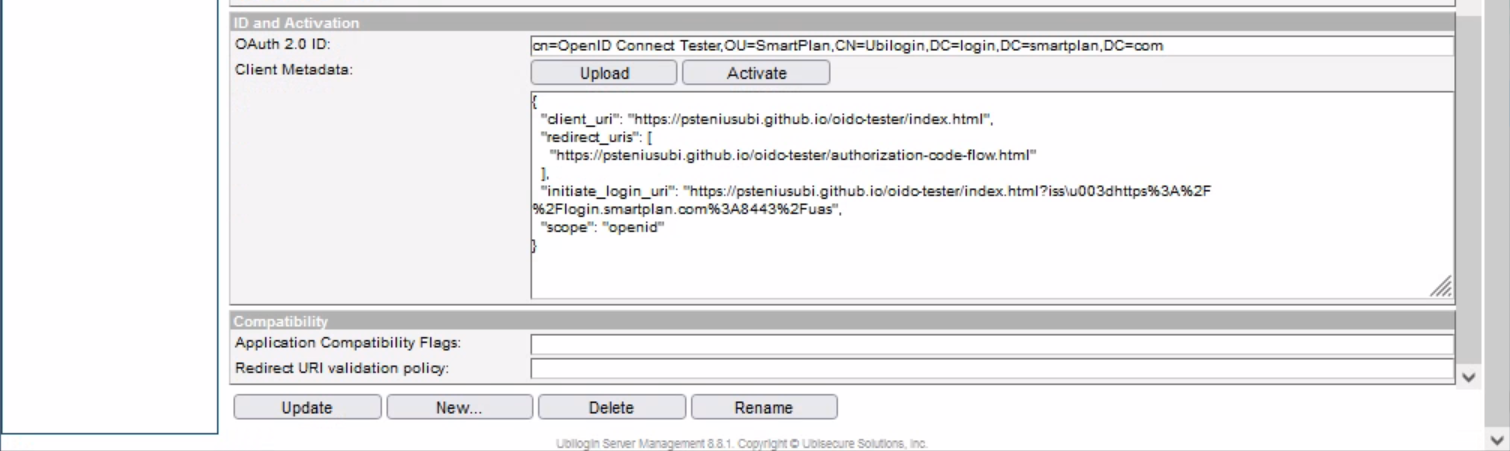
- Now press "Update" at the bottom.
- Also, on the same "ID and Activation" section, press "Activate" to generate client metadata.
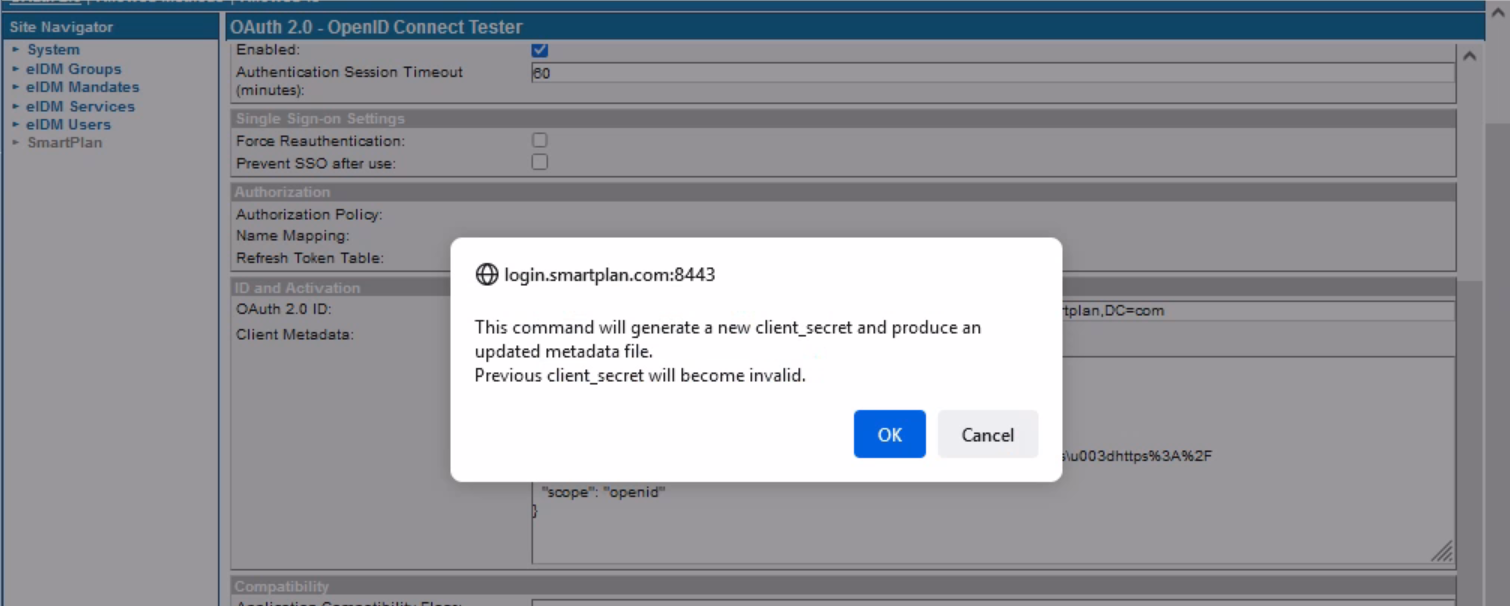
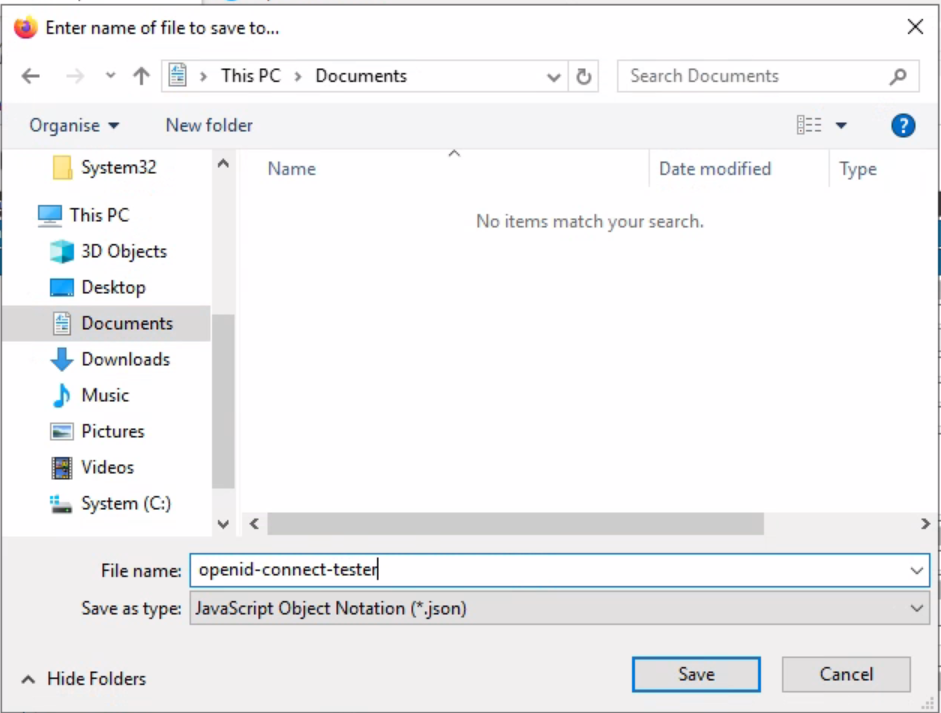
- Save the generated metadata file as openid-connect-tester.json on the disk, for instance on your Documents folder.
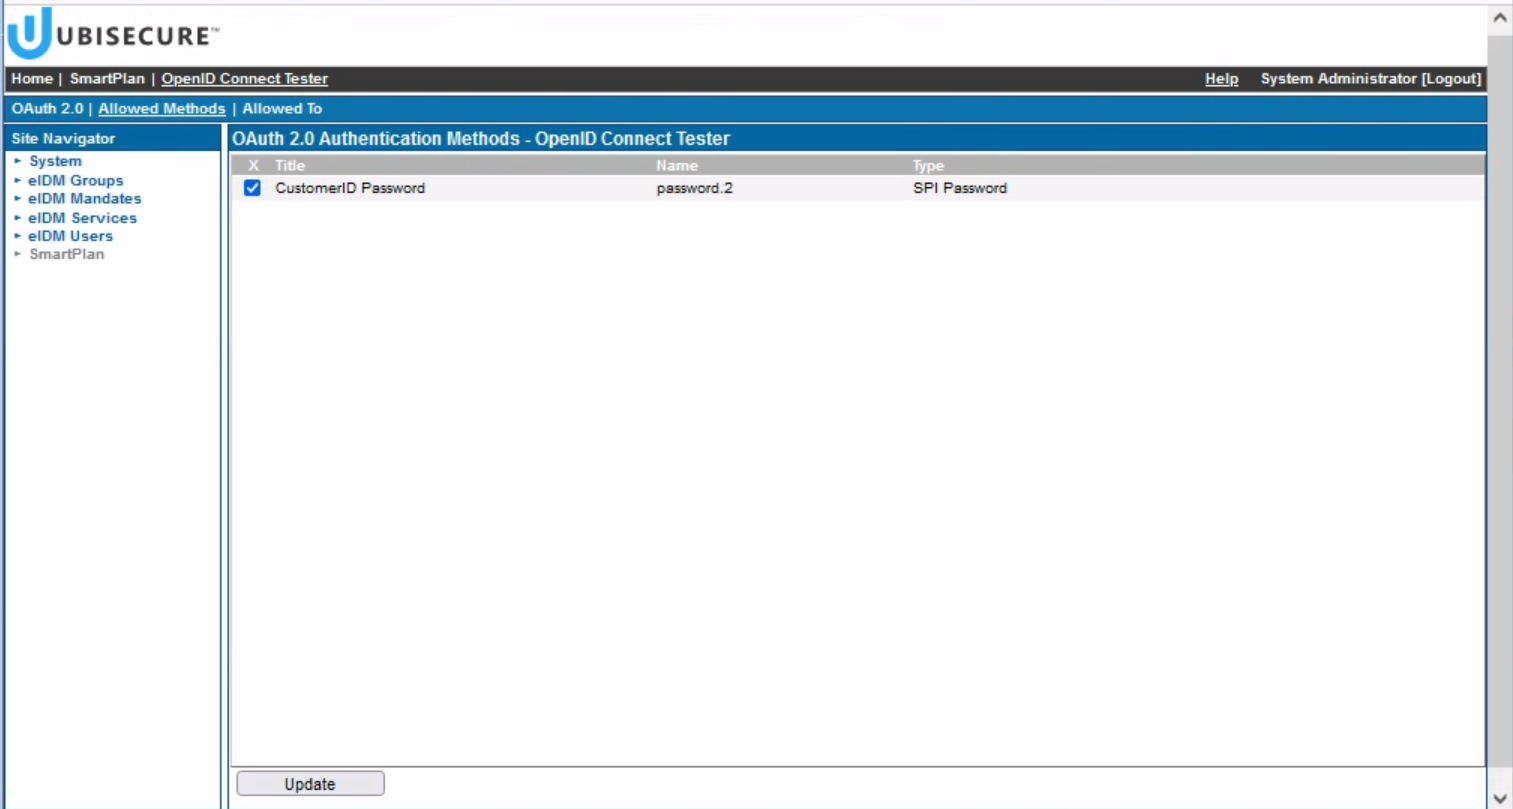
- Click the "Allowed Methods" tab and then tick on "CustomerID Password" box. Then press "Update" button
- Next, click on "Allowed To" tab.
- Press "Add" button.
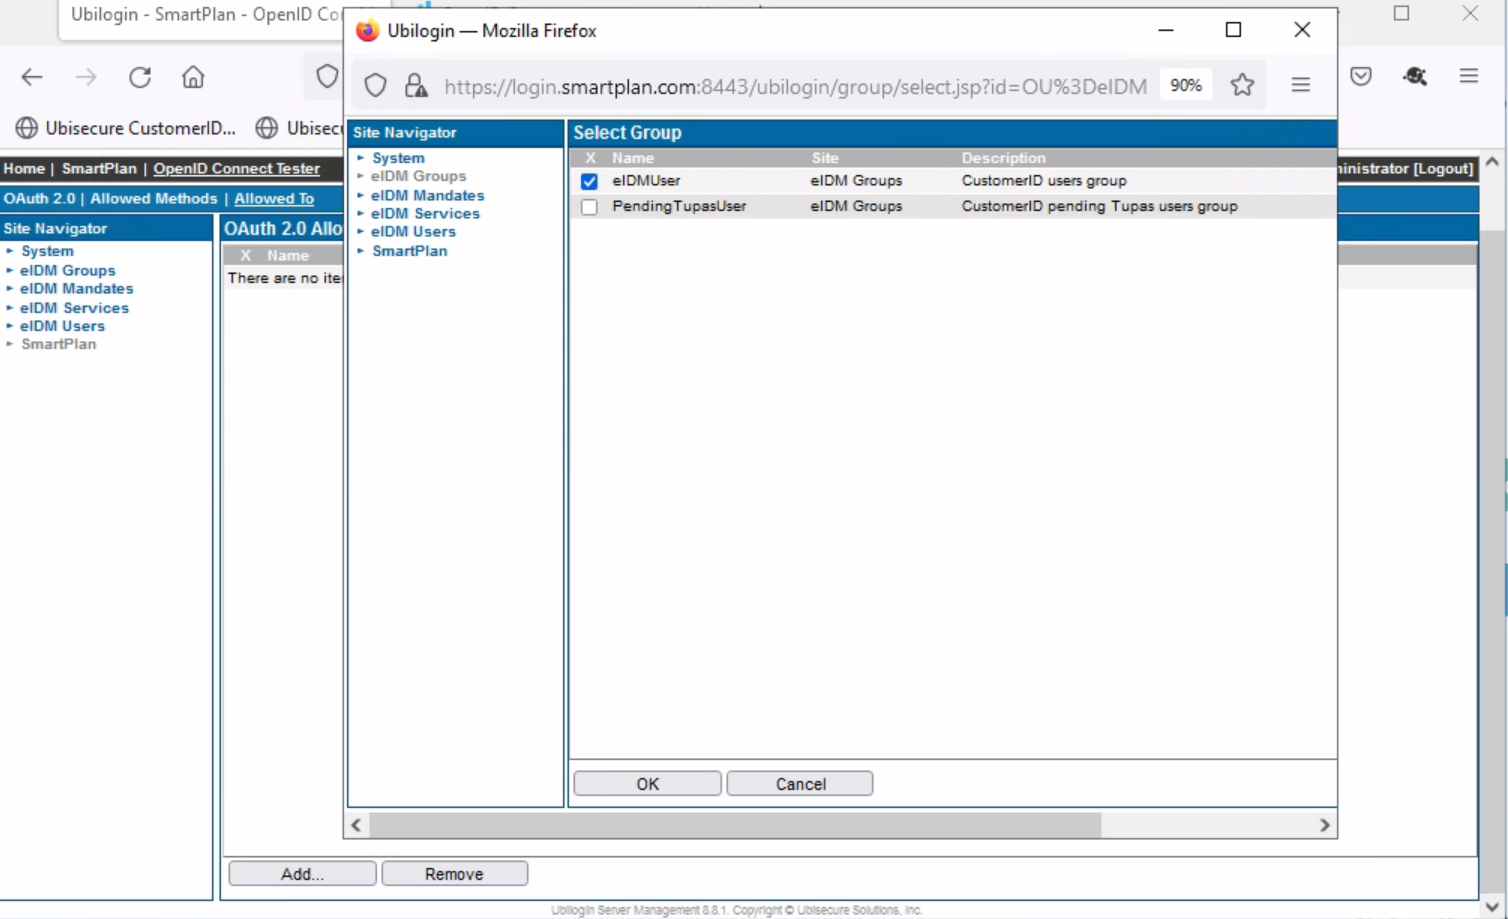
- Once the pop-up window appears, go to Site Navigator and select "eIDM Groups." Tick on "eIDMUser" and press OK.
- Open the file openid-connect-tester.json with Notepad++ to see the generated values of client_id and client_secret.
- Select All and copy to clipboard.
- Go back to OpenID Connect Tester, and while still being on Client configuration window press "Clear" button

- Once the box is empty, do paste (Control + v) into the box. This will fill all the required fields of client configuration, including client_id and client_secret.

- Finally, press OK button to save the full client configuration.
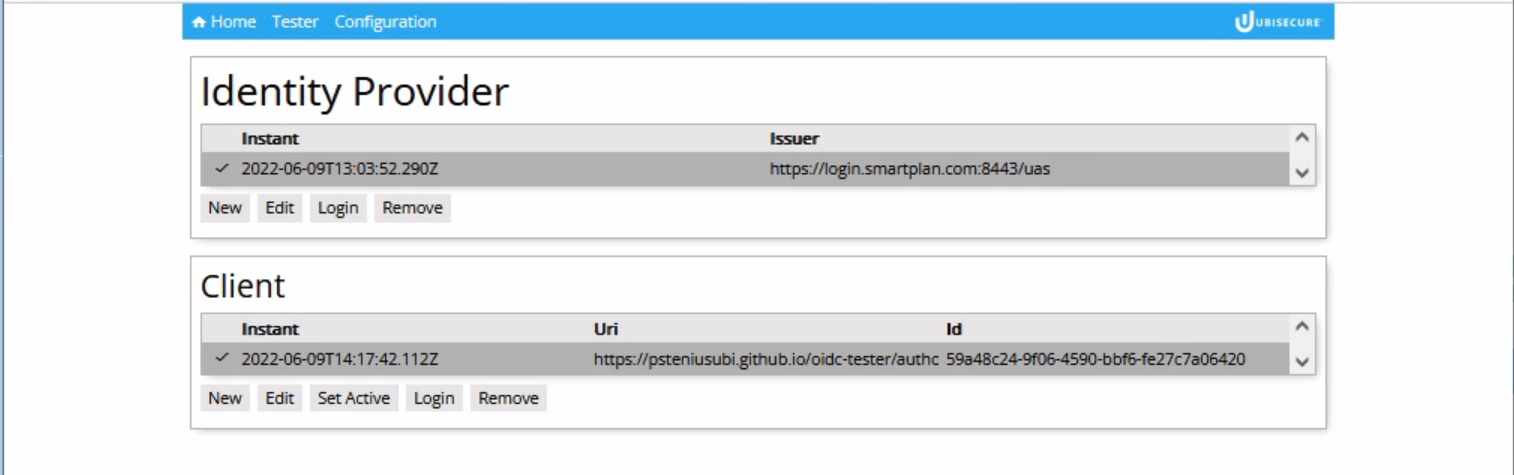
- Now click "Set Active" to make this configuration active.
Step 2: Use OpenID Connect Tester
- Now that all the configuration is done, you're ready to use the application.
- Click "Tester" tab (opens https://psteniusubi.github.io/oidc-tester/authorization-code-flow.html)
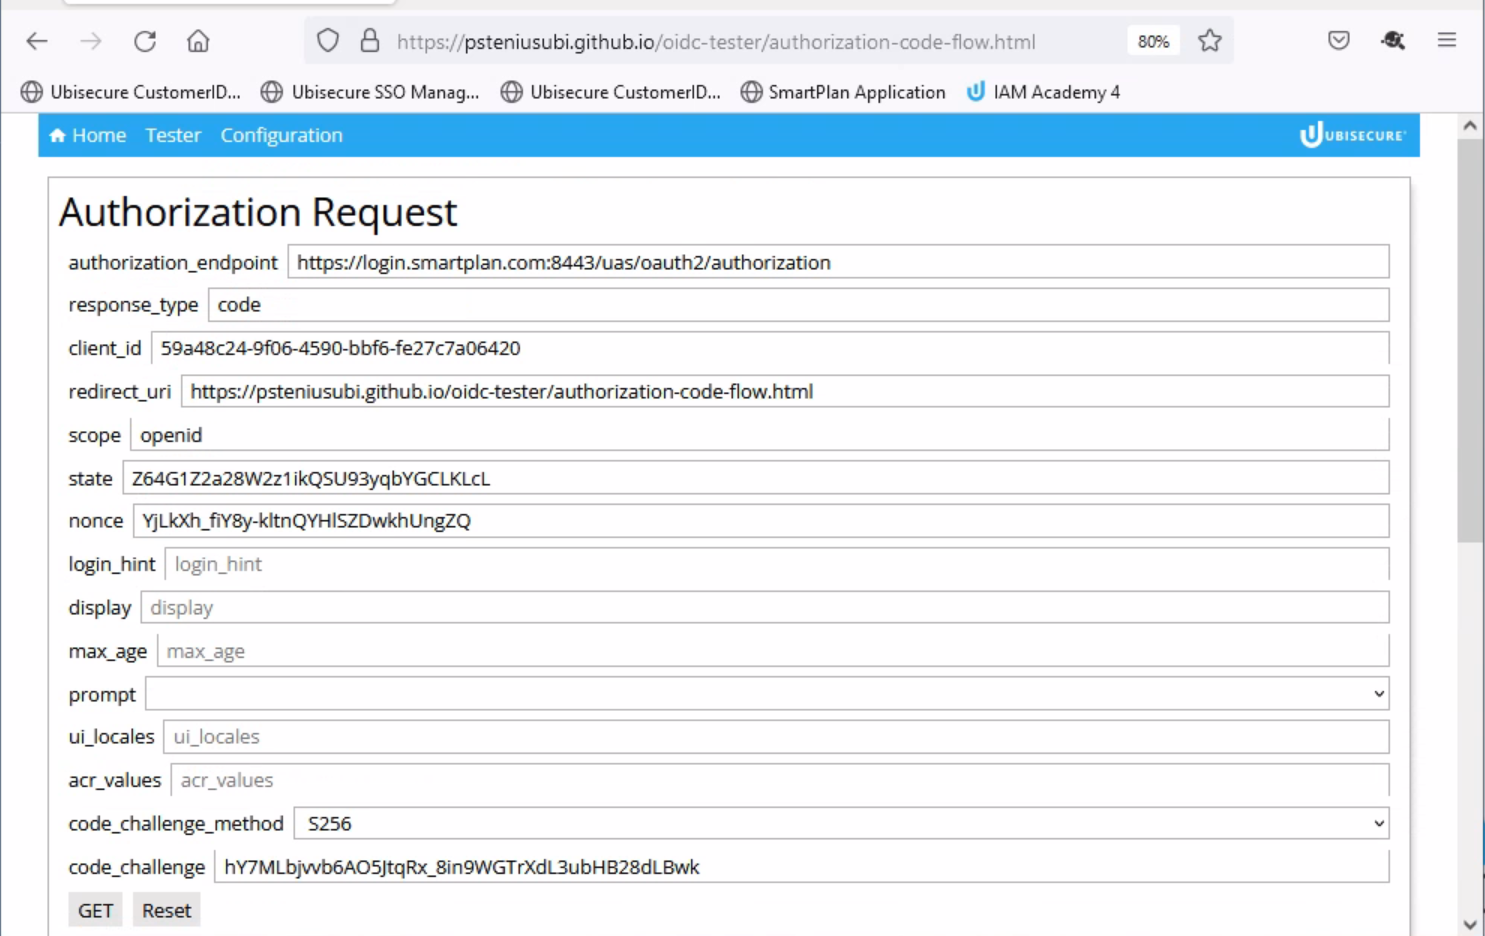
- From now on we will do the authorization code flow, whose first step is an Authorization Request.
- First observe the parameters of the authorization request, and then press "GET" button.
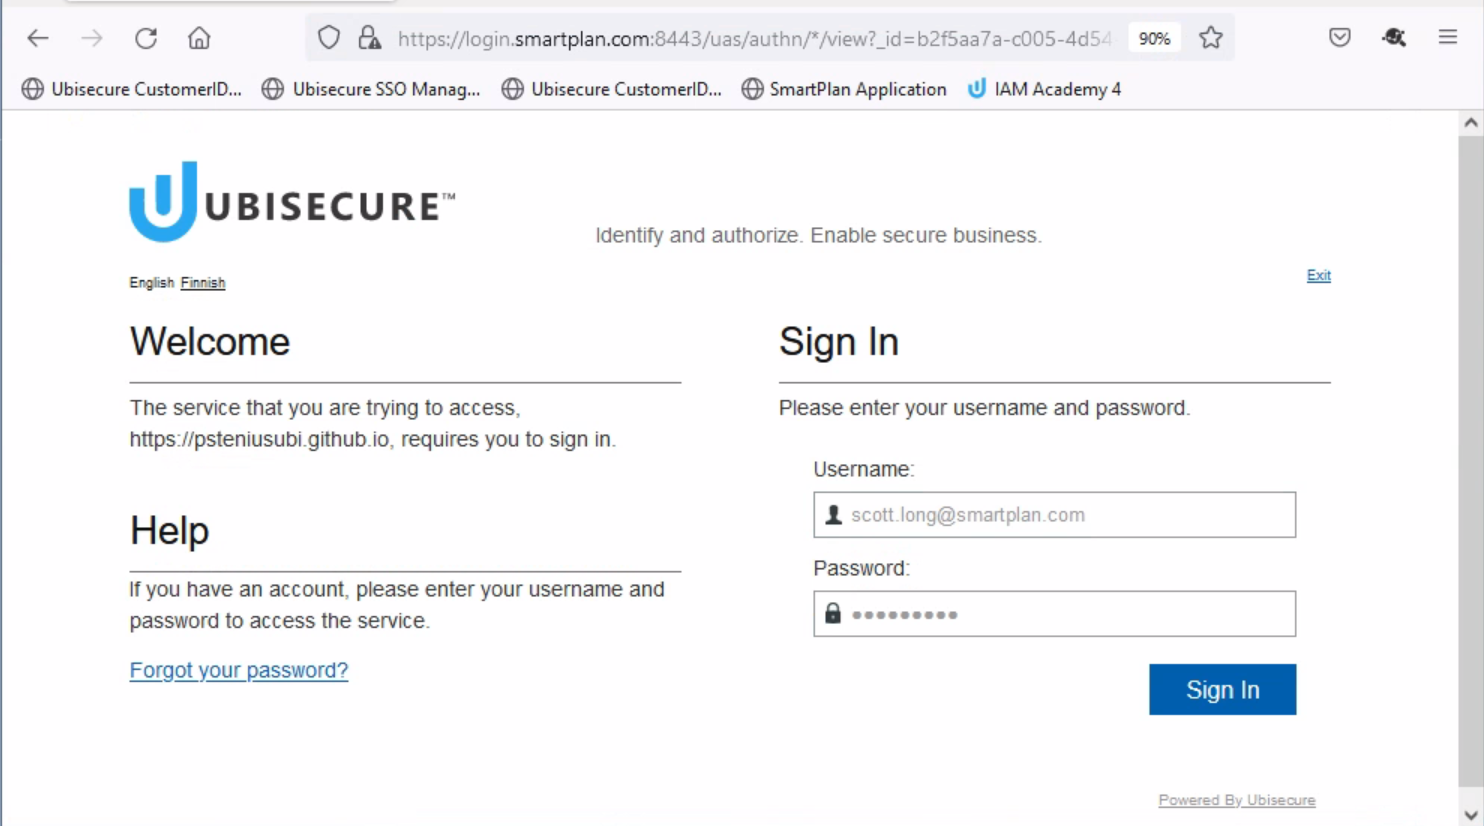
- You will be redirected to a login page.
- Log in using scott.long@smartplan.com credentials.
- After a successful authentication you will see the value of the authorization code ("code" field), and the pre-filled fields for a token request.
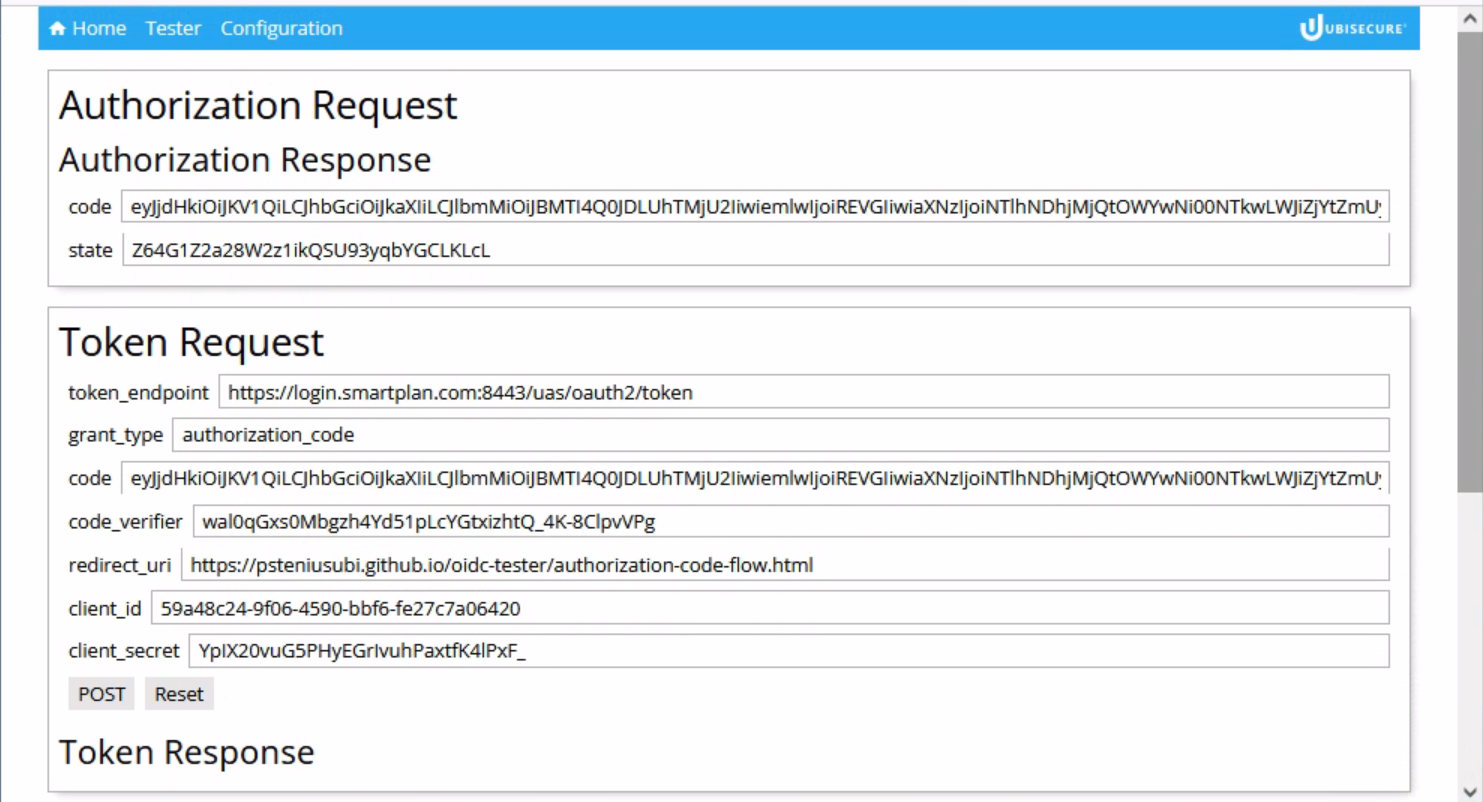
- Now press "POST" to request an access token. As a result you will see the access token and ID token.
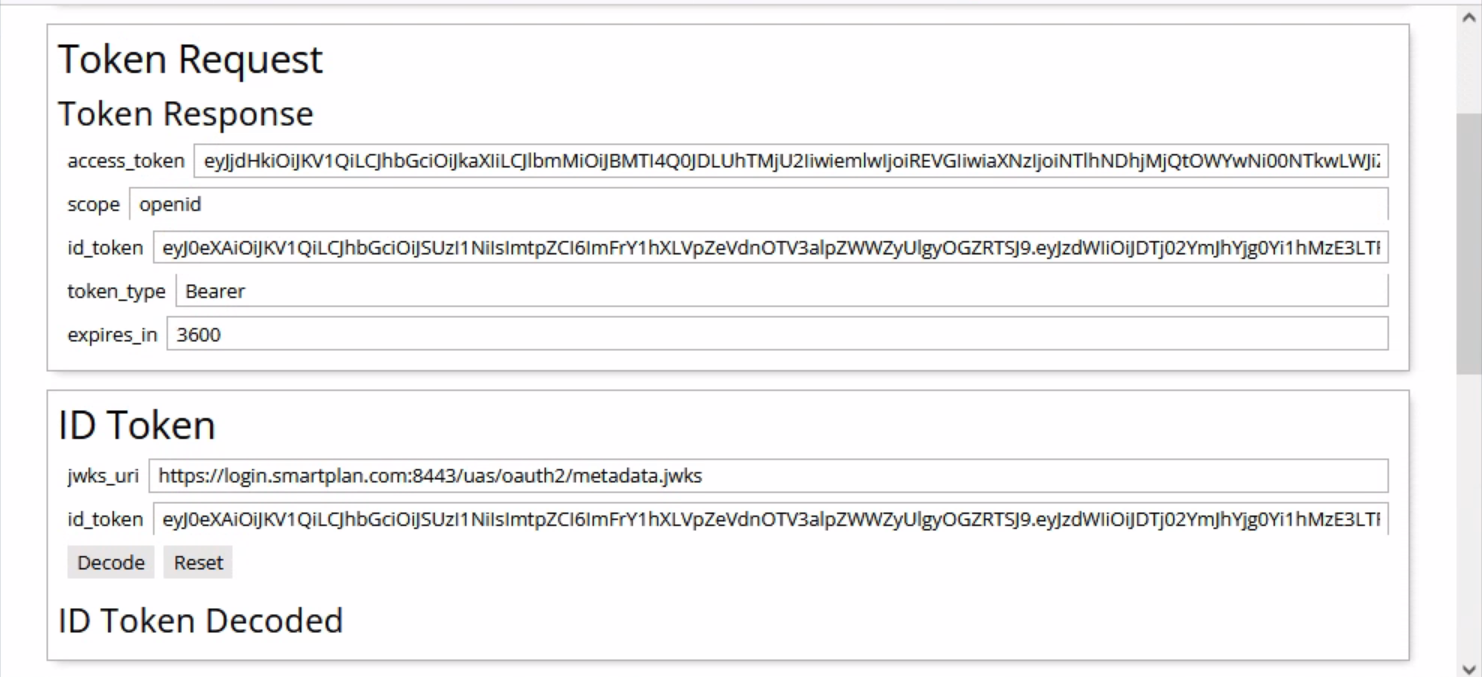
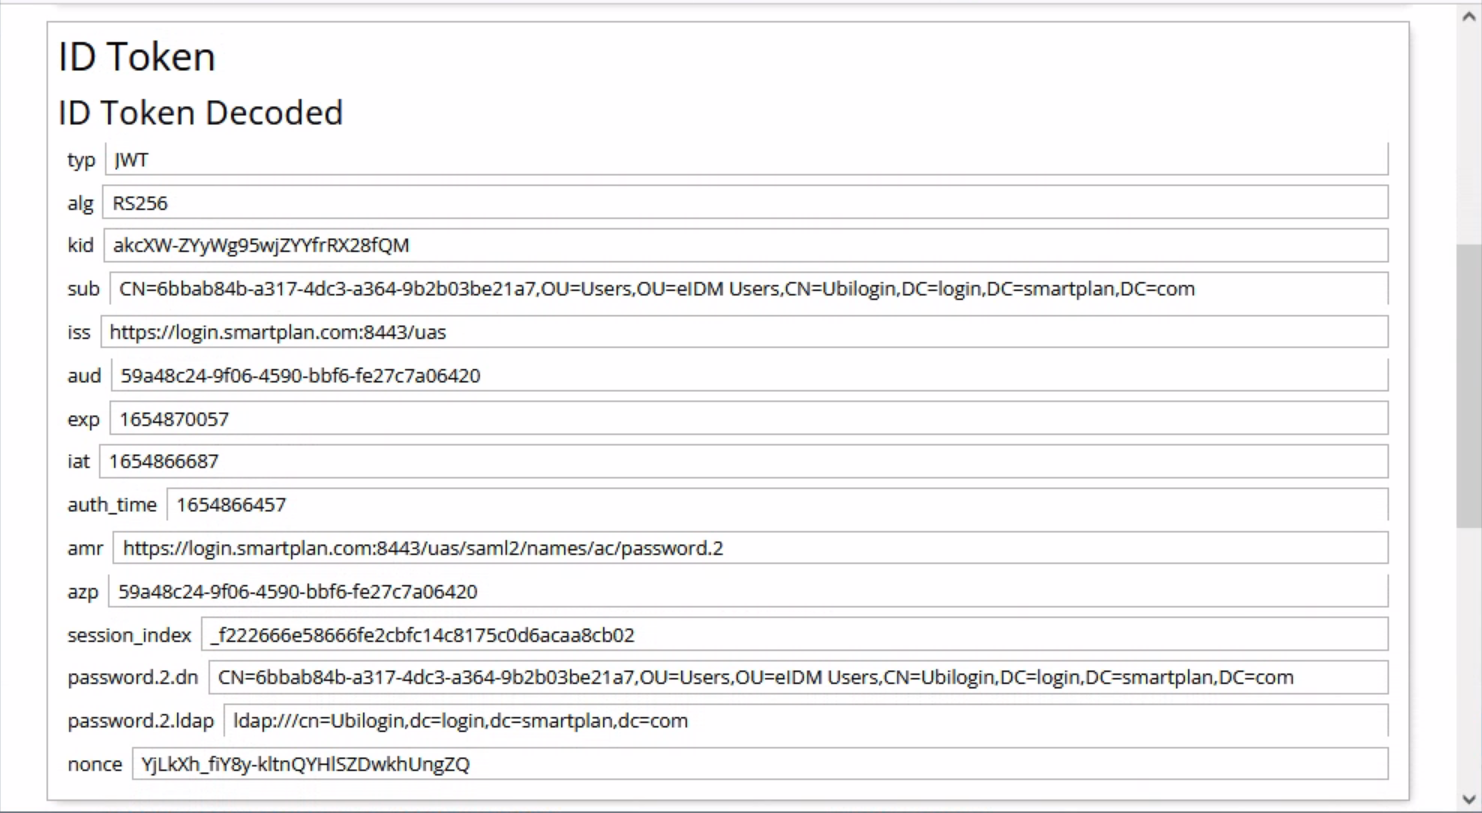
- Press "Decode" button to see the values inside the ID token.
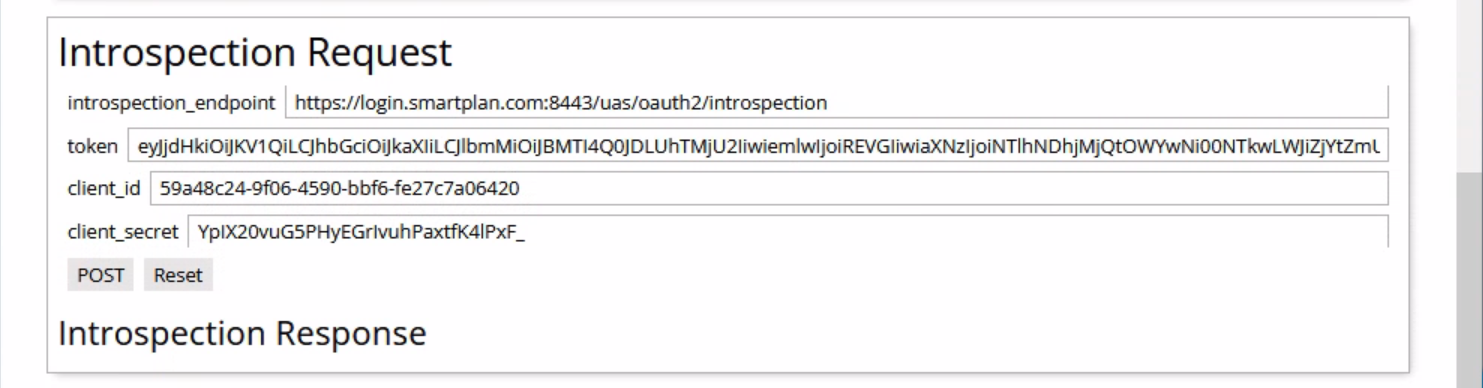
- Finally, on "Introspection Request" section, click on "POST" button. That will send a POST call to the introspection endpoint in order to validate the ID token.
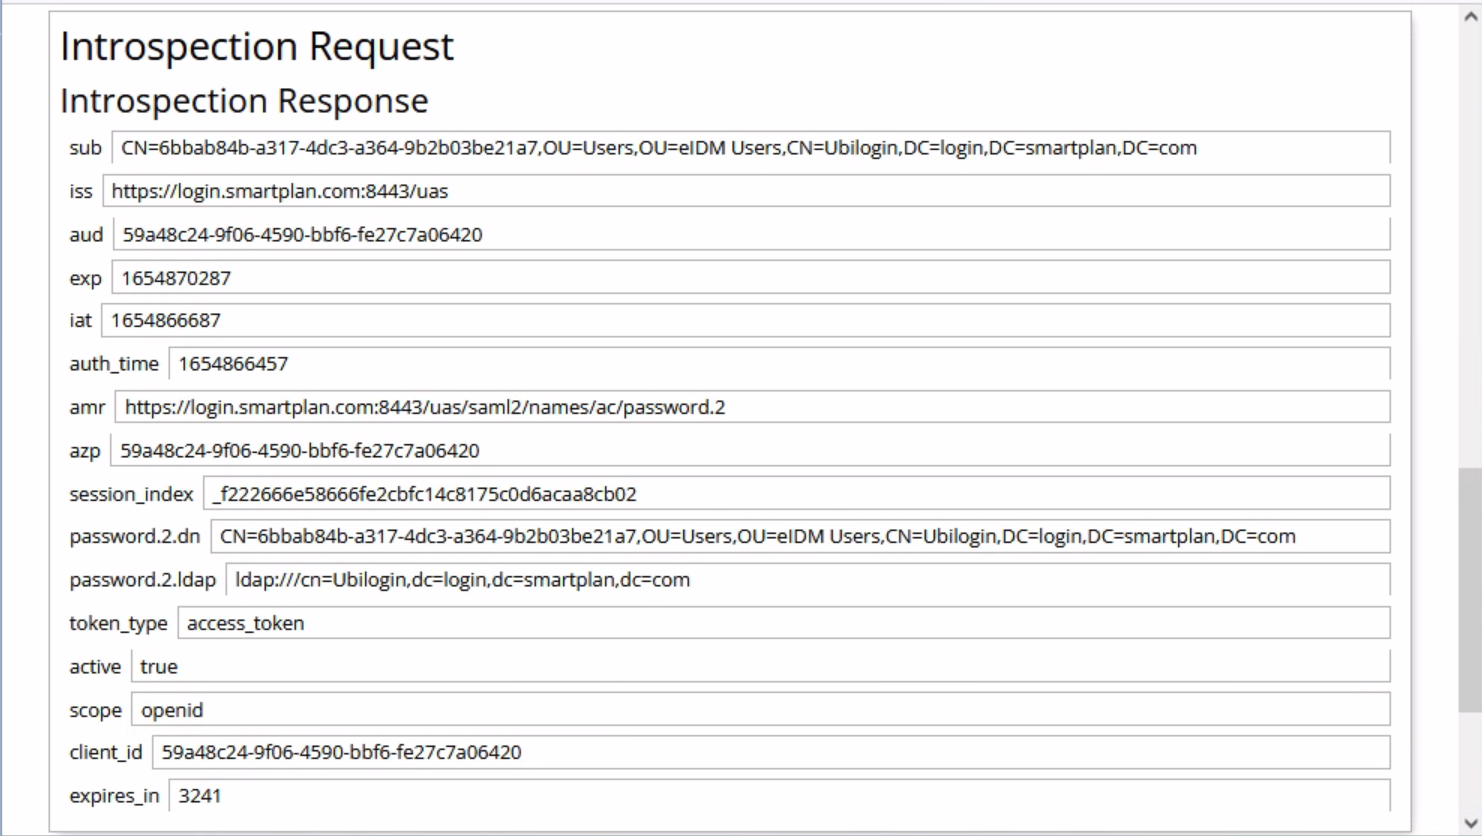
- A successful introspection will show the following values.
- Now you have completed the OpenID Connect authorization code flow.