Application Registration Walkthrough
This Steplist document describes how you can Register a new Application to an Identity Platform using the Trial Console tool. For this procedure, there is an OpenID Connect Tester tool available if you do not have your own Application available. Note, the Registration process is done by using OpenID Connect protocol thus the Application should support it.
Note, pay attention which tool is used in each step, Trial Console or OpenID Connect Tester.
IDaaS Trial Console
Description | Picture |
|---|---|
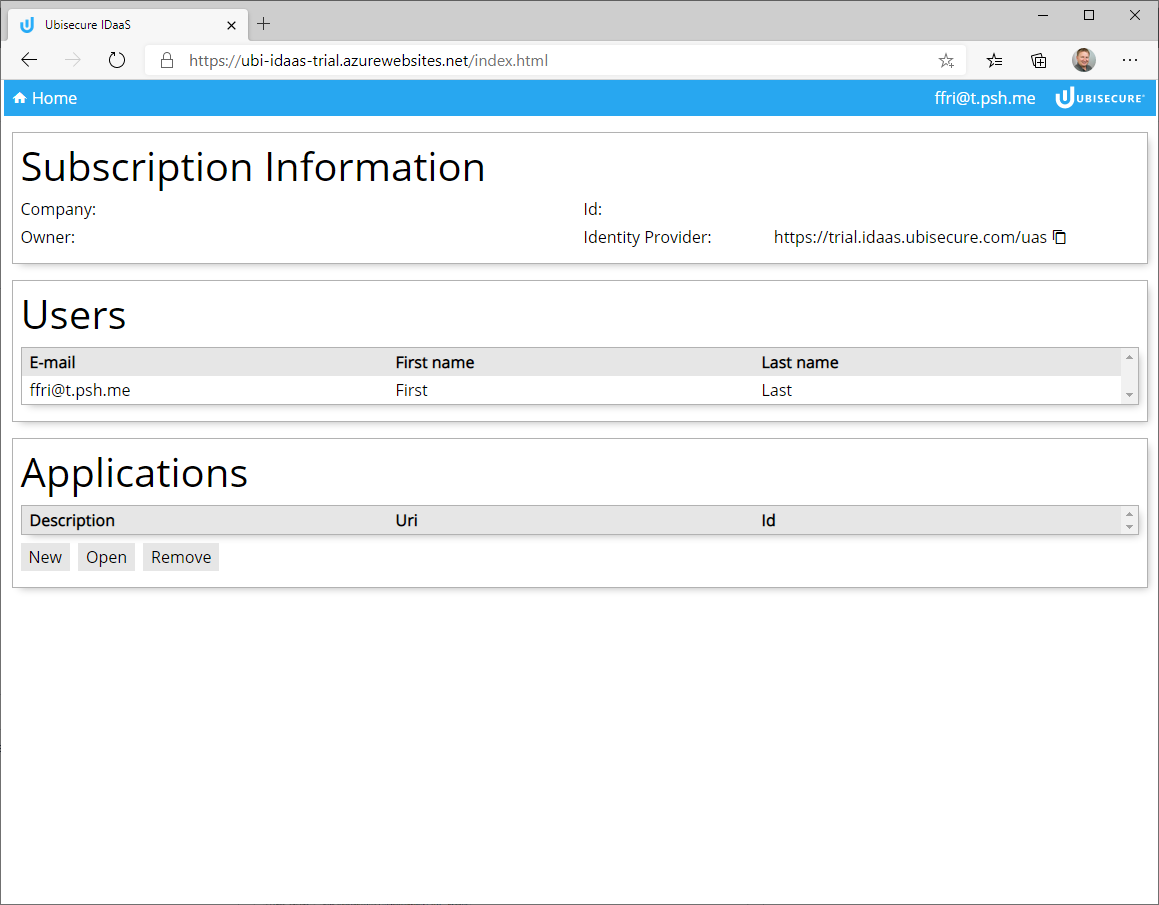
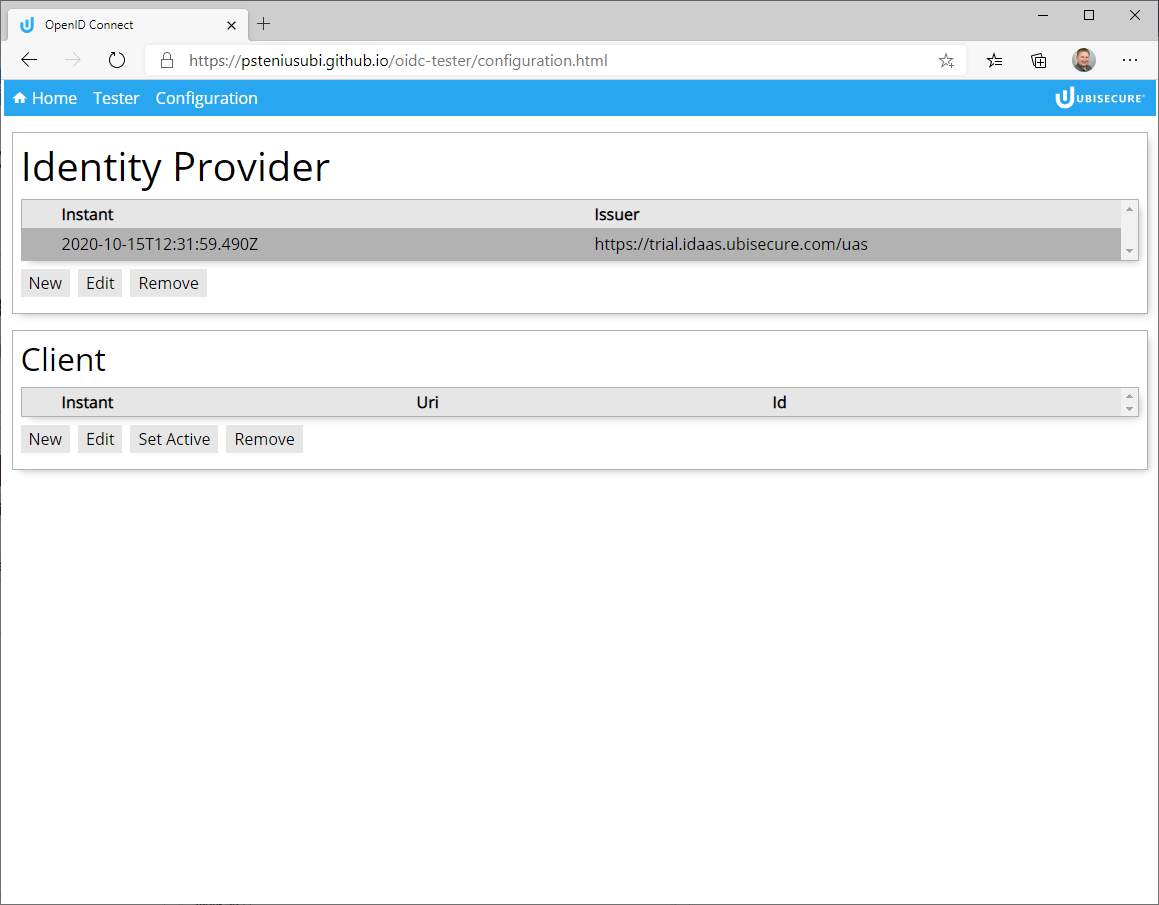
Navigate to Trial Console https://ubi-idaas-trial.azurewebsites.net/index.html (Note, best suited to be used with "New" Edge or Google Chrome browsers). If you aren't currently signed in, please sign-In with your IDaaS Account from Initial Main User Registration walkthrough (click the link if you have not registered an account yet). |
|
| Highlight "Identity Provider" in Trial Console and press Control-C to copy value on clipboard |
|
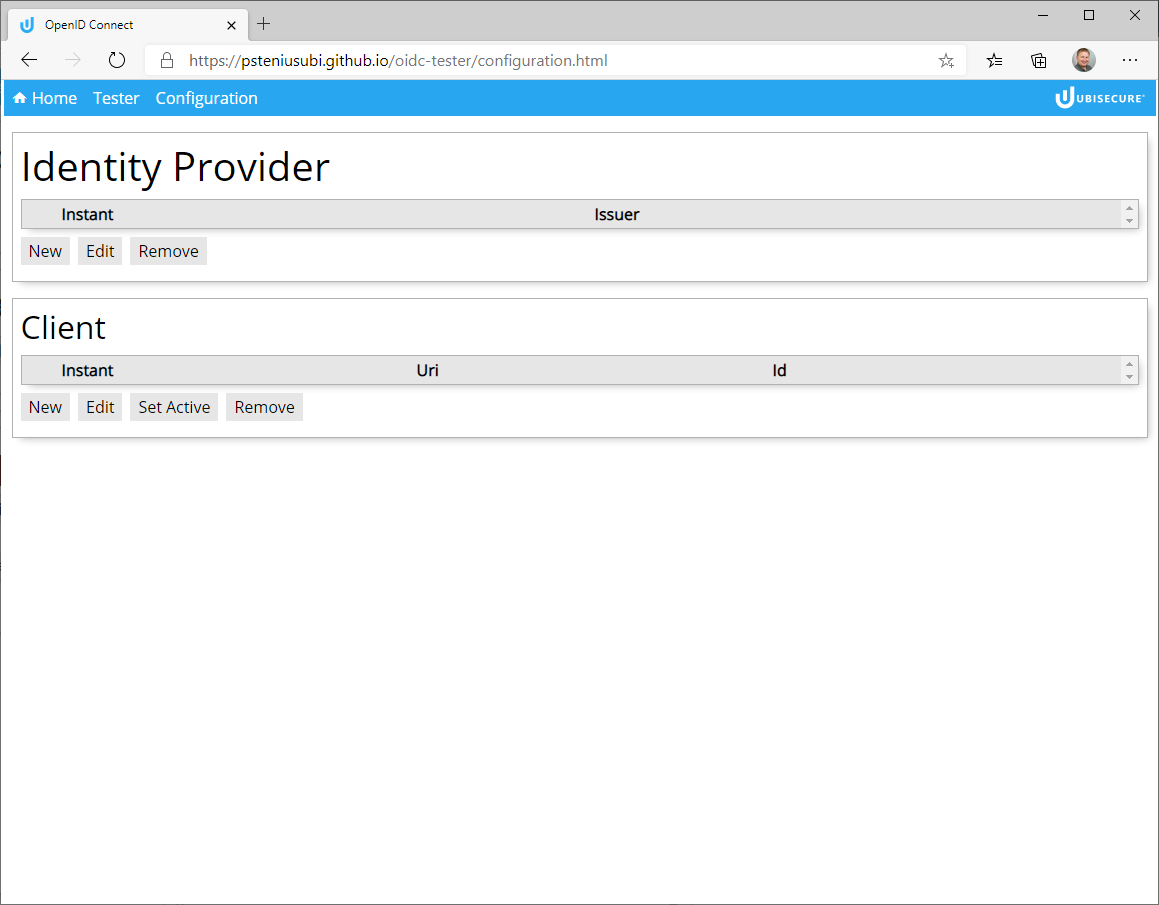
In another tab, navigate to the OpenID Connect Tester configuration page https://psteniusubi.github.io/oidc-tester/configuration.html |
|
Below Identity Provider click "New" |
|
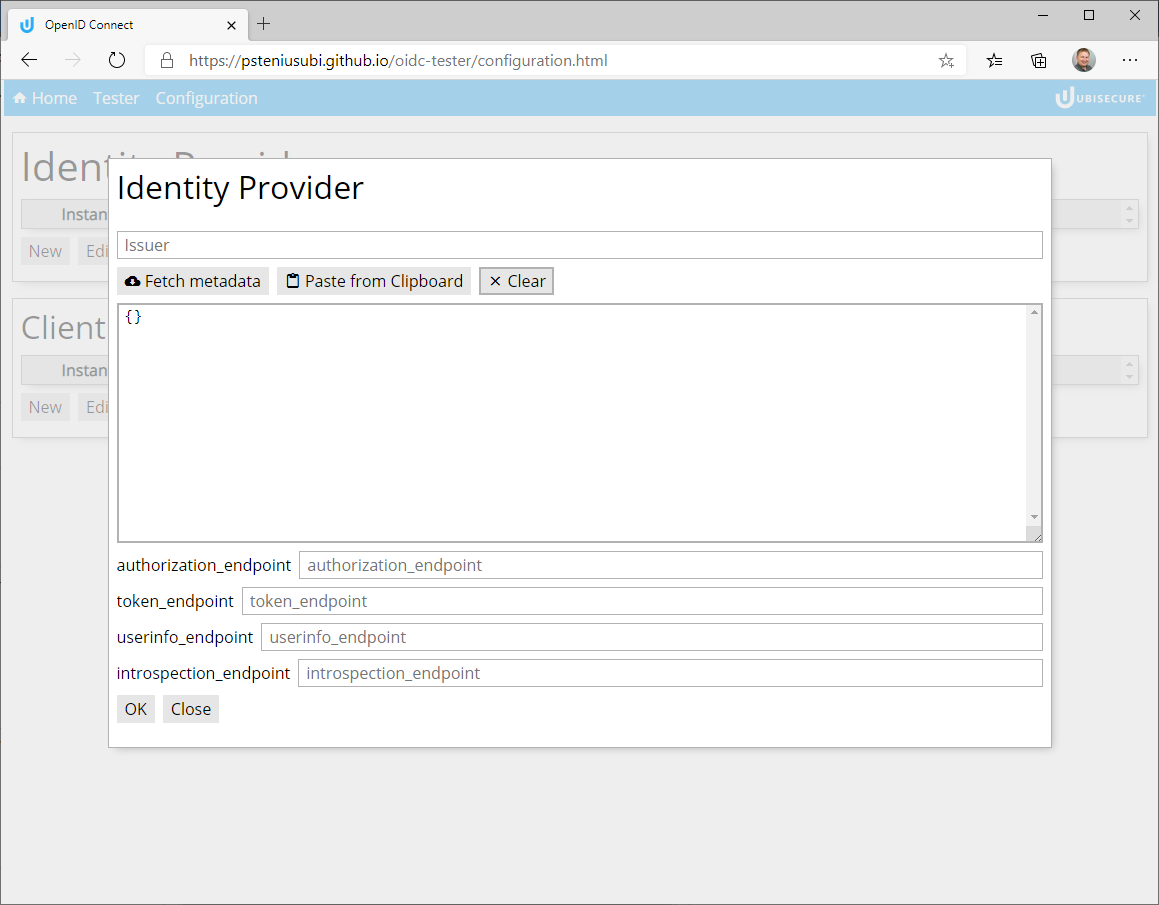
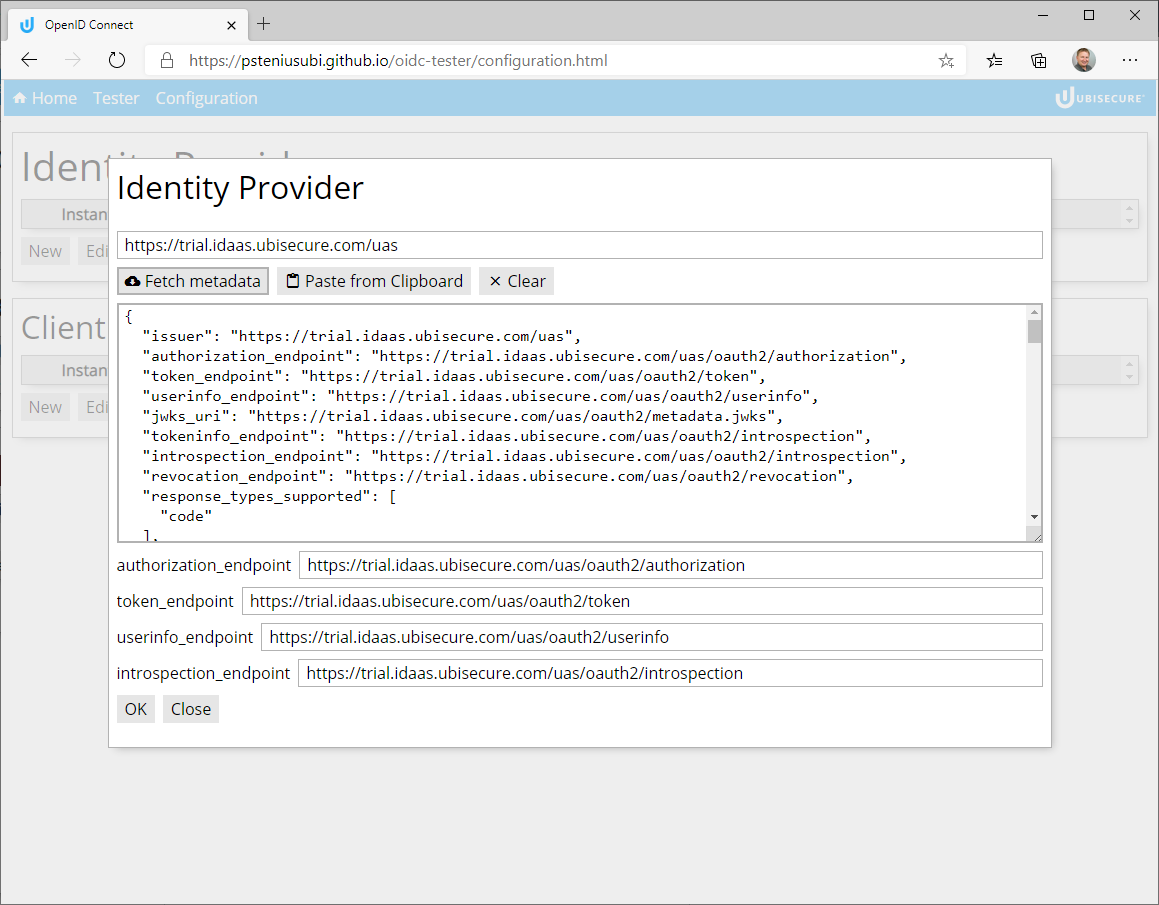
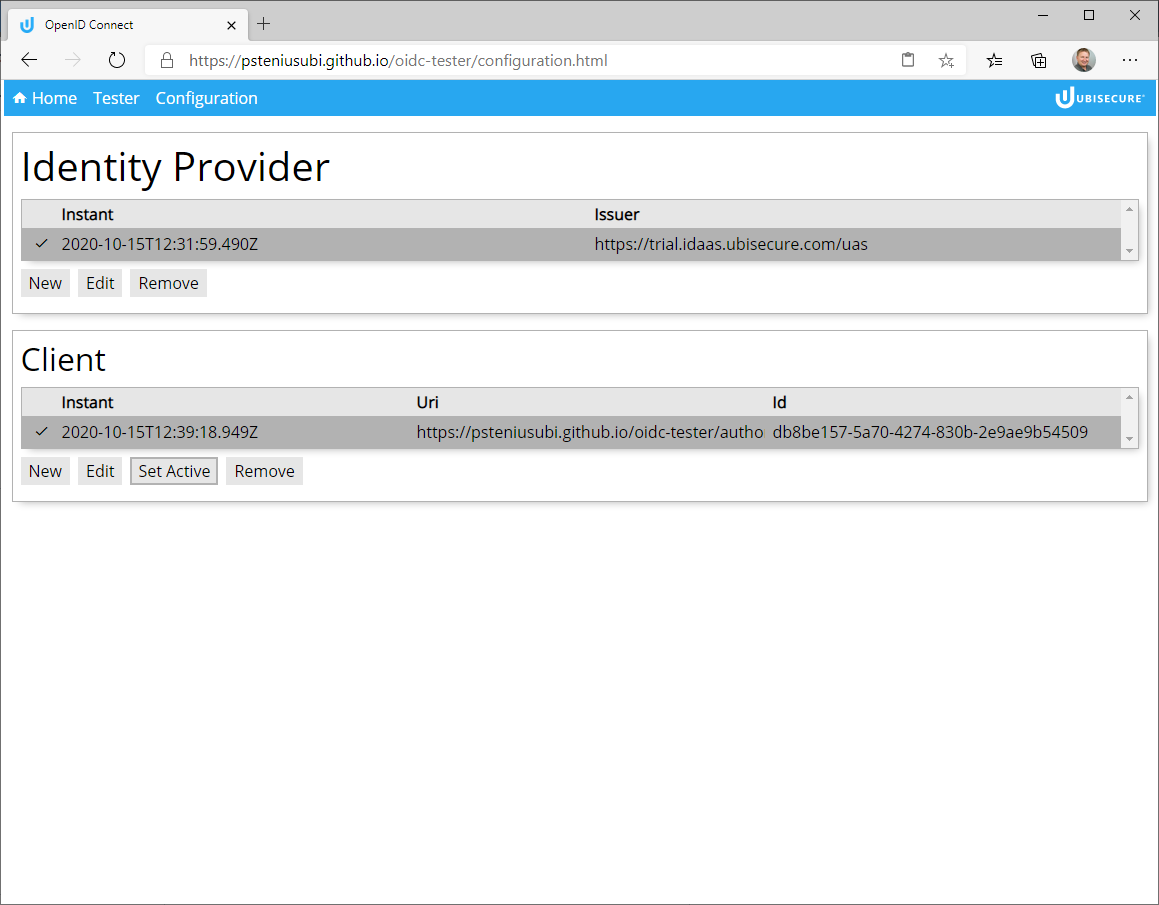
Select "Issuer" field and press Control-V to paste provider name https://trial.idaas.ubisecure.com/uas Then click "Fetch Metadata" |
|
| Click "OK" to save new Identity Provider |
|
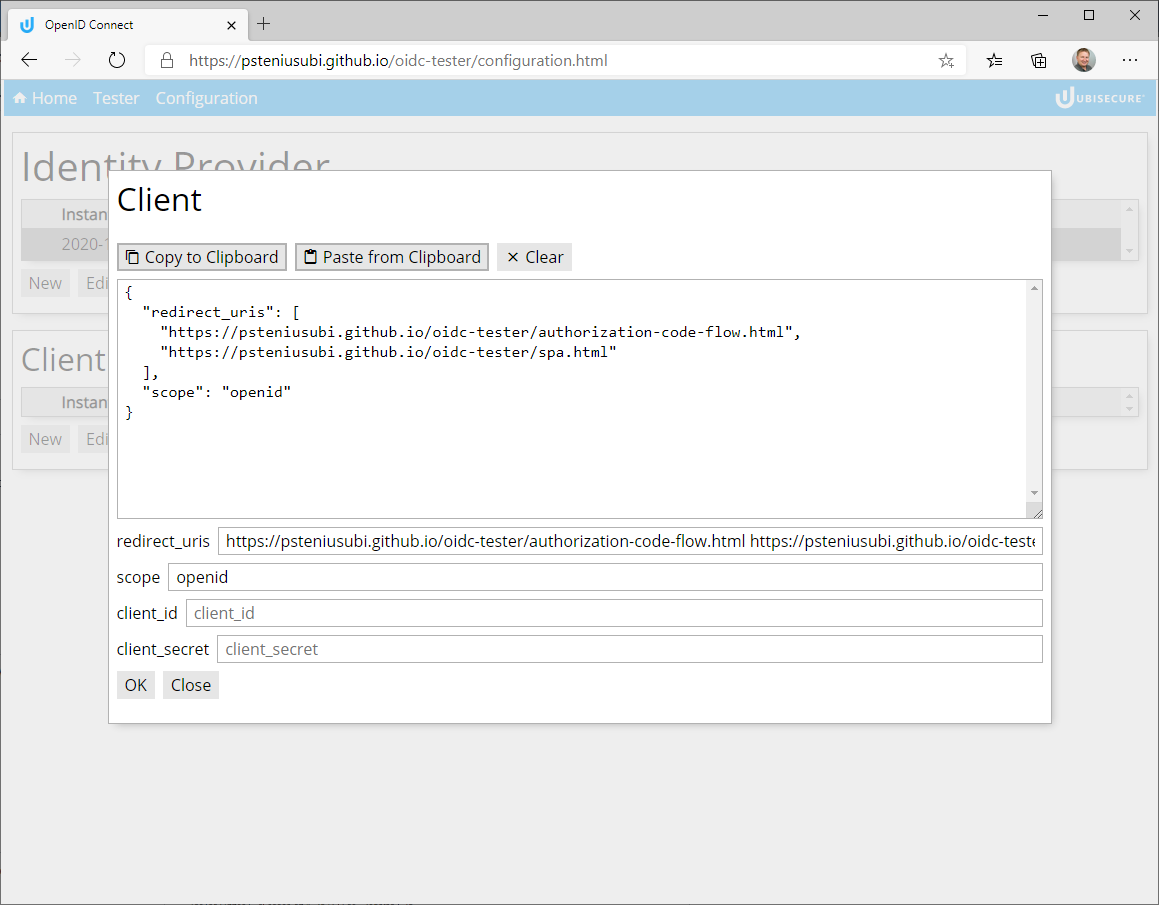
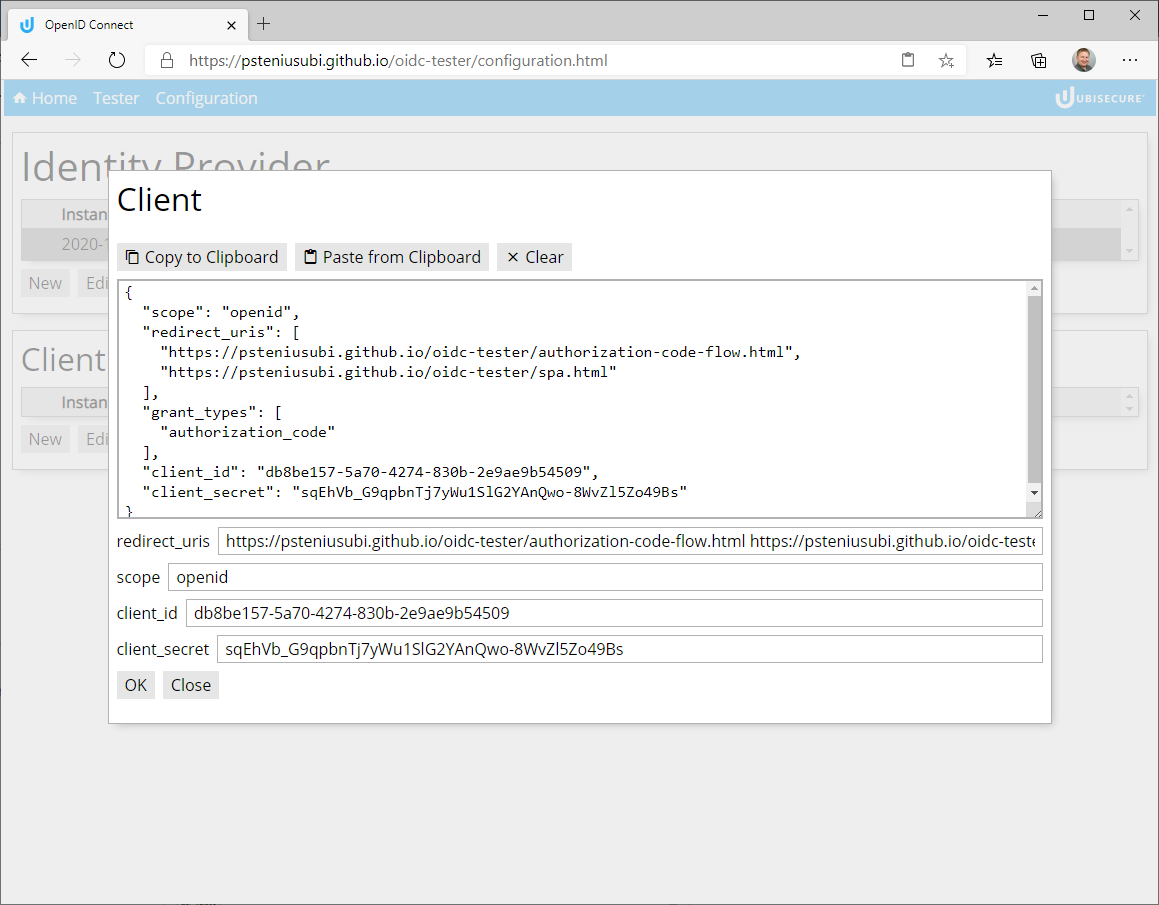
Below Client click "New" Then click "Copy to Clipboard" |
|
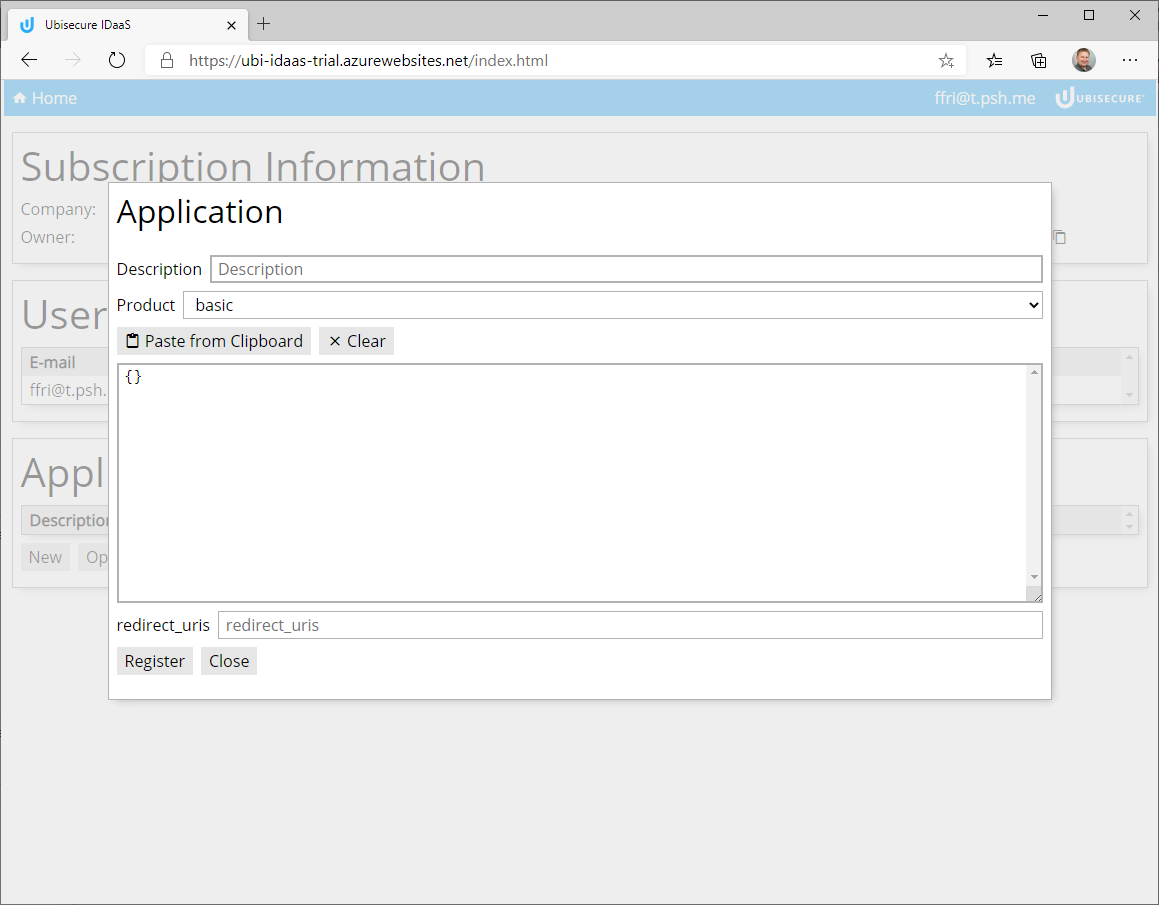
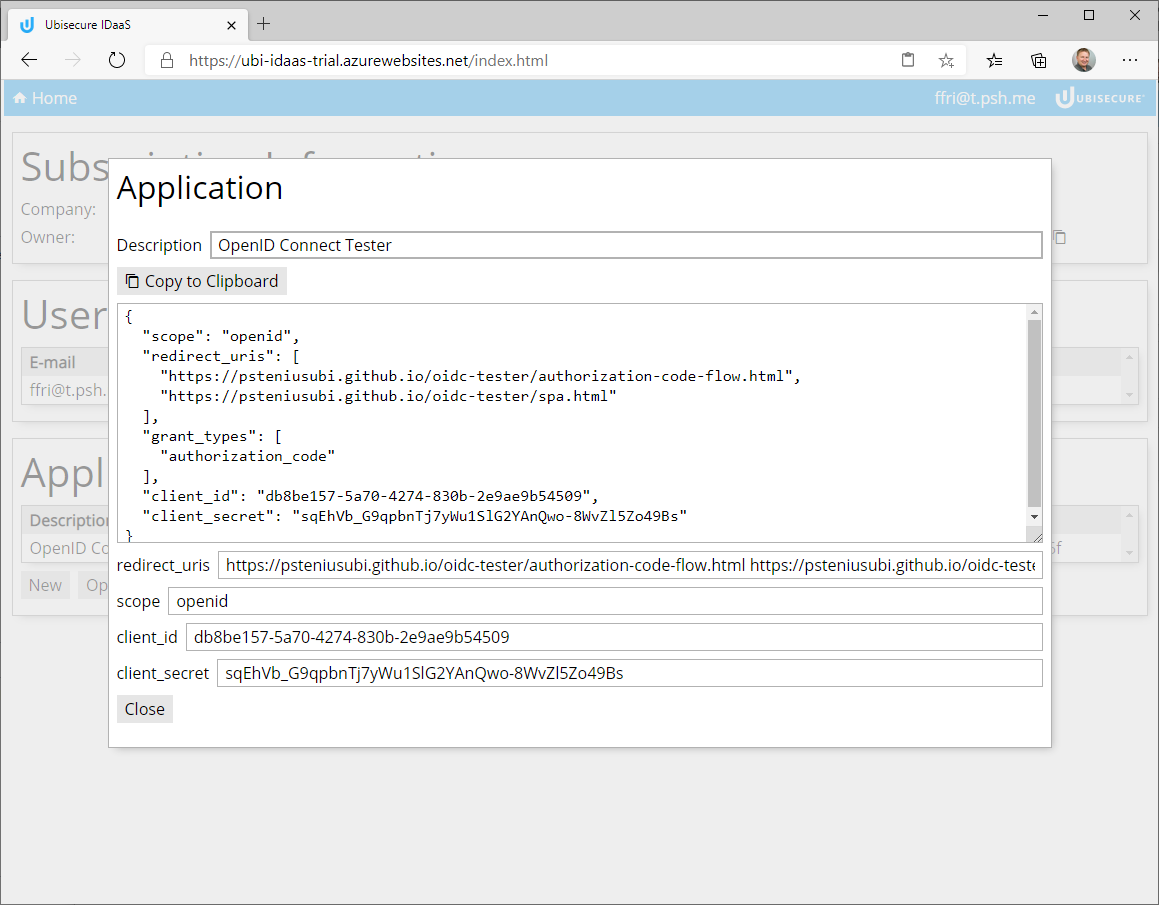
Move back to IDaaS Trial Console tab Below Applications click "New" |
|
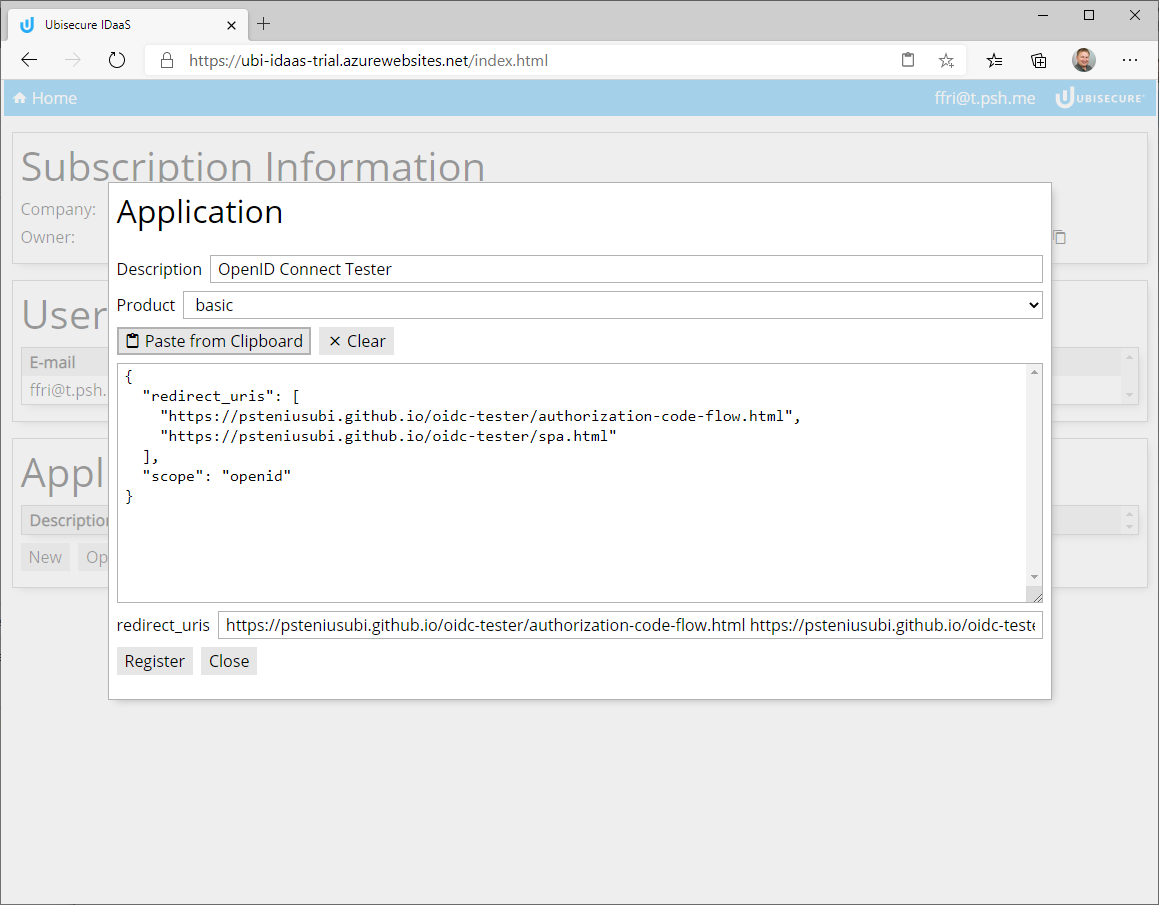
Enter a description for this application Then click "Paste from Clipboard" NOTE! All browsers do not allow pasting from the clipboard. In these cases "Copy from Clipboard" button does not appear in the Application dialog. You can paste the content by selecting the field and pressing Control + v. See the example picture on right for the end result. |
|
Click "Register" to create Registration. Allow few seconds for the operation to complete then click "Copy to Clipboard" |
|
Move to OpenID Connect Tester tab Click "Paste from Clipboard" |
|
Click "OK" to save registration |
|
| Click "Set Active" to make this configuration active |
|
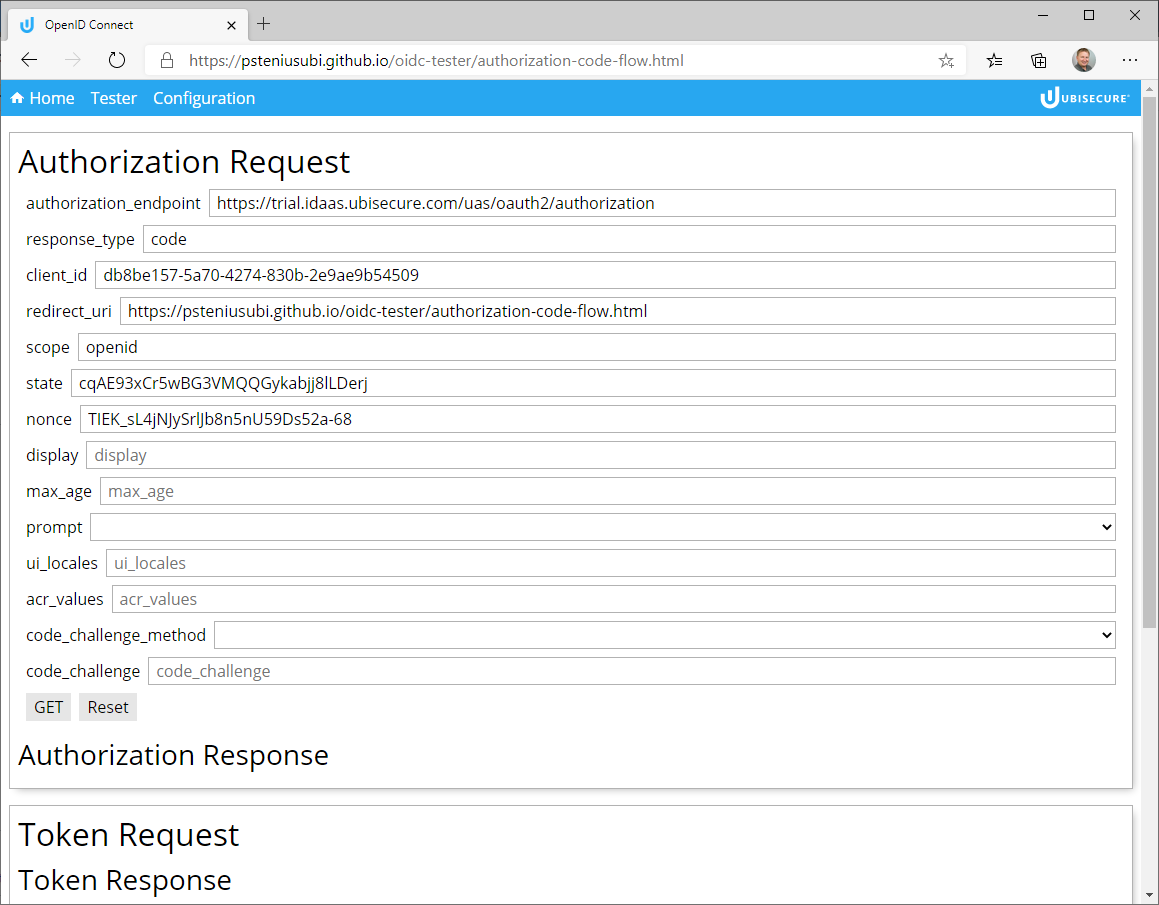
Click "Tester" to start Authorization Code flow Or navigate to https://psteniusubi.github.io/oidc-tester/authorization-code-flow.html |
|
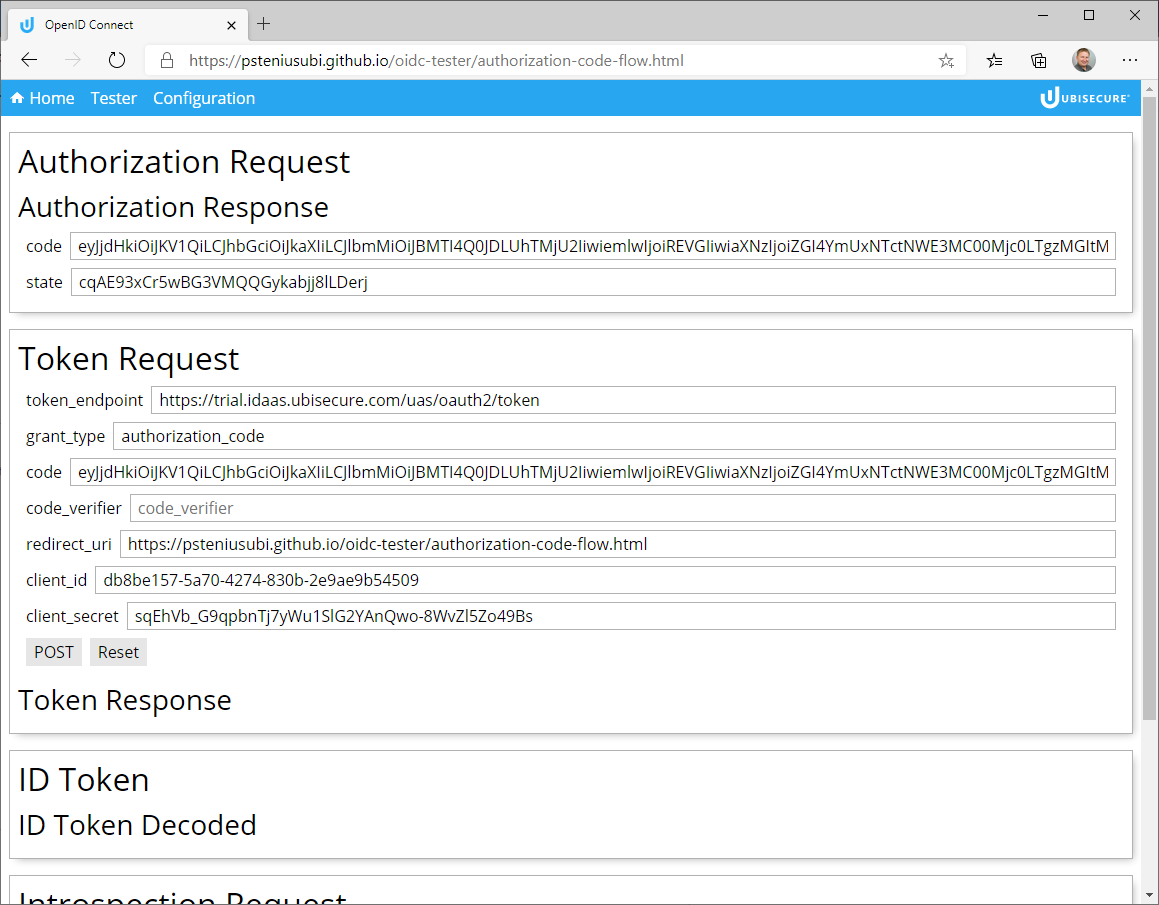
Click "GET" to send Authorization Request SSO server may prompt for authentication When completed Authorization Response and Token Request are shown |
|
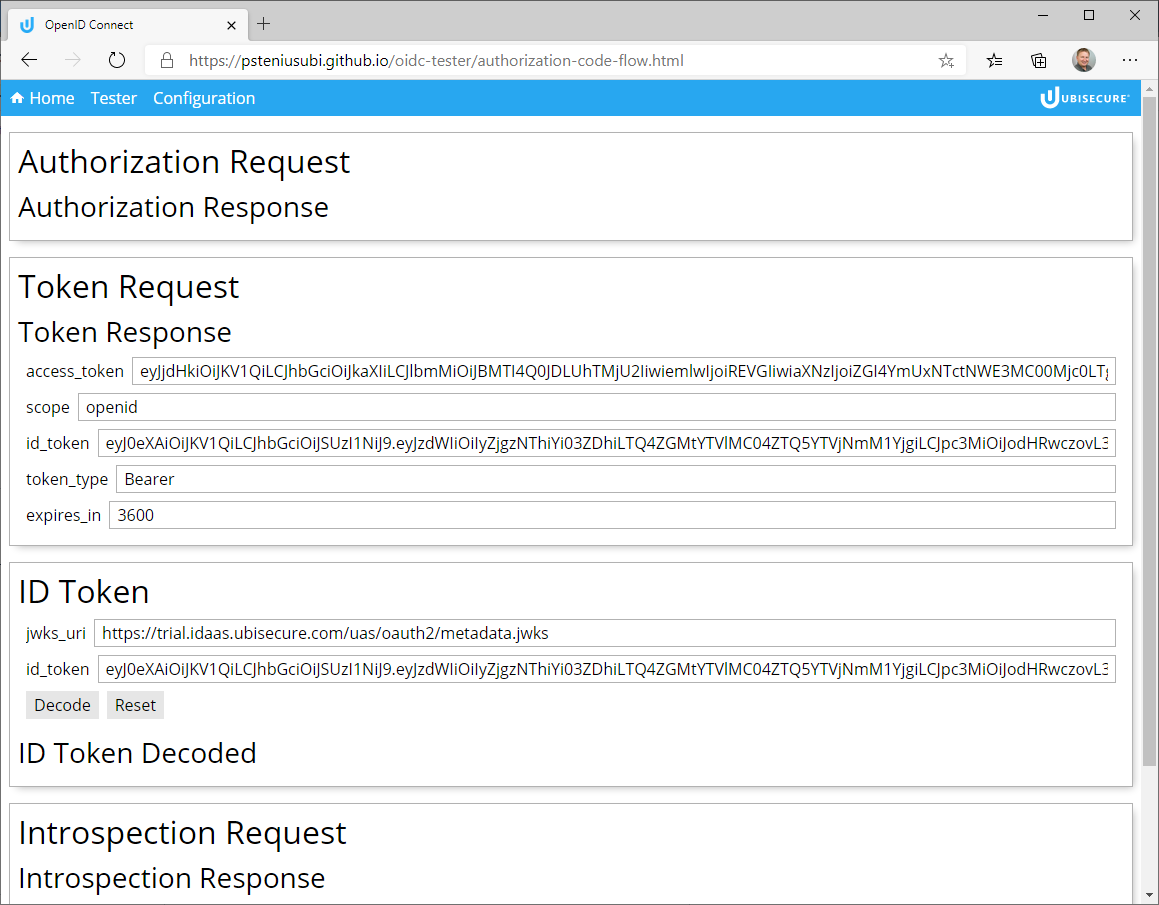
Click "POST" to send Token Request Token Response and ID Token are shown |
|
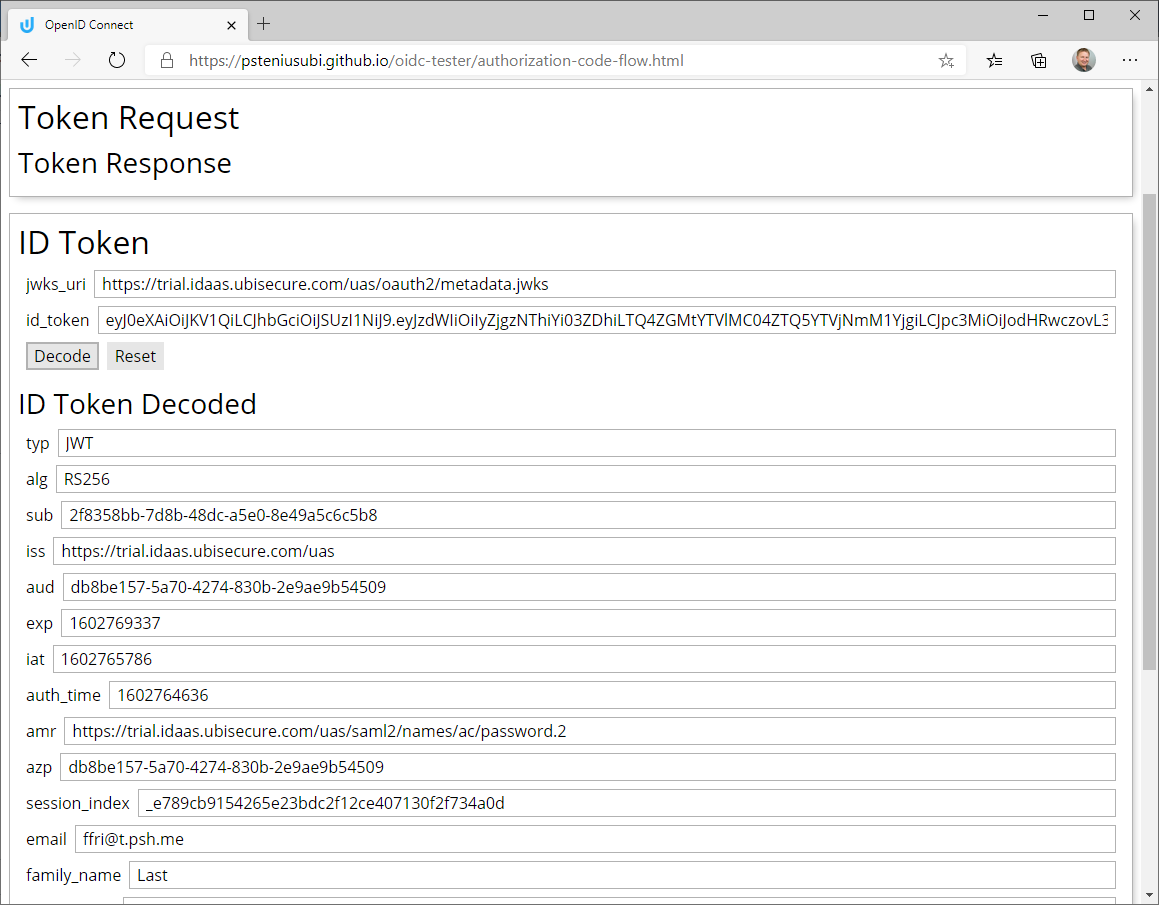
| Click "Decode" to verify ID Token and display claims |
|
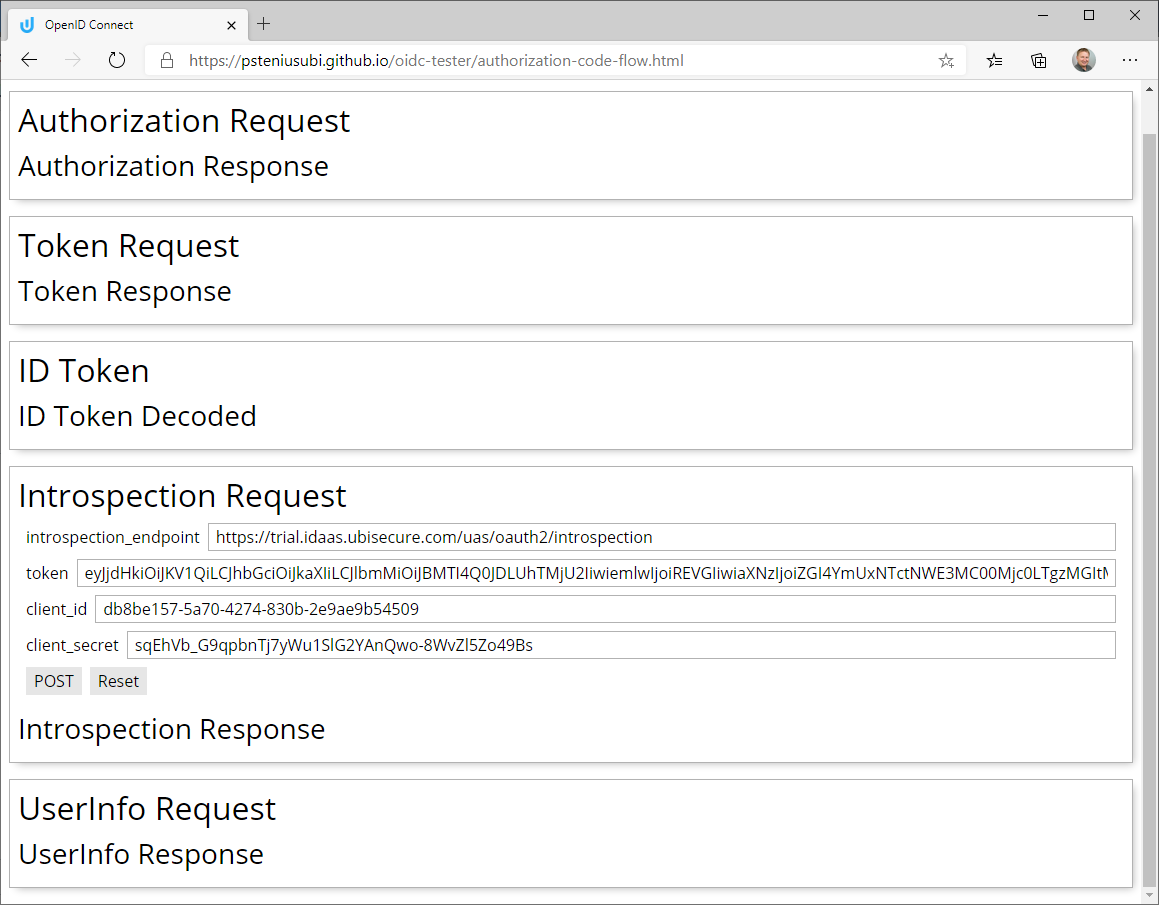
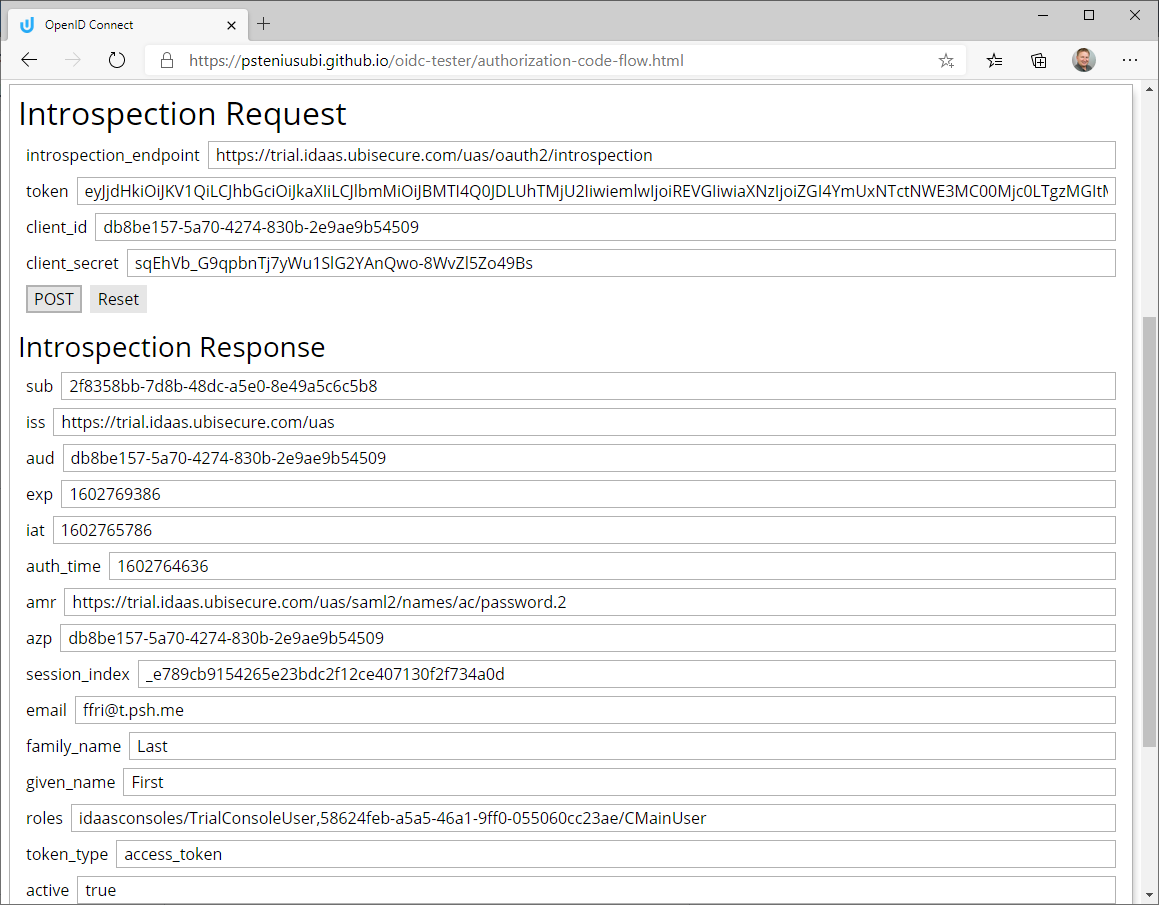
Optional: Introspection Request Scroll further down and click "Introspection Request" to expand |
|
Click "POST" to send Introspection Request Introspection Response with claims is shown NOTE! User Info Request is not available at the moment. |
|