Install Sample SAML service provider application for Java
This guide explains how to install sample SAML SP for Java on Tomcat for Windows.
Step-by-step guide
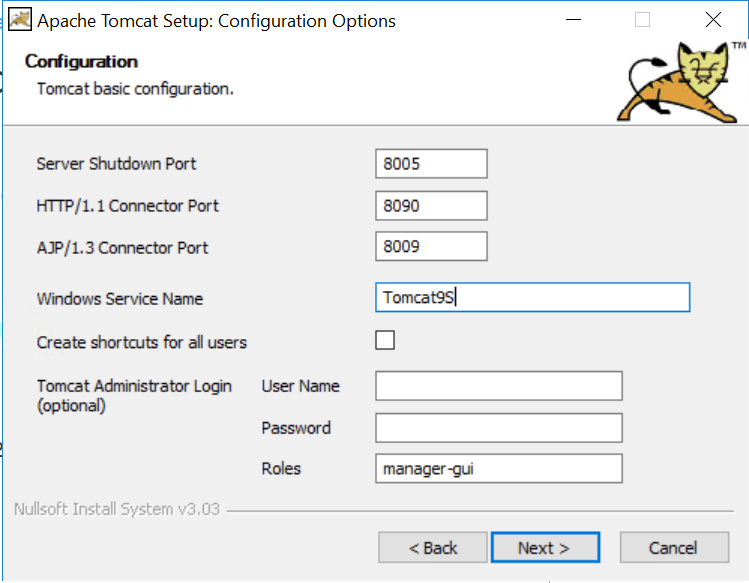
- Install a separate Tomcat 9.0 on your system (in order to avoid potential conflicts with SSO's Tomcat installation). Use the 32-bit/64-bit Windows Service Installer (.exe file).
https://tomcat.apache.org/download-90.cgiDuring the installation, select port 8090 (or another that is not taken) for HTTP/1.1 Connector Port.
The path to install Java is C:\Program Files\Java\jdk1.8.0_144\jre
The system is running when the address http://localhost:8090/ answers as follows:
You can also modify the port number after installation by editing the file C:\Program Files\Apache Software Foundation\Tomcat 9.0\conf\server.xml.
Install "ubisp-sample":
Download latest package from https://demo.ubisecure.com/extranet/downloads/SamlSP_Java_Sample/
Unzip the package and extract all files in the directory C:\Program Files\Apache Software Foundation\Tomcat 9.0\webapps\
Create private and public keys:
cd /d "C:\Program Files\Apache Software Foundation\Tomcat 9.0\webapps\sample\WEB-INF"
"C:\Program Files\Java\jdk1.8.0_144\bin\java.exe" -jar lib/ubisaml2.jar Generate http://localhost:8090/sample/spsso -o saml2/sp -y
Create service provider metadata:
cd /d "C:\Program Files\Apache Software Foundation\Tomcat 9.0\webapps\sample\WEB-INF"
"C:\Program Files\Java\jdk1.8.0_144\bin\java.exe" -jar lib/ubisaml2.jar Metadata saml2/sp -f sp-metadata.xml -y
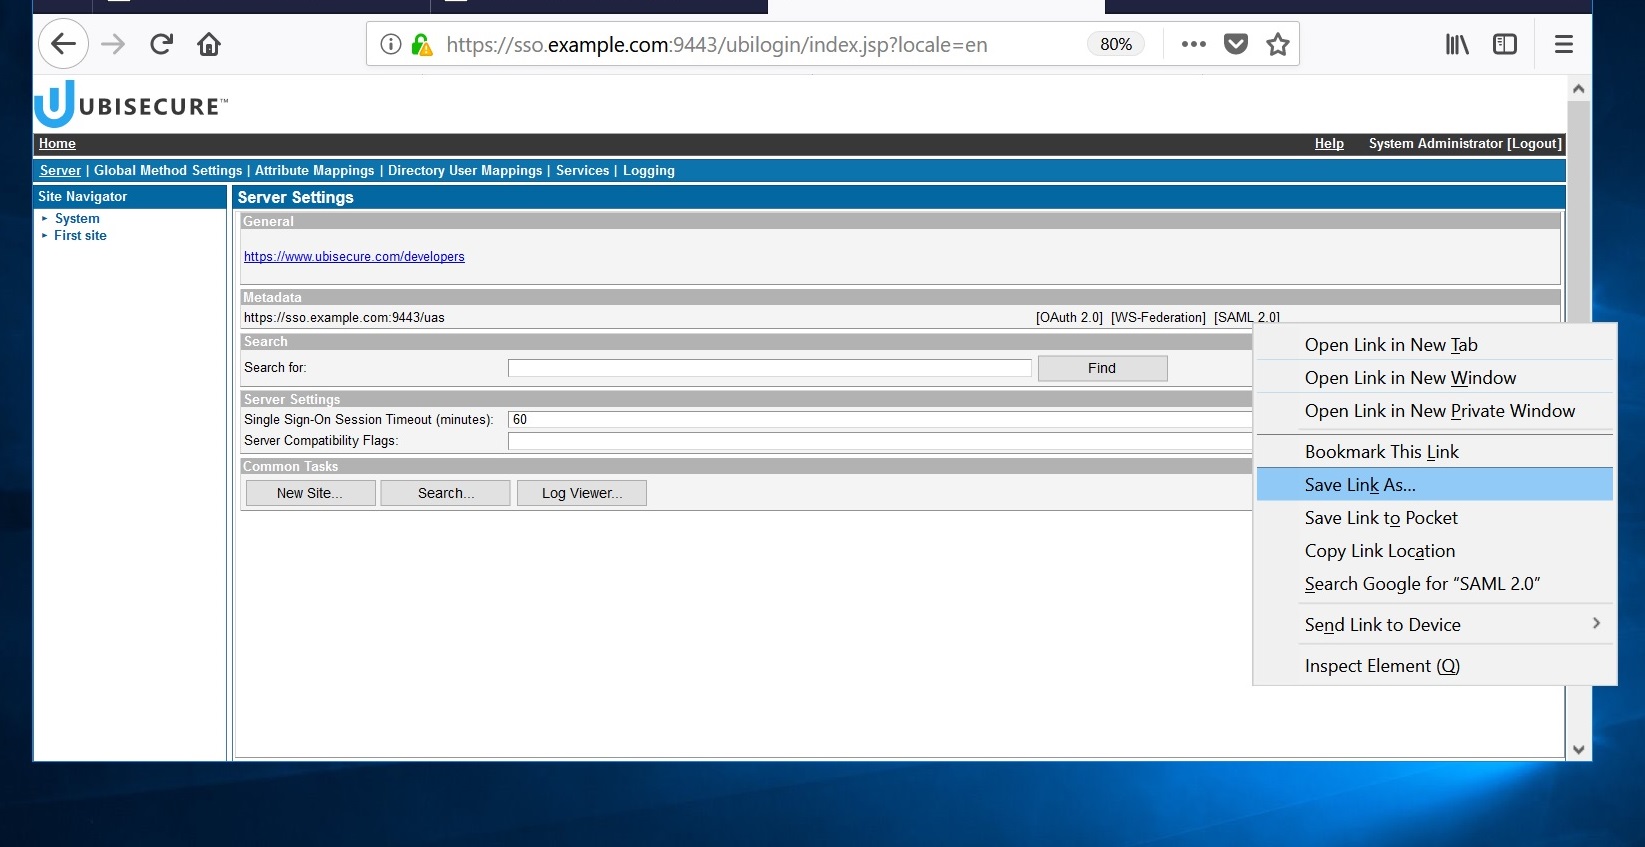
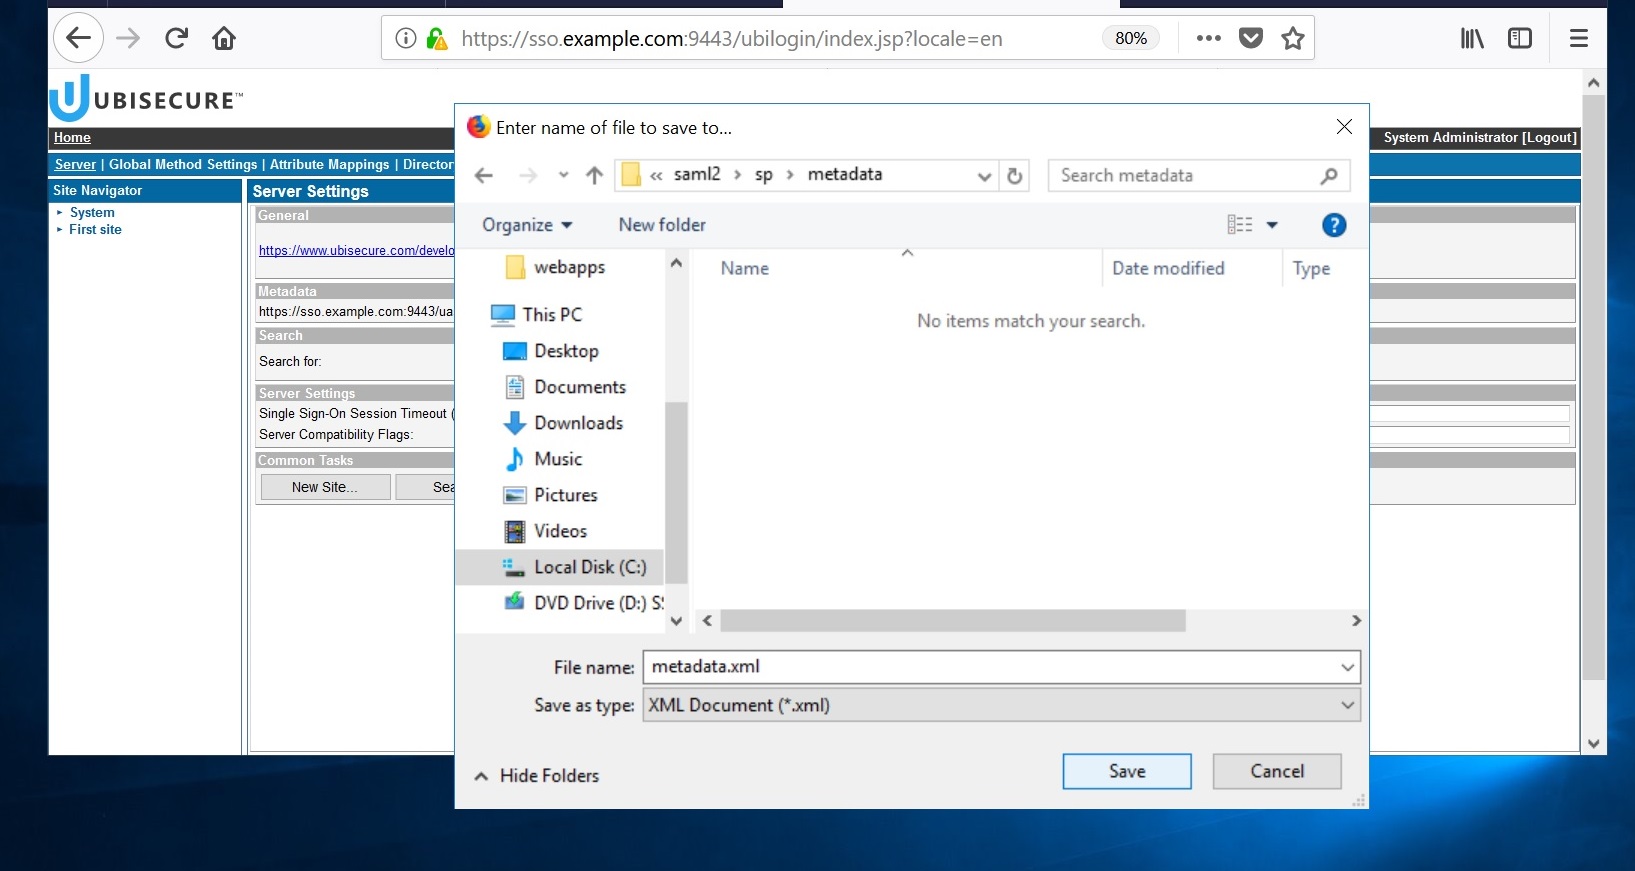
Open the Ubisecure SSO management console. Save the identity provider's SAML 2.0 metadata file (metadata.xml) to the directory
C:\Program Files\Apache Software Foundation\Tomcat 9.0\webapps\sample\WEB-INF\saml2\sp\metadata\
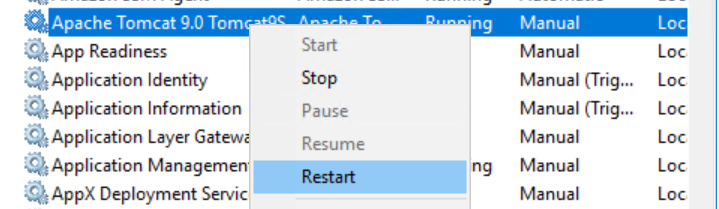
- Restart Apache Tomcat using Services. The application will re-read the configuration during startup.
- Create a site for the application.
Choose "New site" in the Home page of Ubisecure SSO management console. A site name "Applications site" is used in the example below.
Select the site, go to Site Methods, select "Add Method...", and choose the authentication methods that will need to be used on this site.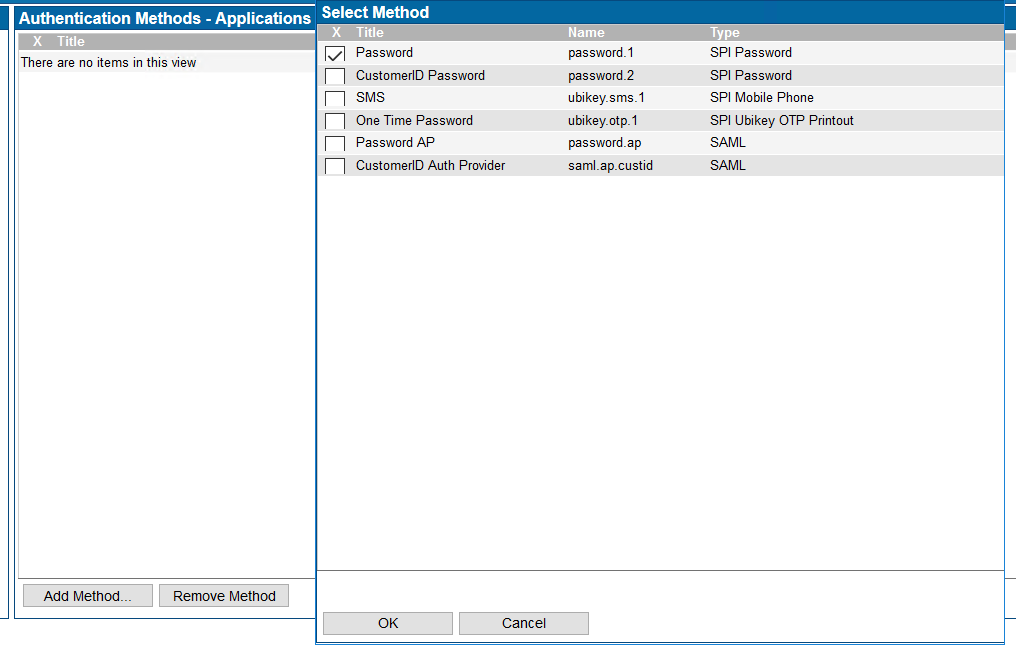
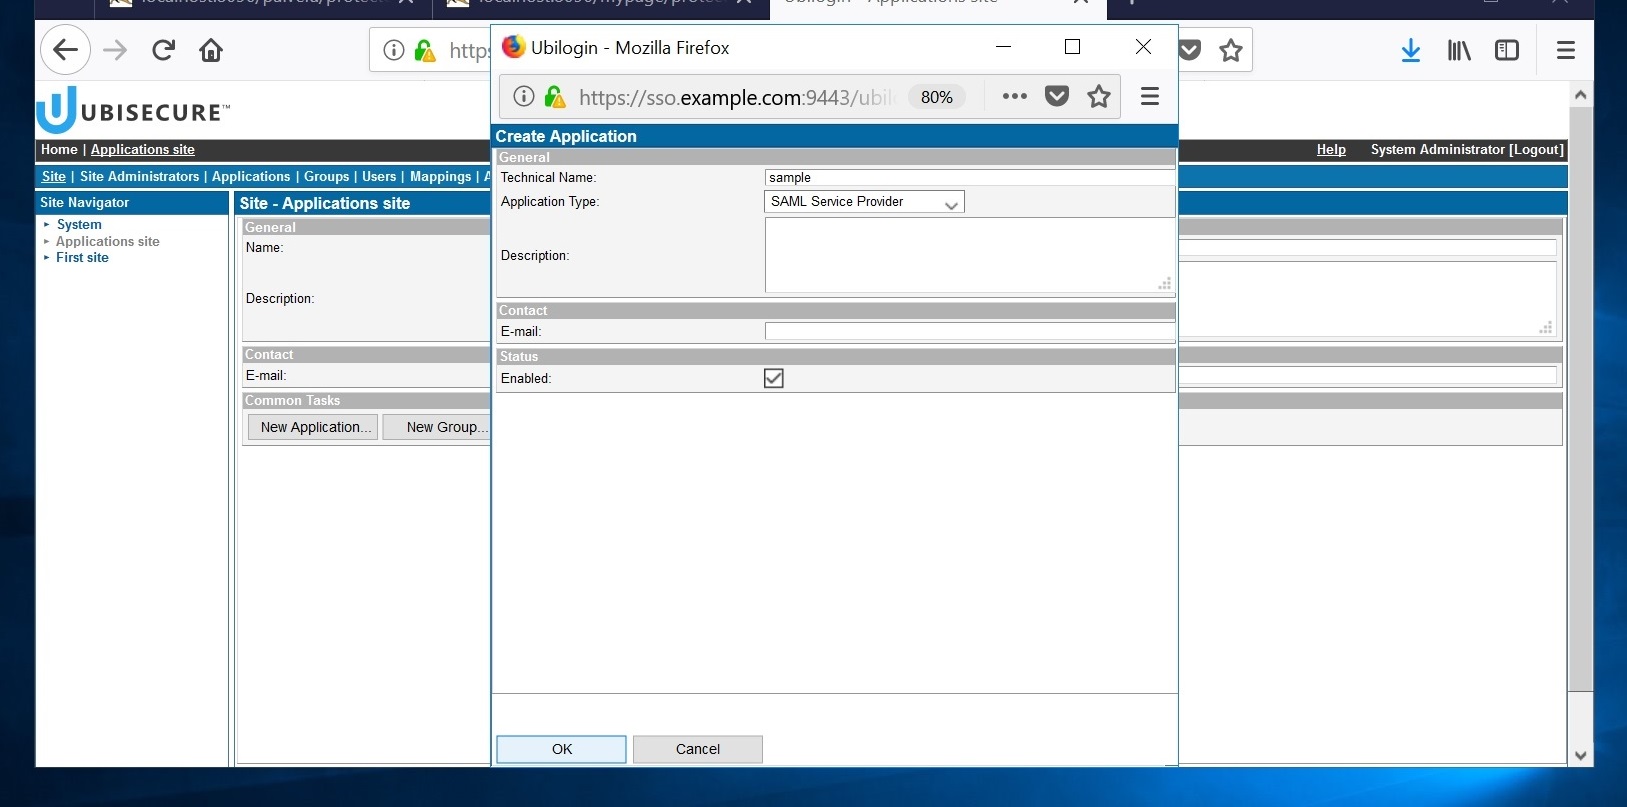
- Now create the sample application on the site.
Go back to the Site tab and then click "New Application." When the popup window appears, write the name of your application, select "SAML Service Provider", and tick the "Enabled" box.
Finally, accept with the "OK" button.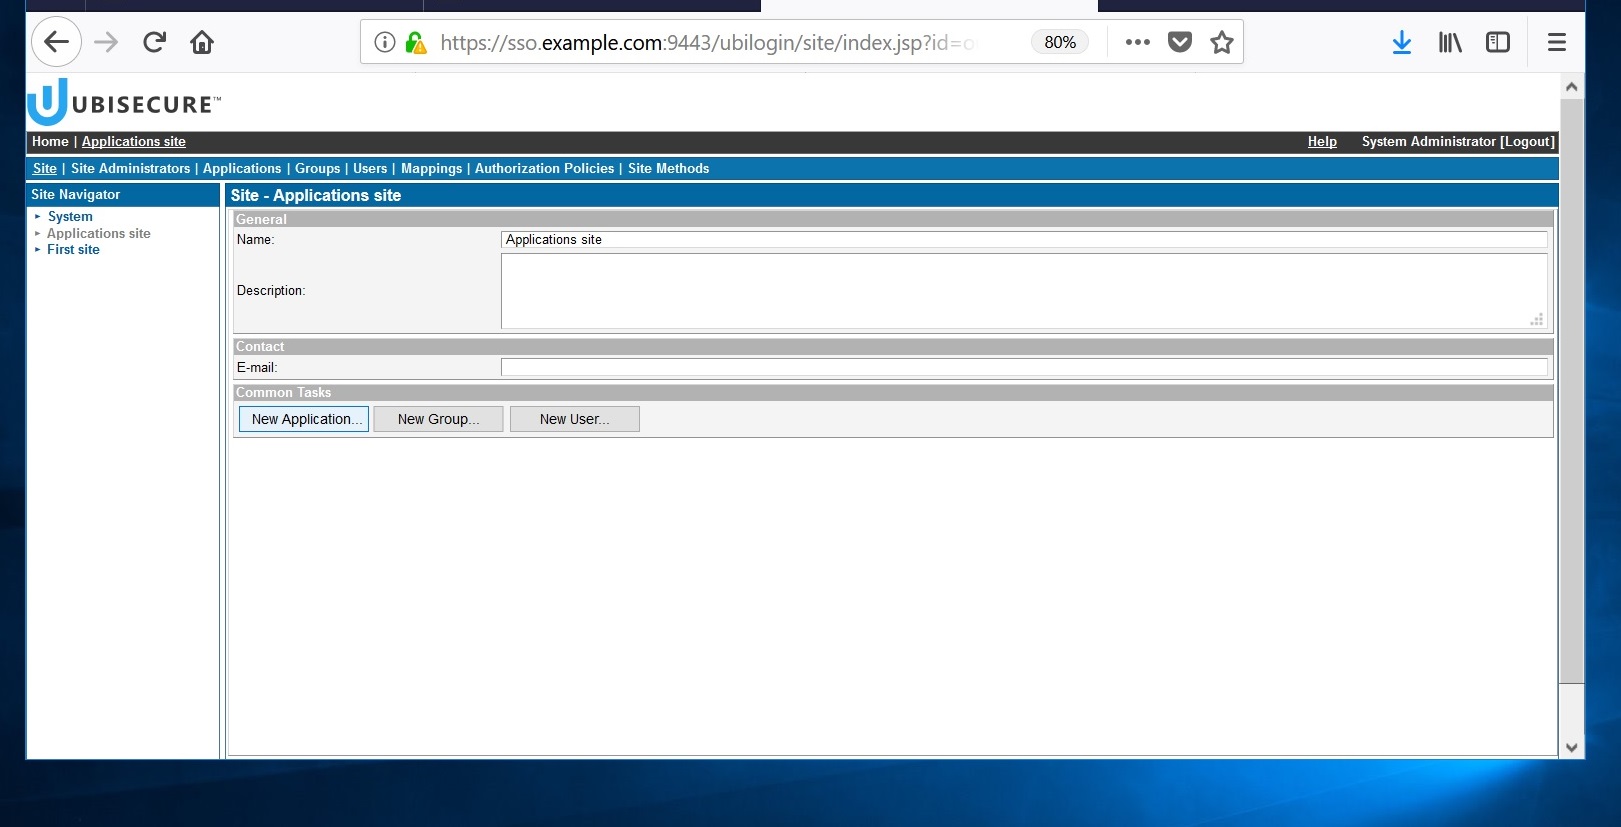
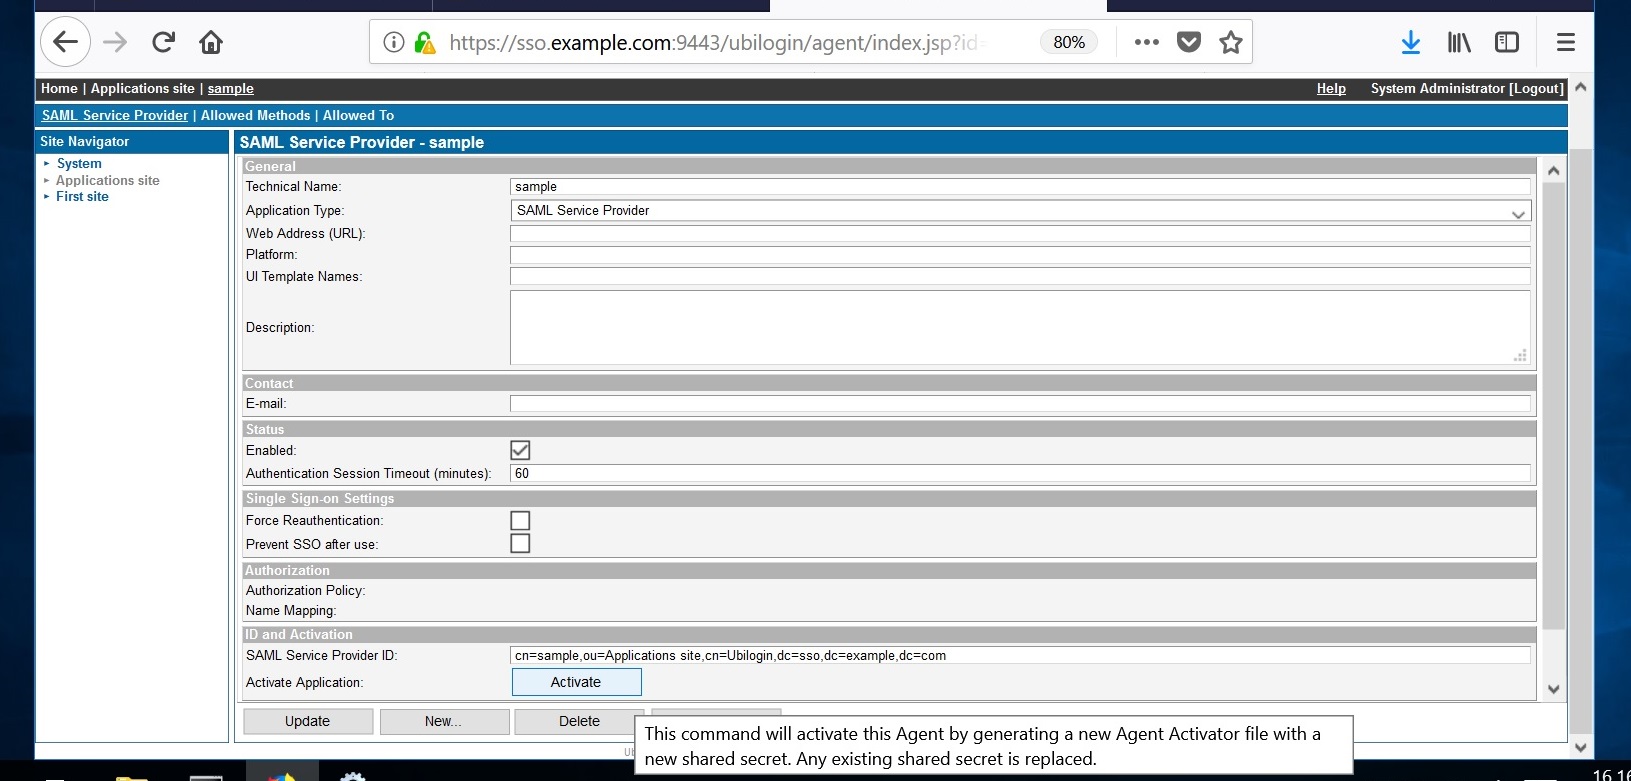
Add the earlier created metadata for the new application.
At "ID and Activation", press "Activate" and select the metadata from C:\Program Files\Apache Software Foundation\Tomcat 9.0\webapps\sample\WEB-INF\sp-metadata.xml.
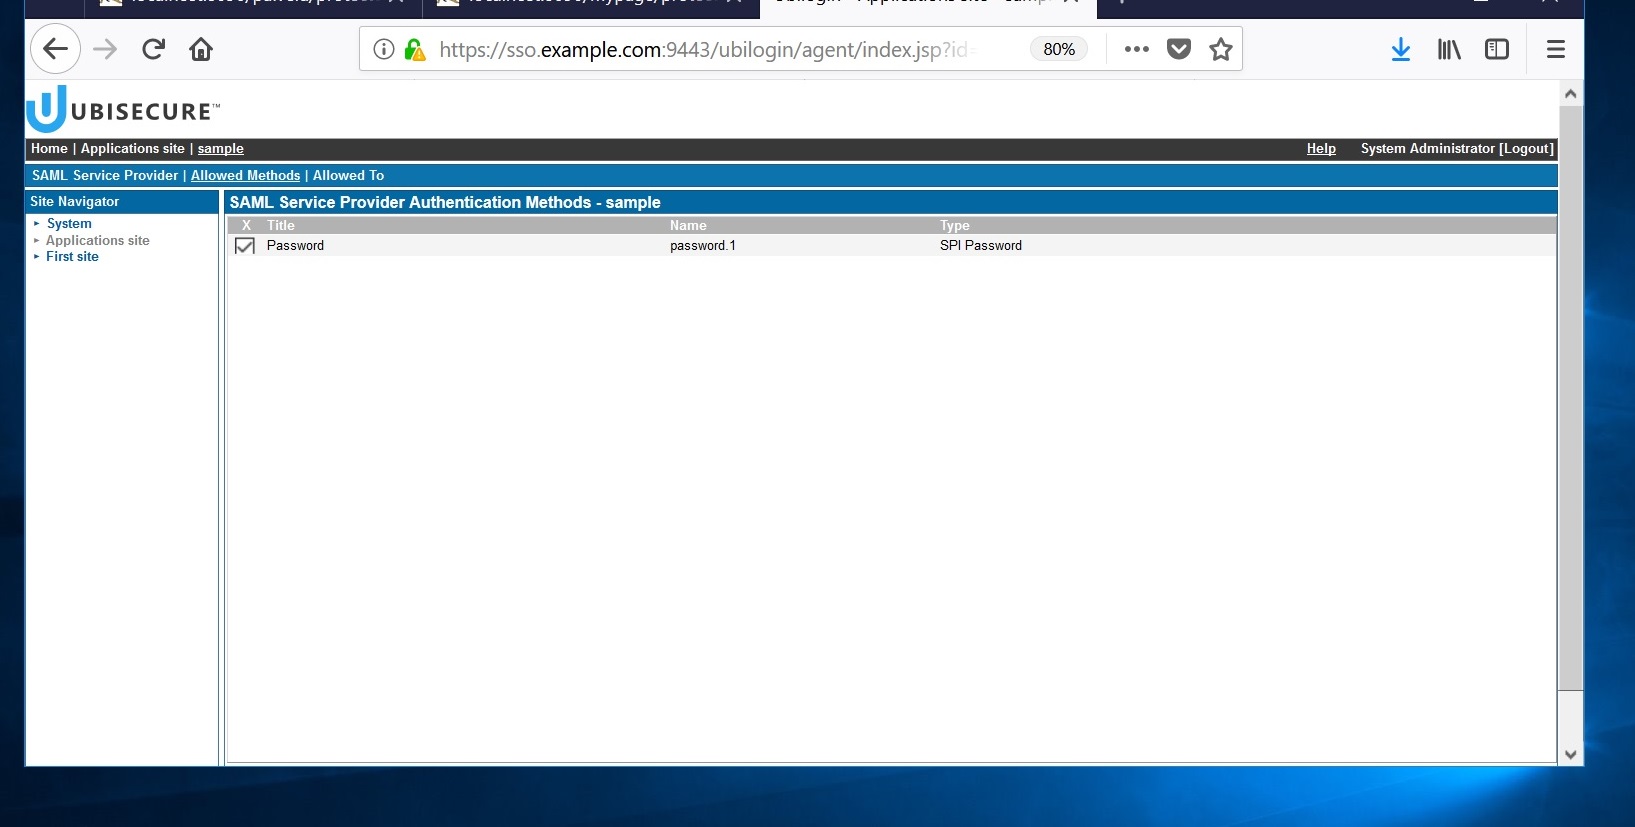
Add Password as an authentication method for the application. Go to "Allowed Methods" and add "Password".
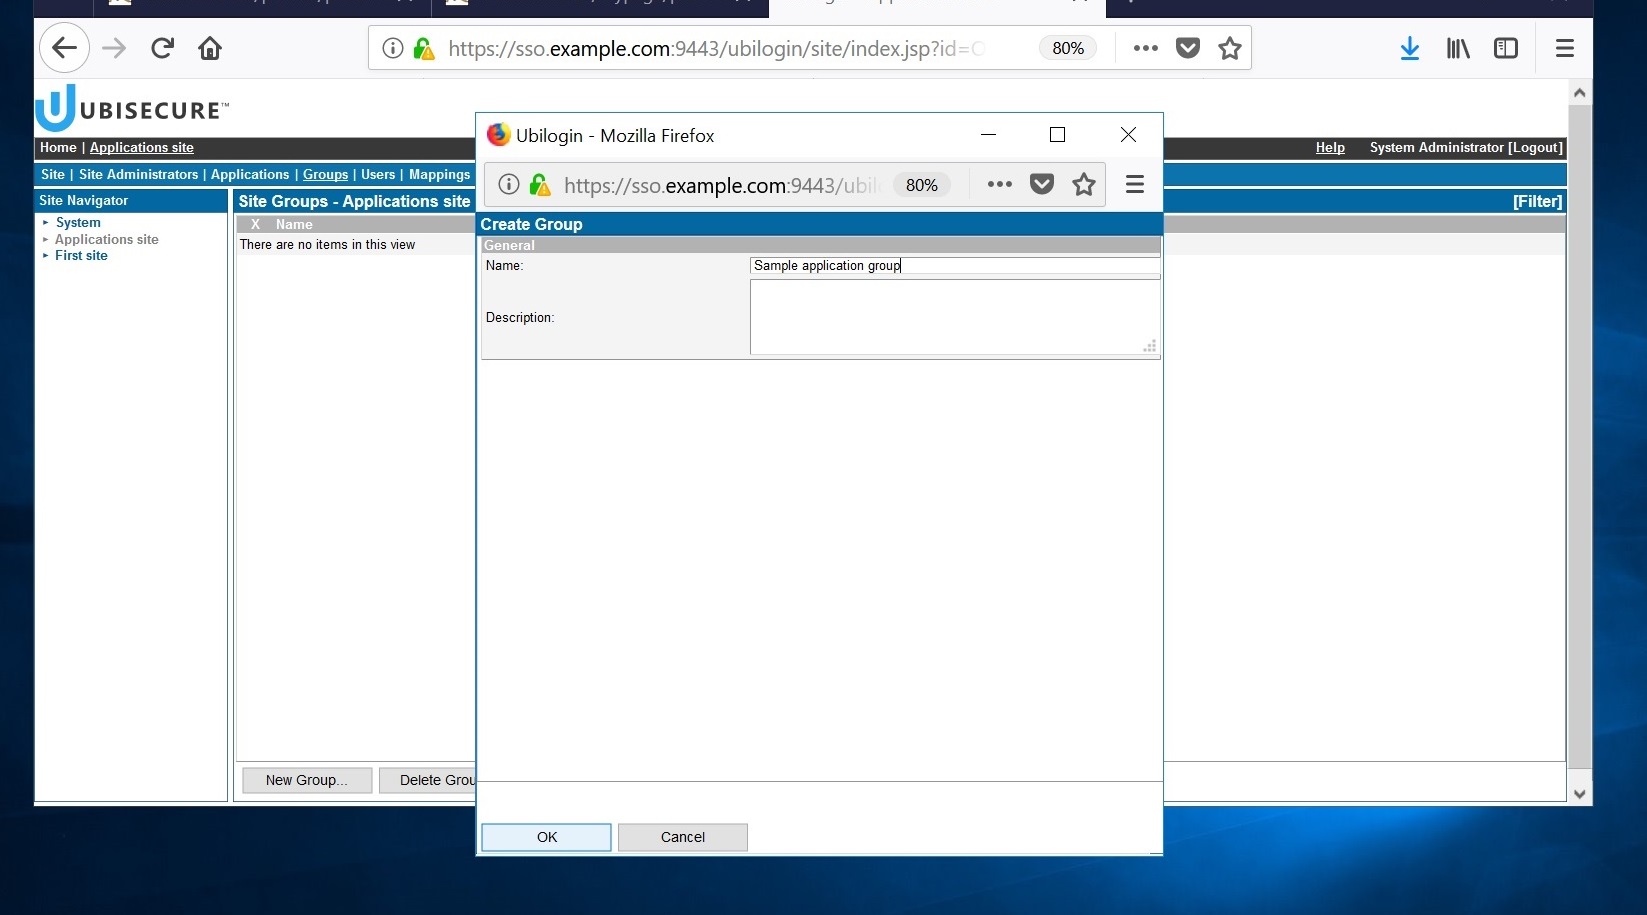
- Create the first group for users ("Sample application group") on the "Groups" tab.
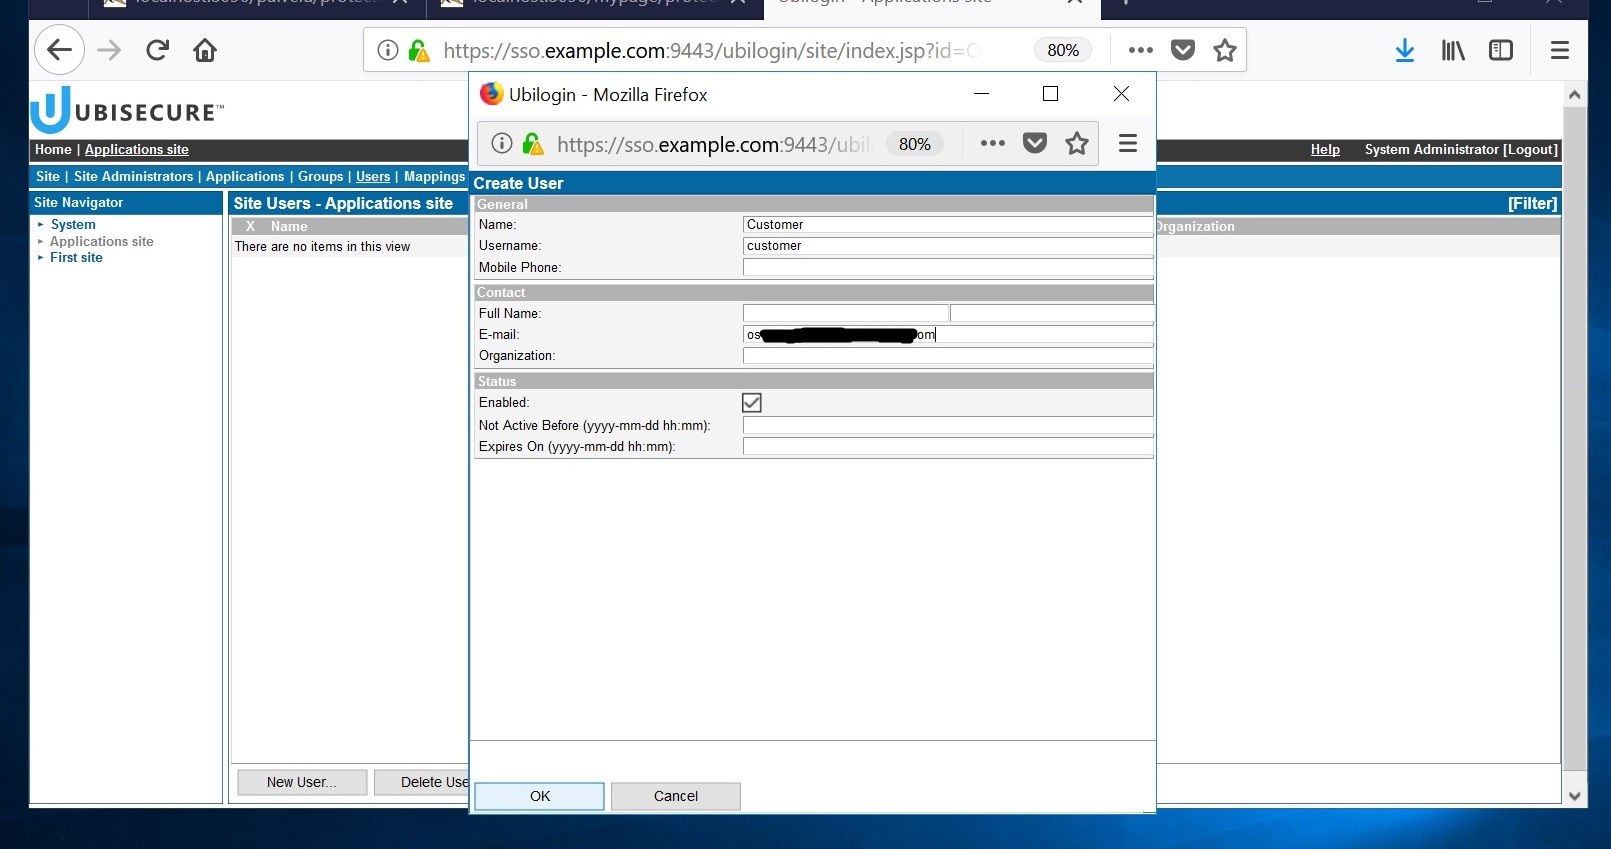
- Now go to the Users tab and create a test user Customer. Allow Password as a method for Customer on their Methods tab, then go back to their User tab, and set a password.
- Add the new user to Sample application group. In order to do that, go to the Member Of tab of the user and select Sample application group.
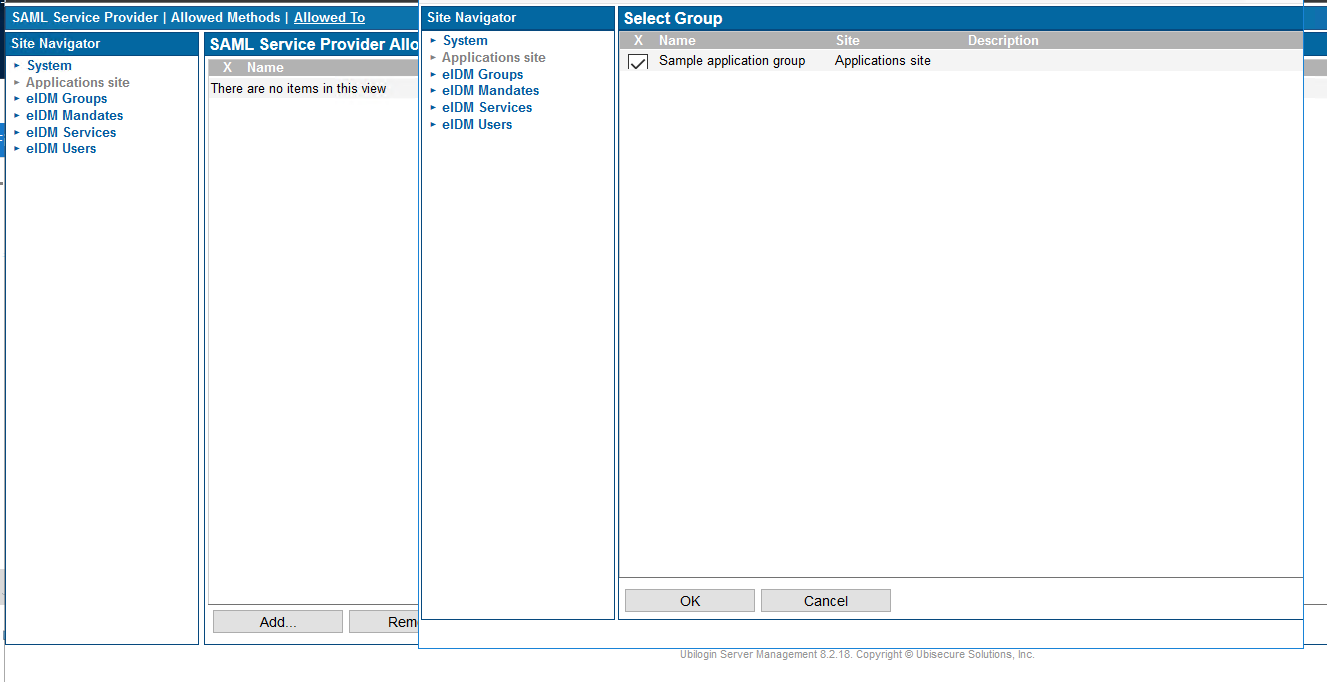
- Go to the Applications site's Applications tab and select "sample". In "Allowed to", add Sample application group.
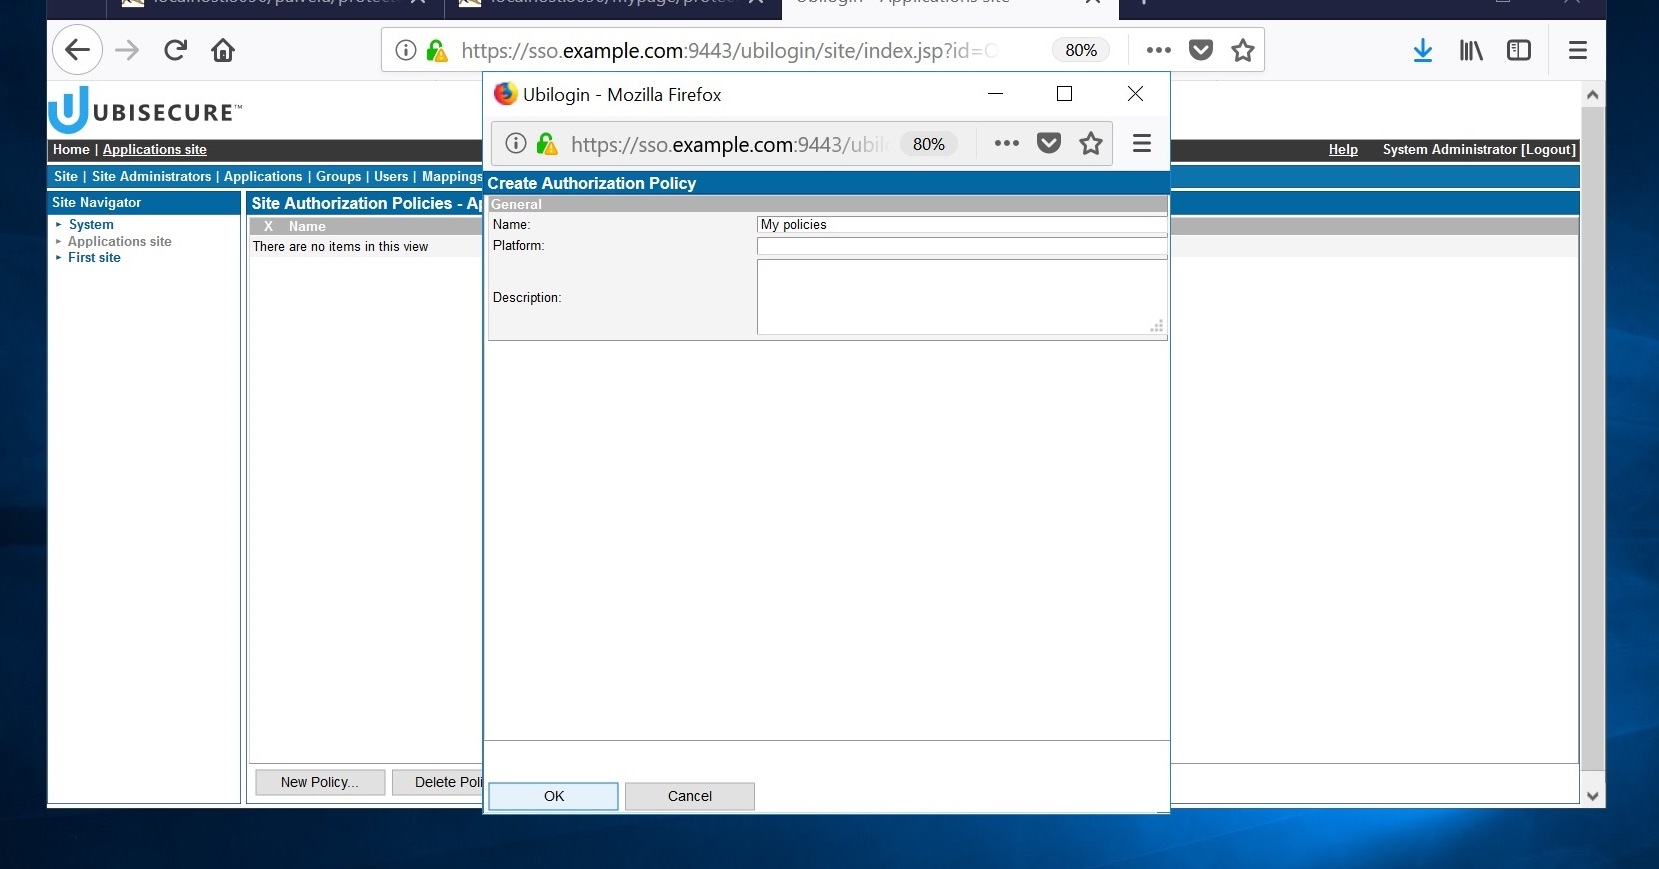
- Create an authorization policy for Applications site.
This view should be shown after the creation: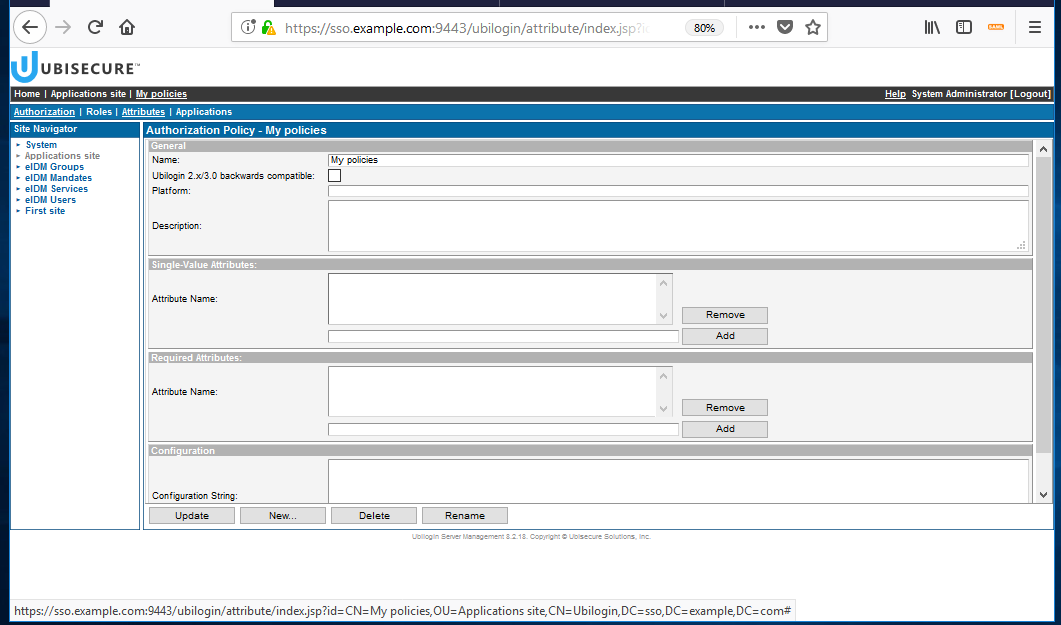
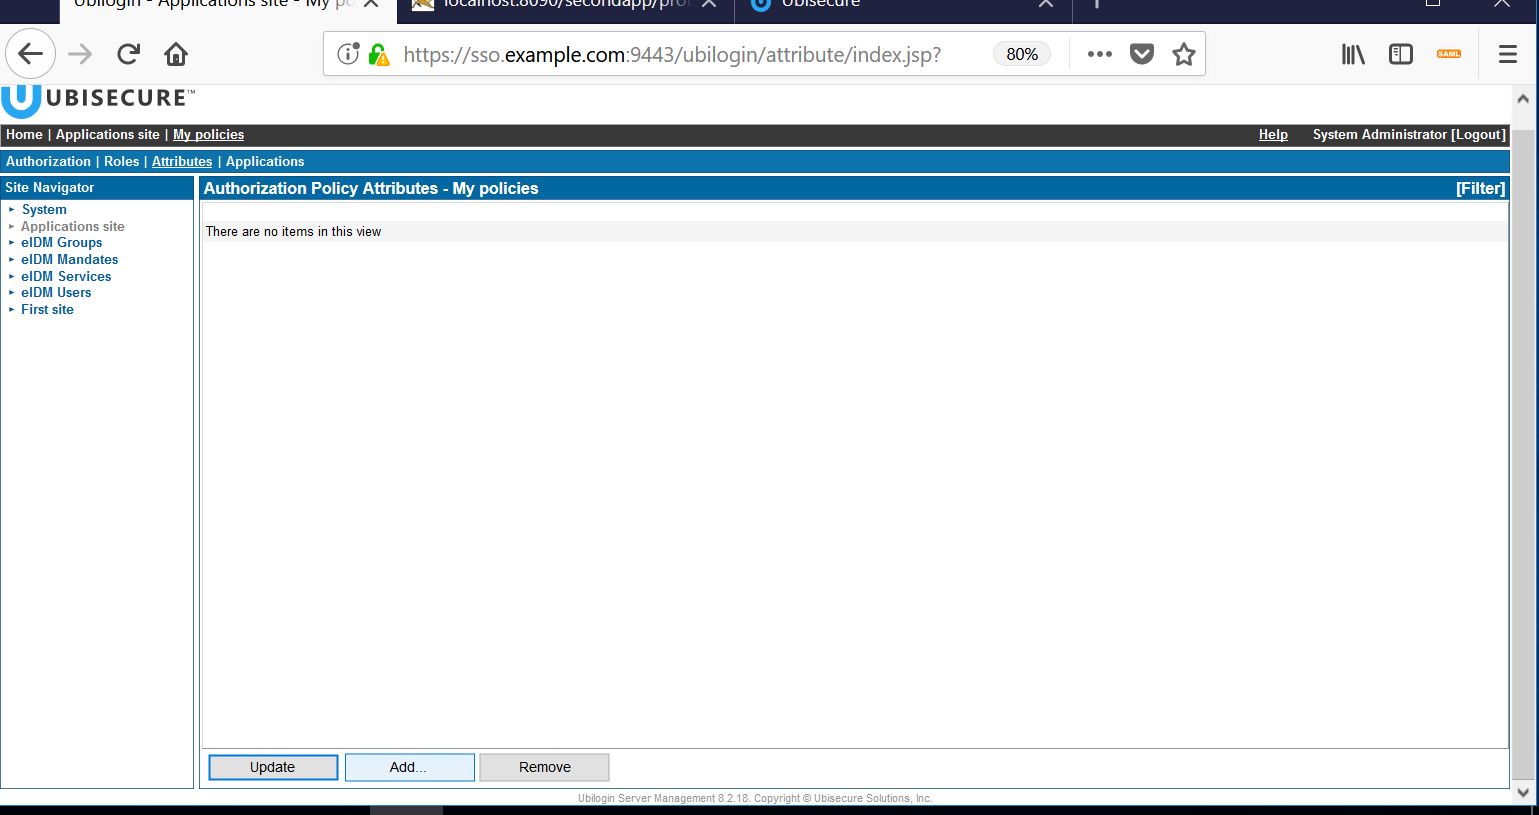
- Next, choose the Attributes tab. The Attributes screen looks empty at first:
Click the "Add" button at the bottom. On the left side, select Applications site, and then Sample application group (or the group you have created) on the right side.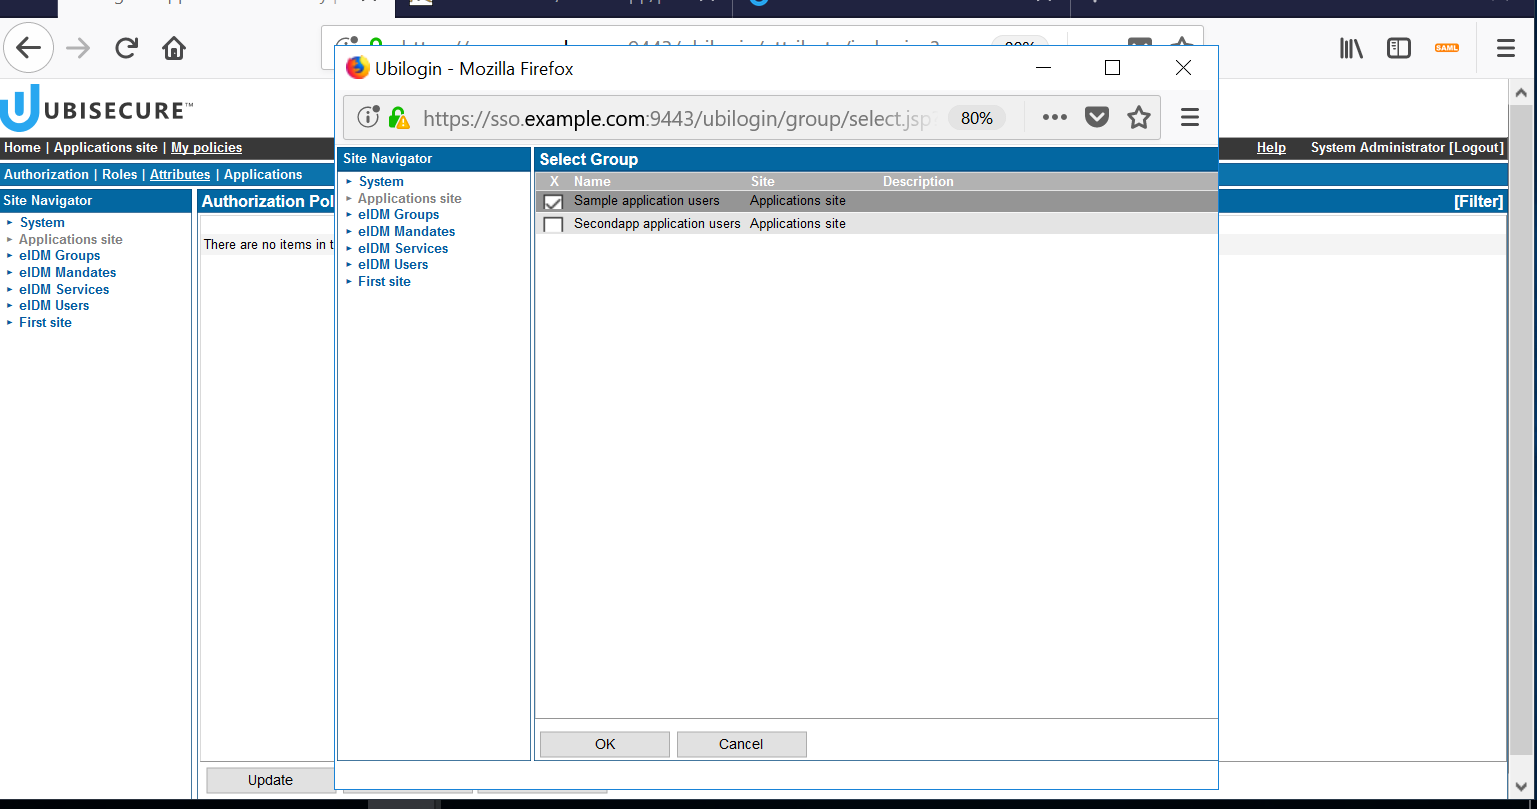
Once you click "OK", you will see the following view. The attribute name is listed, and you can click on "Show values" to see more details.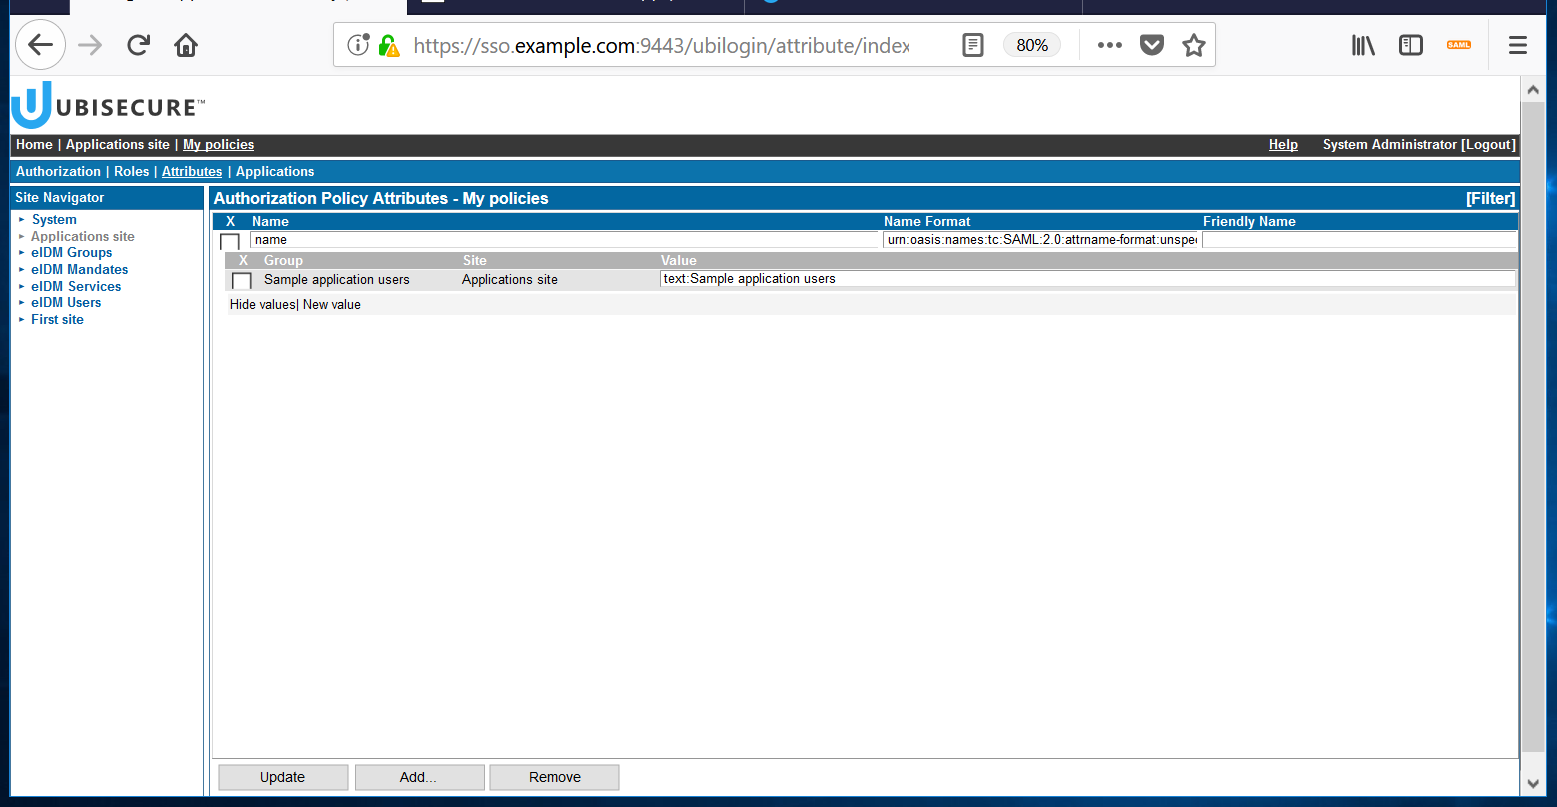
Now you can add as many attributes as you wish to transmit to the application. Let's add: first name, last name, mobile phone, and roles. In order to do that, you must edit the "Value" that appears when you show values. Also, make sure that "Name" field doesn't have spaces but a single word. The following table shows the values you must add for each attribute:
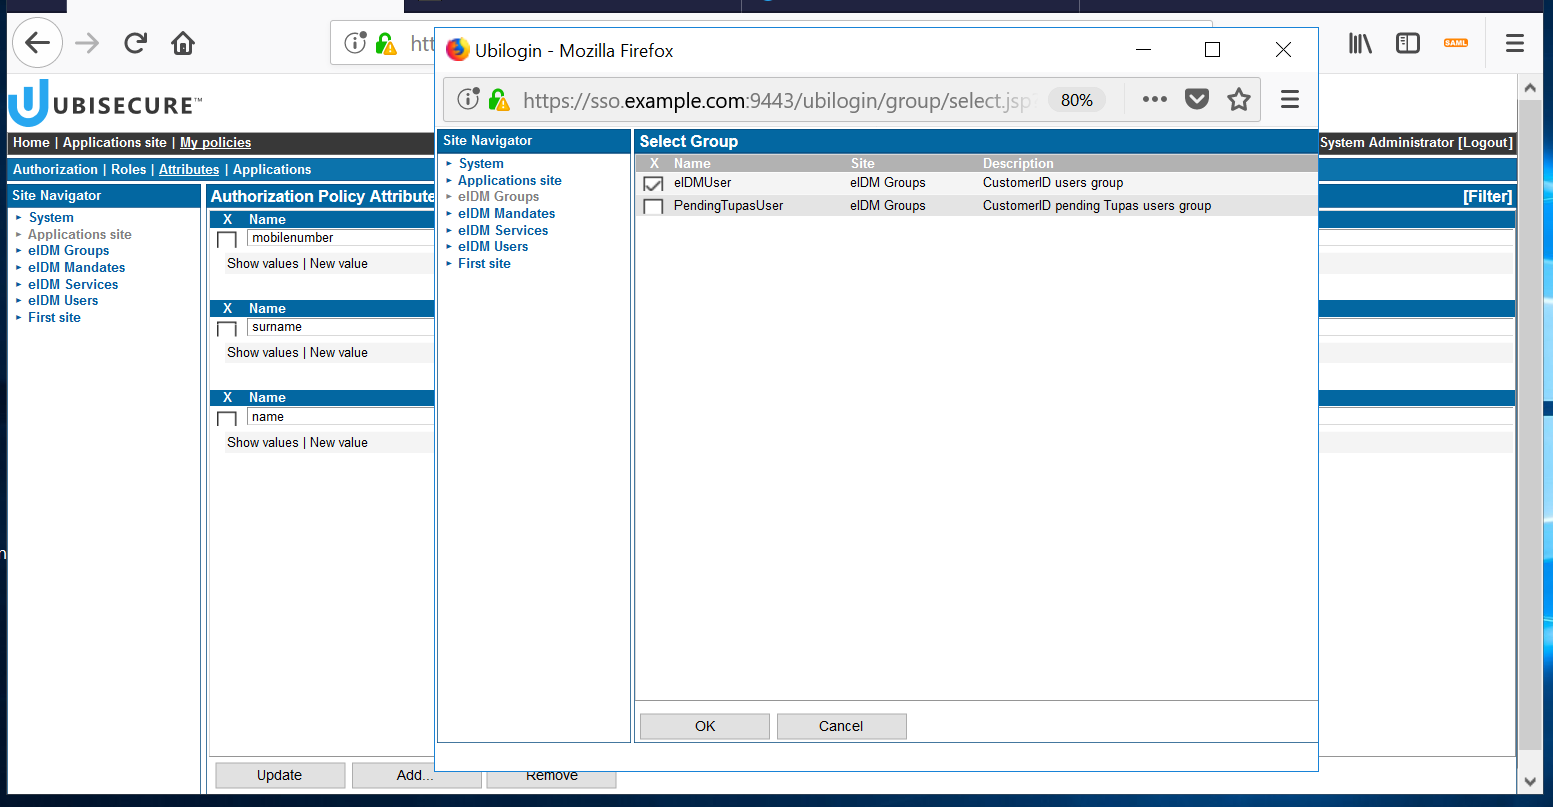
Attribute Name Value First name name user:givenname Surname surname user:sn Mobile phone number mobilenumber user:mobile Roles* roles eidm:roles *In order to add roles, you must select "eIDM Groups" in Site Navigator, and then select the eIDMUser group.
Once all attributes have been added, you will see something like this. Make sure that you have ticked "show values" for all attributes.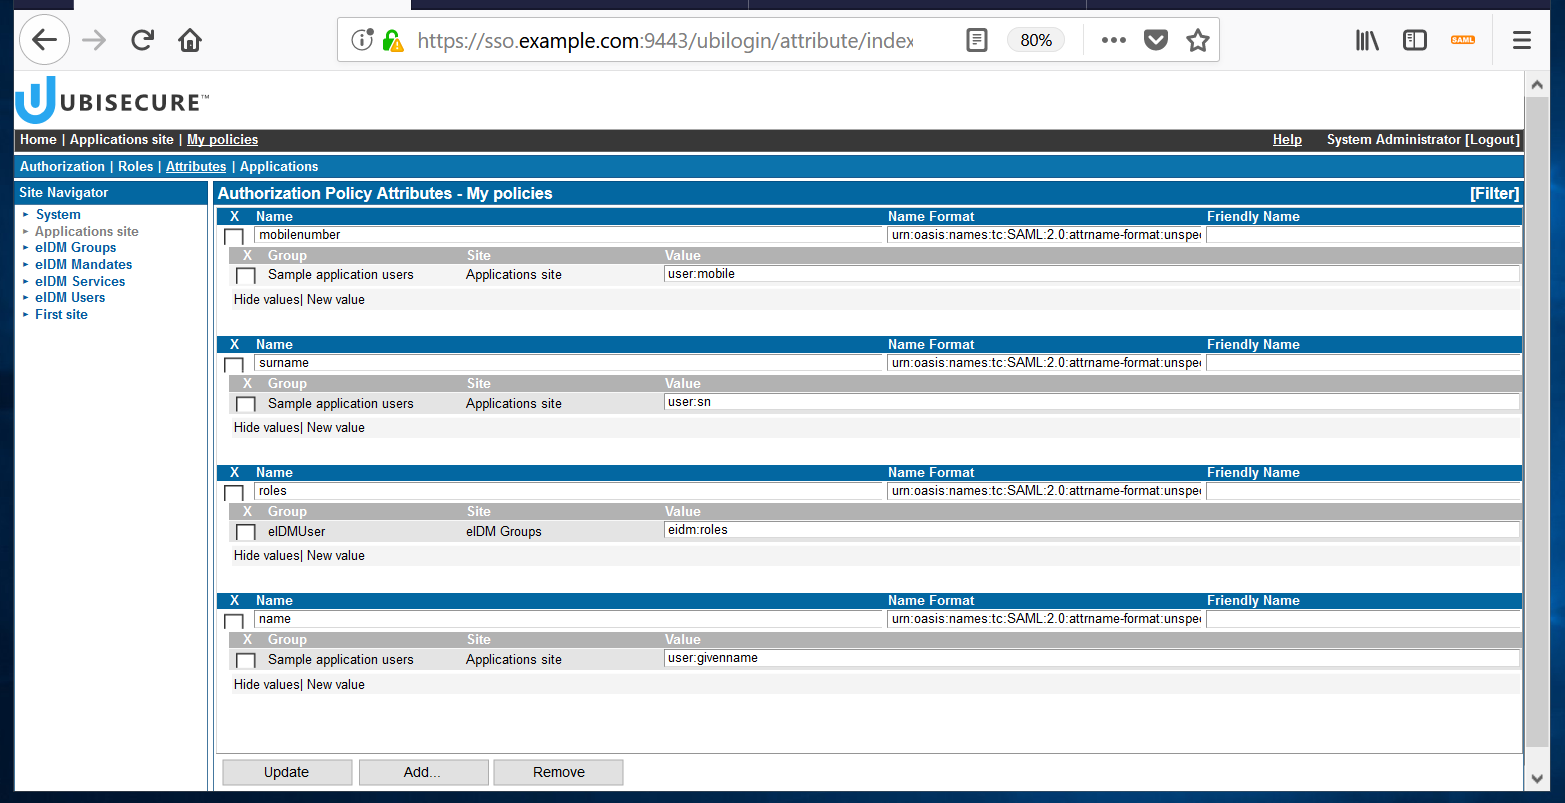
- Attach the authorization policy to the sample application; use the Applications tab to add the sample application.
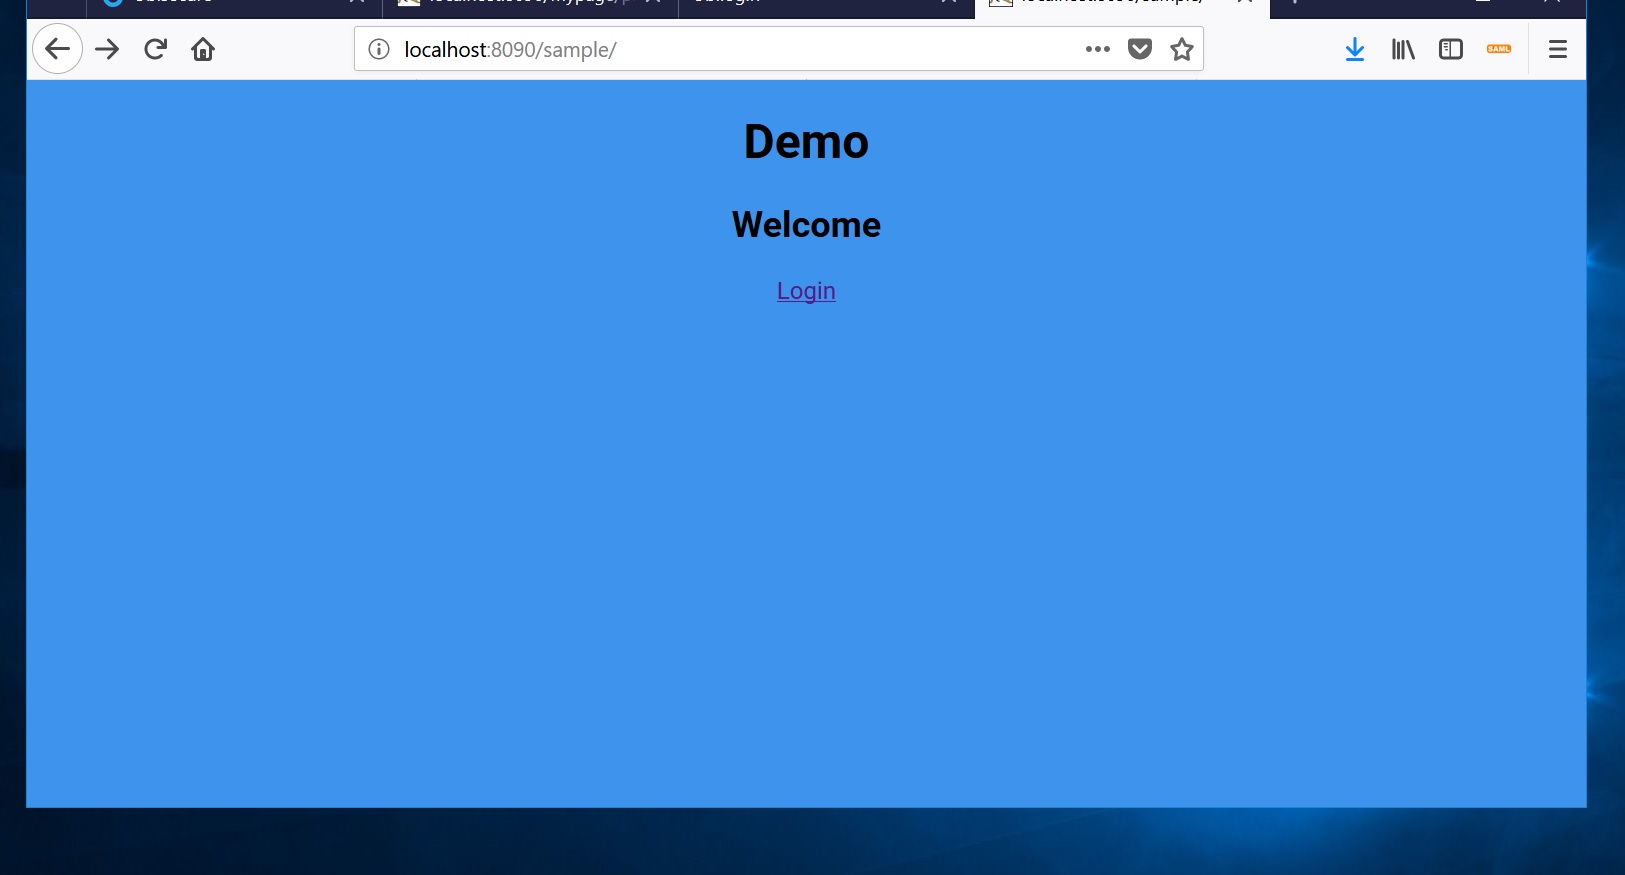
- Now open your browser: http://localhost:8090/sample/ (Ignore security warning if you haven't installed HTTPS:)
- Going on to Login, you will now be prompted to log in using a configured authentication method; in this guide's example, the user Customer with their password should be used.

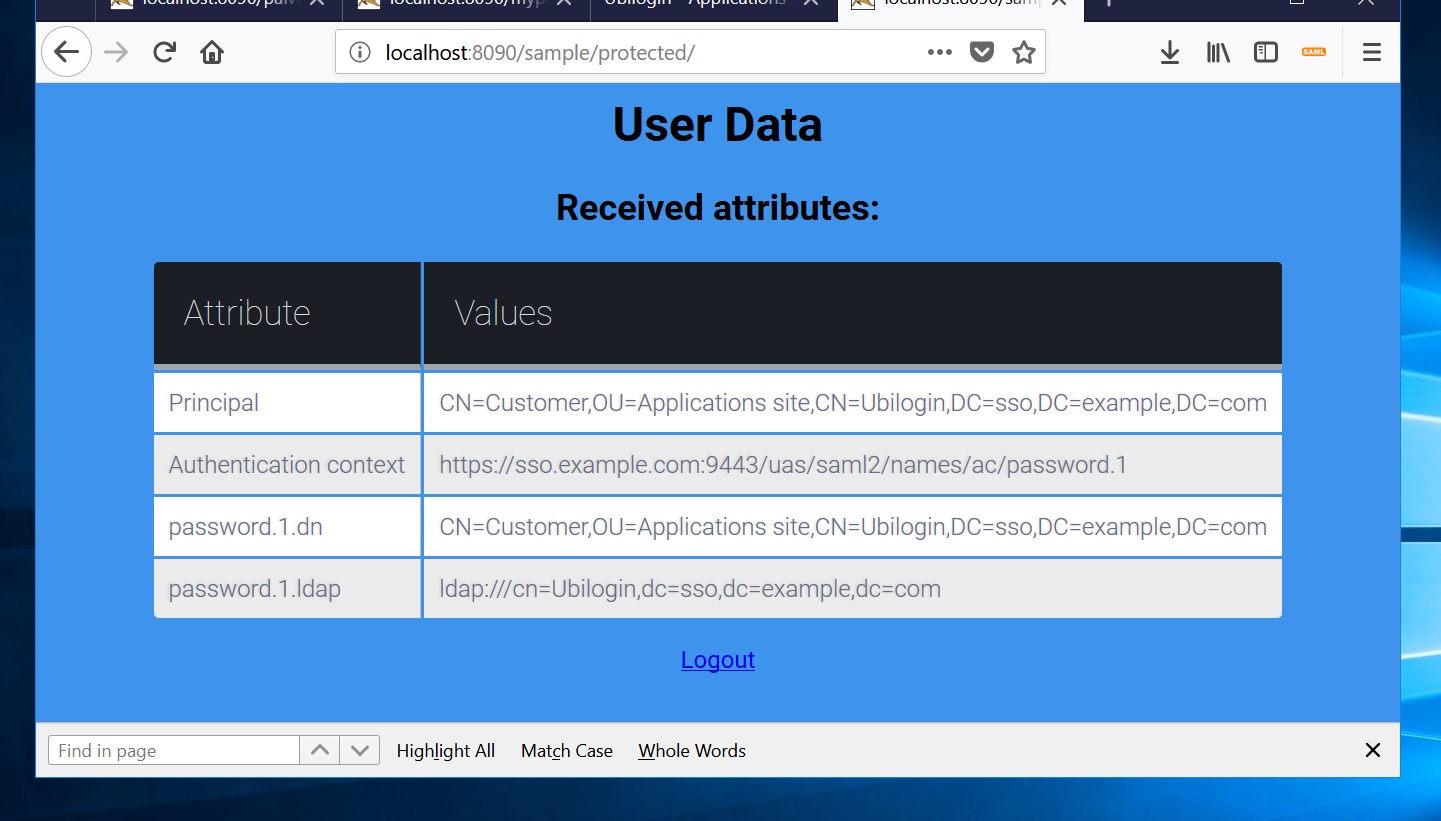
- Finally, you will see a page like this which displays the user's attributes. The attributes shown are determined by the settings made in the authorization policy.
- You're done.
Related articles